Archive for the ‘downstairs’ Category

ZZZZZZZT!

Tuesday, January 3rd, 2012

electrical hazard sign


Just kidding. Hey, we passed our electrical inspection. YAY! Also passed our plumbing inspection and building inspection. Now that the powers that be have given their official nods of approval, the walls can finally get closed up. Sheetrock arrives tomorrow morning. Onward…

every time a window closes

Monday, December 26th, 2011

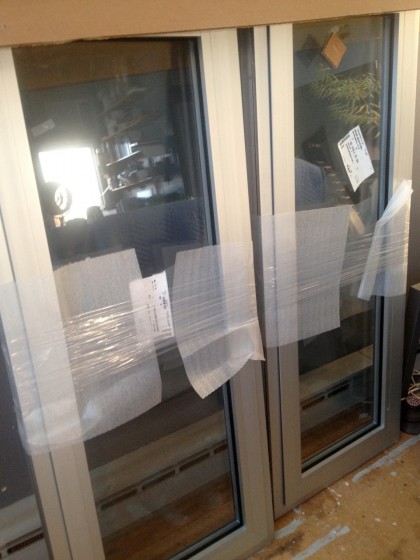
… a door opens. That’s what they say, right? So a few weeks back, it may have looked like all the windows were in and we were set for the winter. But no. These two hopper windows have been waiting in a corner…

window1


Christmas week, David and Joe finally unwrapped them (Thank you, Santa)…

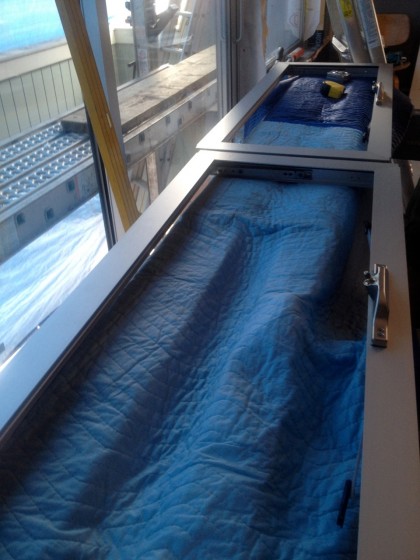
windows


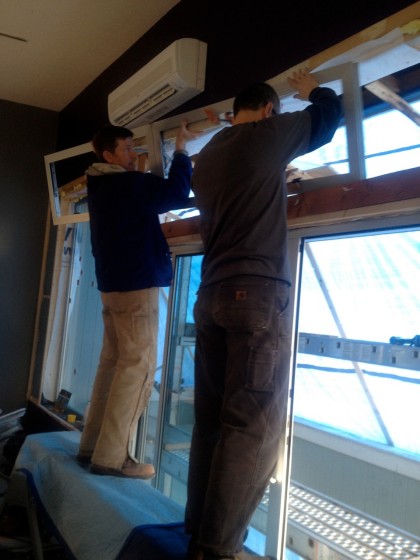
… and fitted them in over the upstairs sliders where they belong.

windows2


Now the living area is much, much warmer. Bonus: we no longer hear the constant flap flap flapping of the blue tarp. I can’t wait until said tarp is gone and a trip to the livingroom no longer feels like a visit to the bottom of the deep blue sea.

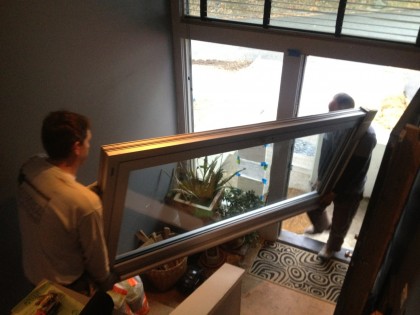
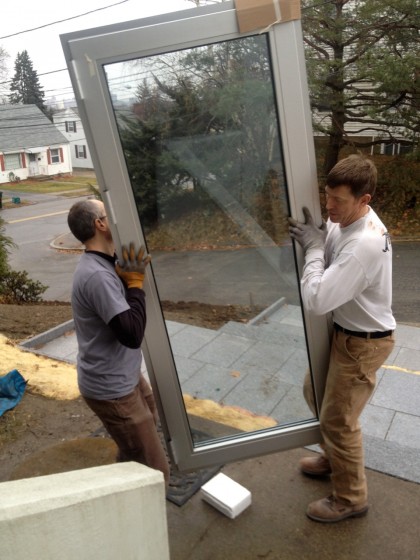
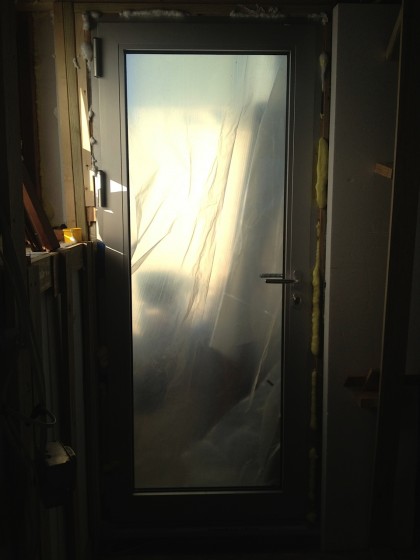
While the boys were at it, they also tackled installing the new and incredibly heavy aluminum door downstairs. But first they had to get it there…

door1


door2


Here’s where David takes over:

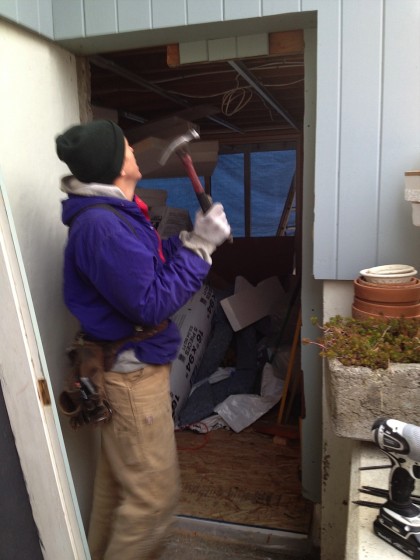
First we had to remove the old door and its associated framing (which was pretty funky, it must have been installed at 4:20 on a Friday). Once we had that corner of the house open we realized the beam was sitting on just two 2x4s, one of which was split. They missed an opportunity to land the beam on that foundation wall on the left side of the opening here…

door4


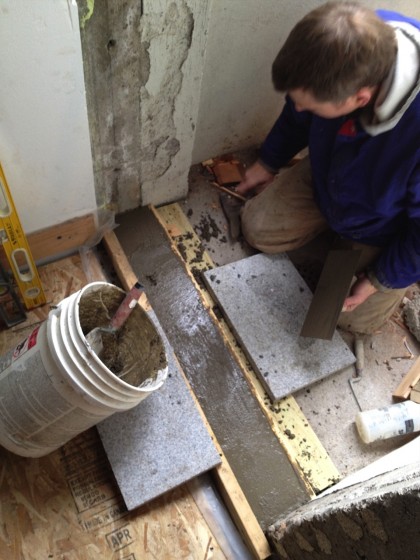
The concrete under the door was packed in under the old door in a haphazard way, so we replaced that too — remembering to use a bonding agent between old and new concrete so they’d stick together…

door5


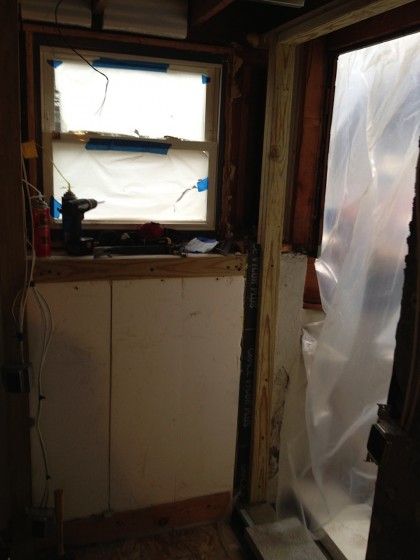
We put super tape between the new door framing and the foundation walls, and used treated lumber for good measure…

door6


The old concrete work is pretty funky, so it took some serious shimming to get the door plumb and square. Then I filled the remaining spaces with low-expanding foam. That will look much cleaner when the walls get finished…

door7


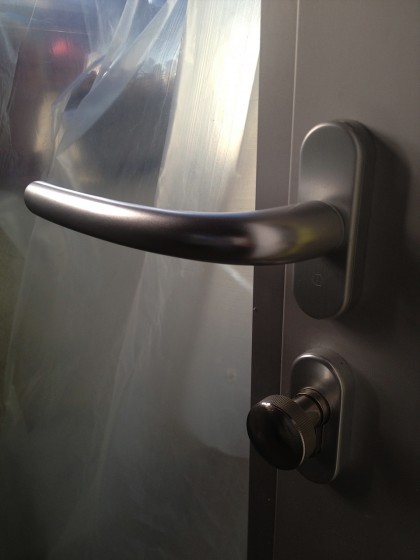
The door hardware is German and super smooth…

door8


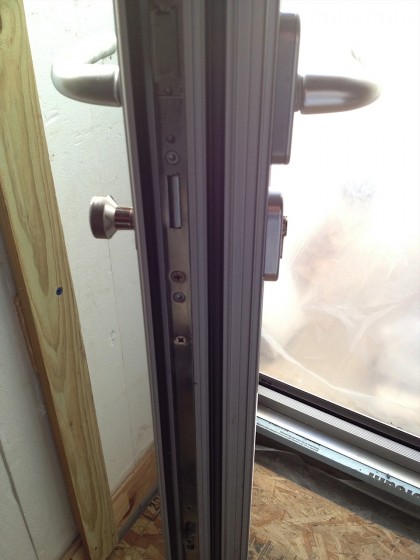
The locking system will take some getting used to. The lever throws the bolt and also four pins that lock the door along its whole length. …

door9


Supposed to be storm proof or something — with the right glass, which we didn’t opt for since we don’t live in Florida.

Looks hot, doesn’t it? Our front door will be replaced, too. In the fullness of time, of course.


fyi on the a/v yo

Friday, November 25th, 2011

My home audio specialist and A/V club president, Mr. Bettridge, now brings you this public service announcement.

———————————————————————————————-

As long as the walls are open, I’m taking advantage of this opportunity to run all the wire we’ll ever need — I hope. So what does that include? Funny you should ask.

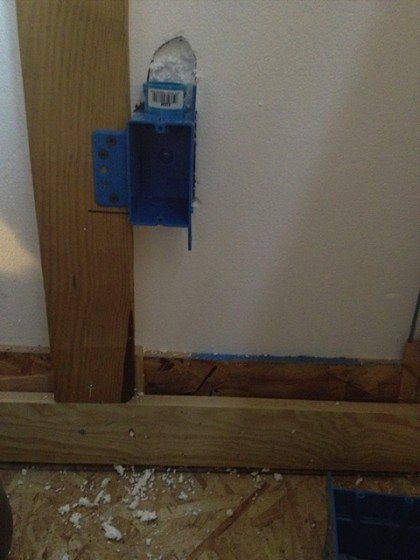
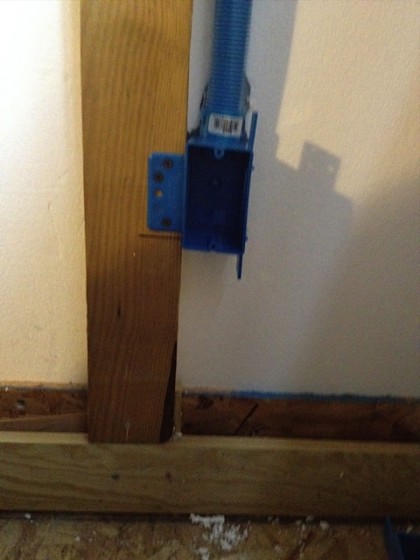
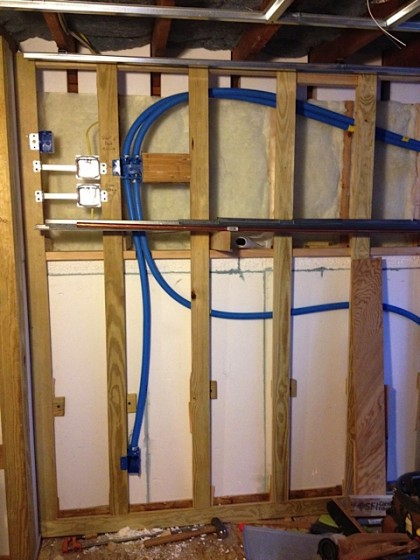
To connect the front left, right and center speakers, and the sub-woofer to the A/V cabinet, I ran 1” ENT conduit. Electricians call it Smurf tube because of its Smurfy blue color. Its real name is Electric Non-Metallic Tubing. It’s a flexible pipe that’s easy to install, easy to connect and easy to pull wire through.

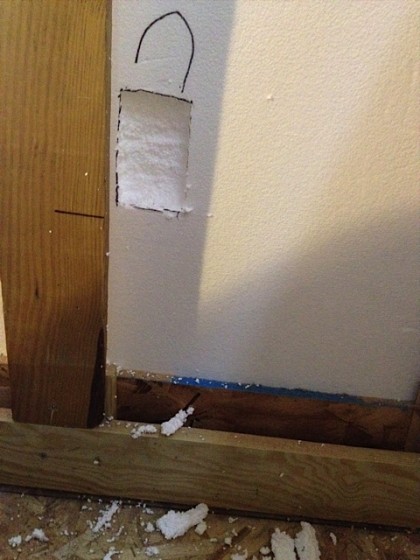
First, I traced the boxes onto the 3” foam insulation…

electric1


The box is mounted and a connector snaps into the box…

electric2


And the ENT simply pushes in to the connector. Easy peasy (although blurry)…

electric3


The four runs will enable us to experiment with different speaker wire at will, with everything hidden neatly behind the sheetrock — which I will be adding soon…

electric4


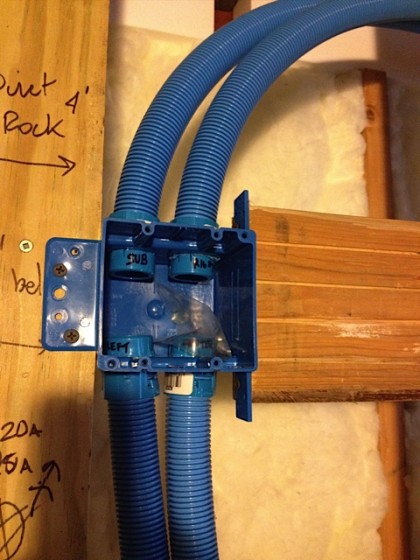
It’s a good idea to label everything to simplify things when you run your wire. Ya never know…

electric5


Joining this 4” square box (also known as a 2-gang box) in the A/V cabinet will be:

  • Two dedicated 20-amp electric circuits to provide plenty of power for 7.1 channels worth of amplification and the rest of the A/V gear.
  • Connections for in-wall speaker wire to the rear and rear surround speakers.
  • CAT-6 data wire to allow connection to a music server and the internet.
  • RG-6 quad-shield coaxial cable to carry cable TV, as well as TV and radio signals from an antenna (remember those?).
  • A 1-½” conduit that will allow running an HDMI cable to the TV. Most wire can have connectors installed after the wire is run to its destination but increasingly complex connections require wires to be factory terminated. Rather than burying the wire in the wall and hoping nothing ever damages it, or that the wire doesn’t become obsolete, I opted to run a conduit large enough to pull a complete HDMI cable and hopefully whatever cables replace HDMI in the future.

Hopefully all this will enable us to take advantage of current and future technologies without having to open up the walls or surface-mount wire.

getting into hot water

Wednesday, October 19th, 2011

Nope, no problems here. This is all about our new, high-tech, energy-saving hybrid water heater. Talk it up, David!

———————————————————————————————-

Some months back I told you about our house scientist and how we consulted with him on creating a greener, more energy-efficient home with this remodel. His recommendations resulted better insulation. But we’re also upgrading all of our equipment — starting with the water heater.

That meant out with the old and inefficient…
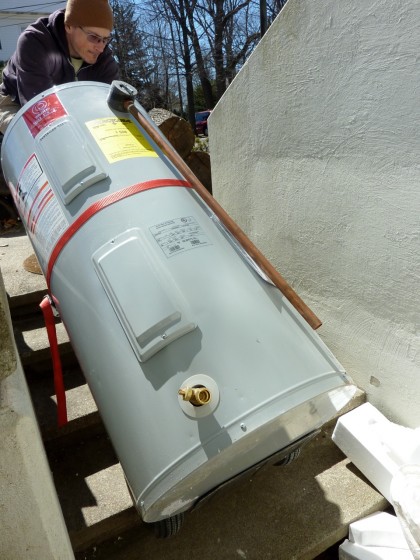
the old, inefficient water heater goes bye bye


And in with the new space-age unit we like to call HAL…
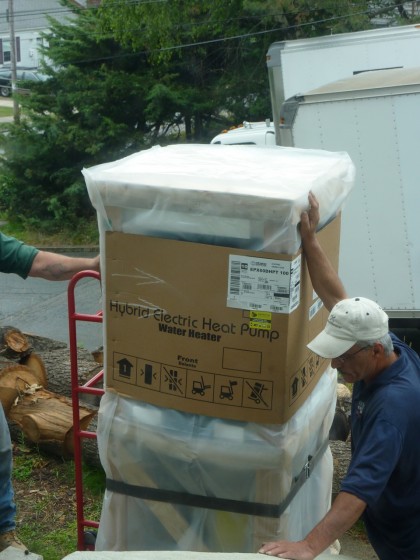
the new hybrid water heater arrives


Even in its crate, you can tell this Energy-Star rated, State Industries Premier Hybrid Electric water heater is the future. It can use as little as 30% of the electricity of a regular unit…
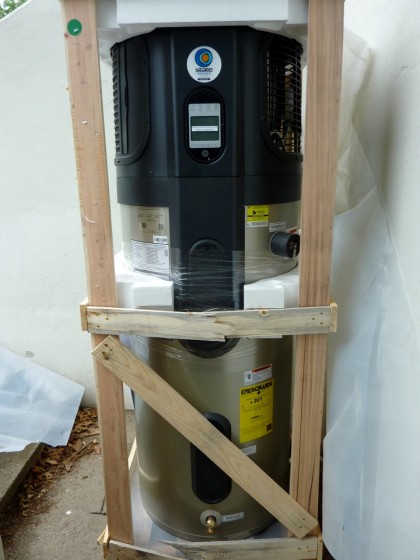
the hybrid water heater in crate


You can think of it as a traditional electric water heater with the addition of a heat pump on top. Or you can think of it as an electronic wizard of hot water, with multiple modes of operation…
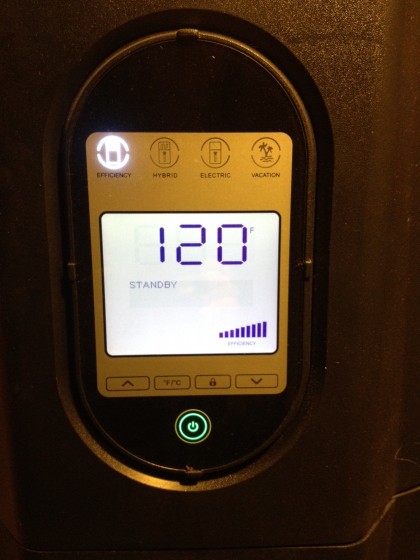
electronic display on the hybrid water heater


Energy-saver mode: runs the heat pump to pull heat (and, bonus: moisture) out of the air and put it into the water inside the tank. Hybrid mode: uses the heat pump and the smaller upper electric coil to heat the water, still saving some electricity but giving a faster recovery time — handy if everyone needs hot water at once for some reason. All-coil mode: shuts out the heat pump and just uses the two heat coils like a traditional water heater. I guess it would come in handy if we had a house full of guests for a week. Vacation mode: go to the beach without running full-bore.

It has a 60 gallon tank — 10 gallons larger than we’d need with a traditional electric heater. Why? Because in energy-saver mode the recovery time (the time it needs to reheat the water in the tank) is slower.
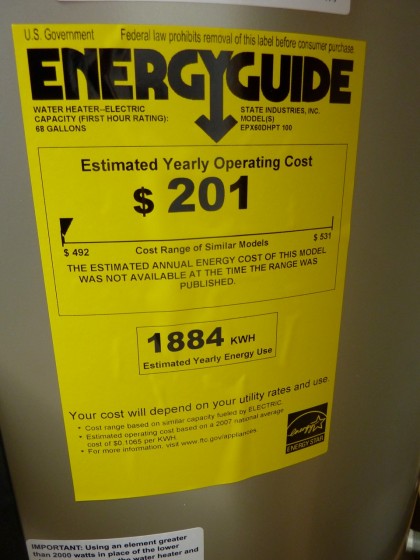
hybrid water heater energy guide sticker


Hard to say at this point how much (if any) electricity we’re saving with the new water heater. However, I have noticed that it only runs once or twice per day for about an hour at a time. Its secondary function as a dehumidifier is working great though — it pulls the humidity down 2-3 percentage points every time it runs! That’ll be great when July rolls around.

It needs 750 cubic feet of 50+ deg F air to draw heat from, but the pantry/utility closet we have it in is much smaller than that…
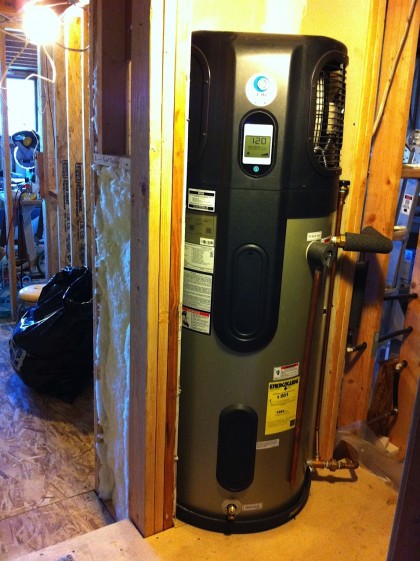
water heater in place


Don’t worry, we figured that out. See that opening inside the wall on the left there? That’s for a duct that will allow the heat pump to draw in warm air  from the larger main space. In fact, Joe just hand-crafted said duct from sheet-metal, mass loaded soundproofing vinyl and foam. And yes, pixie dust…
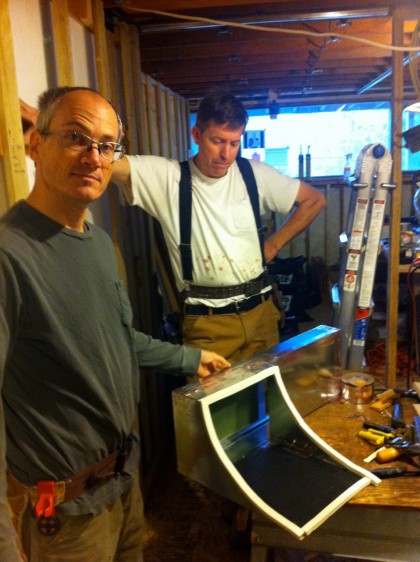
joe and his duct


That man is awesome. And now we pop it into place. Like buttah…
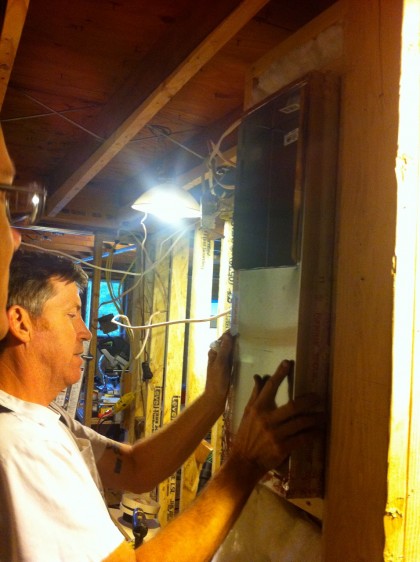
duct slides into place


The intake grille will be up at the top, offset from the unit’s intake. The foam and vinyl were added to cut the amount of noise getting out (the unit is noisy as the heat pump is basically an air conditioner).

Want more info on this hybrid water heater? You’ll find it here.


running the plumbing

Tuesday, October 18th, 2011

David will now show you how we’re getting closer to having a bathroom downstairs…

—————————————————————————————————

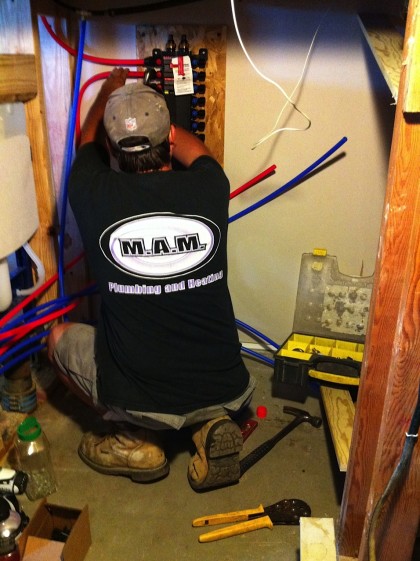
Things are really moving along down here. Once the bathroom framing was done, the plumber came in and ran all-new plastic pipe…
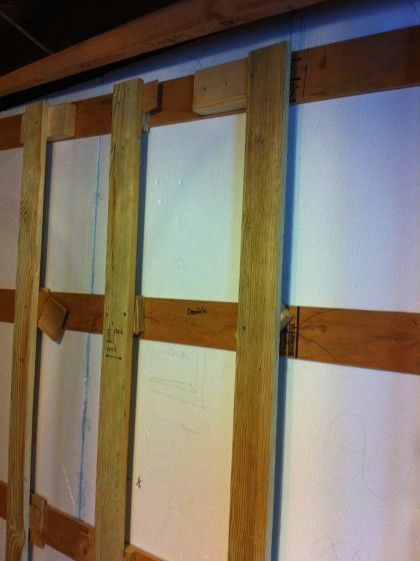
plumbing2

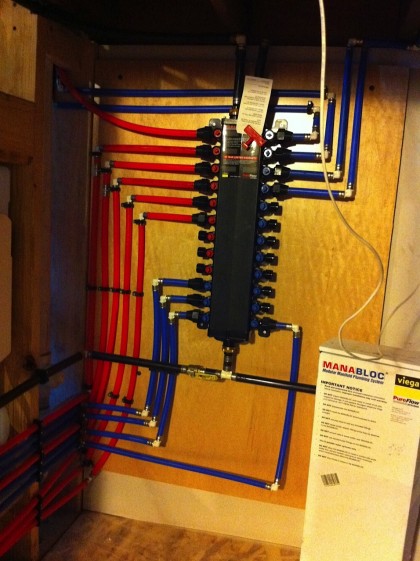
Rather than the traditional branch-style method of piping, with one shut-off for the whole house and individual shut-offs near some fixtures (but not usually all fixtures), we opted to have a manifold (think breaker panel for water) with all the piping in a home-run configuration. This means every fixture has its very own feed direct from the manifold and its very own shut-off…

plumbing4

Each of those little red and blue circles down the sides of the manifold is a shut-off. Eventually they’ll get labels so we know which is which.

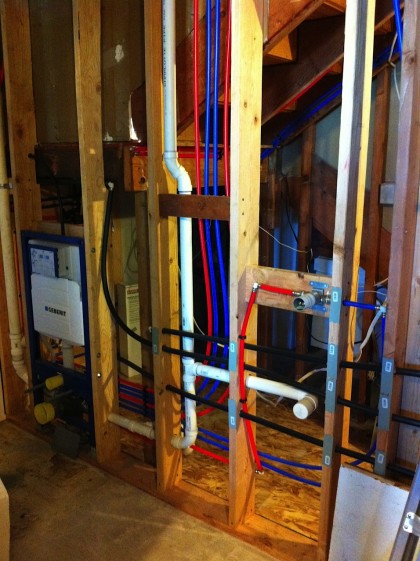
There was just a sliver of space between our old, floor-mount toilet and the shower, so we’re going with wall-hung to gain some space back. That’s the precursor to our new Duravit wall-hung toilet on the left — its slim Gerberit tank (jah, German) hides away inside the wall framing…

plumbing5

The sink faucet rough-in with drain below is on the right.

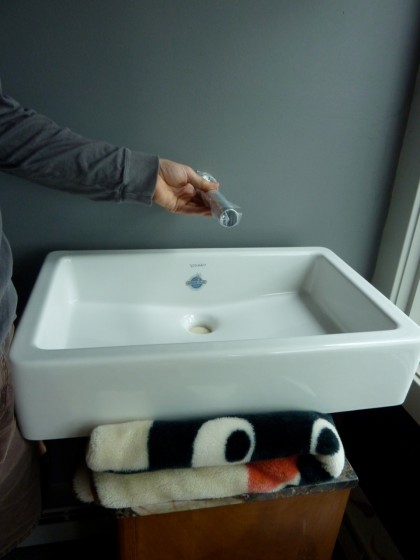
For the faucet above the sink, we also chose wall-mounted. You can’t resist playing with it when you open the box, it’s so cool….

playing with the sink and faucet


Modern. Simple. Not a bunch of fuss.

Then there’s the shower. Remember what it used to look like? Now we’re going for a much more minimal look. No more tub and the shower will have a partial glass wall with an open doorway for stepping in.

Brook wants a teak grid in the shower, so we went with this for the floor below it…

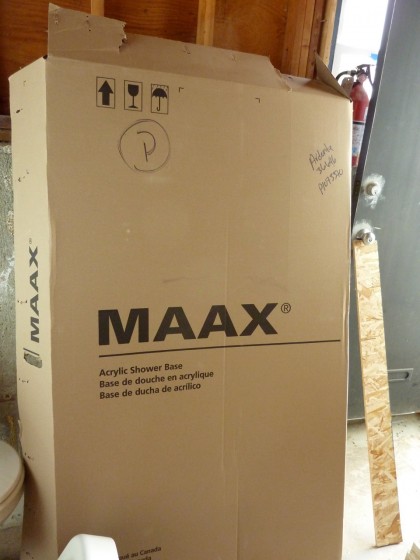
shower pan by Maax


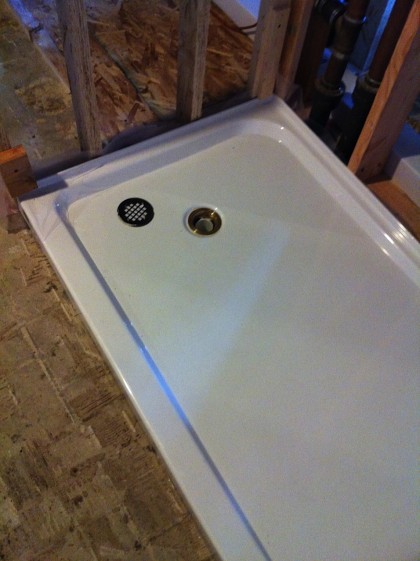
The shower pan will save us big over having to create a tile shower floor. Comes already sloped for drainage…

plumbing3


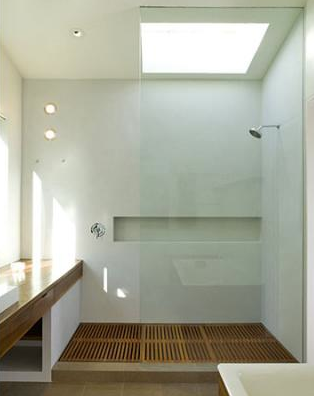
The plan is that the removable teak grid will sit inside the pan and look somewhat like this…

shower with teak floor, cary bernstein architect | houzz.com

shower with teak floor, cary bernstein architect | houzz.com


In fact, that’s pretty much the same idea we’re using for the glass wall, too. Should look very swank when it’s all said and done. Speaking of which, I should probably get it said and done right now!


back to the walls

Thursday, October 13th, 2011

More from David on the remodel progress…

——————————————————————————————-

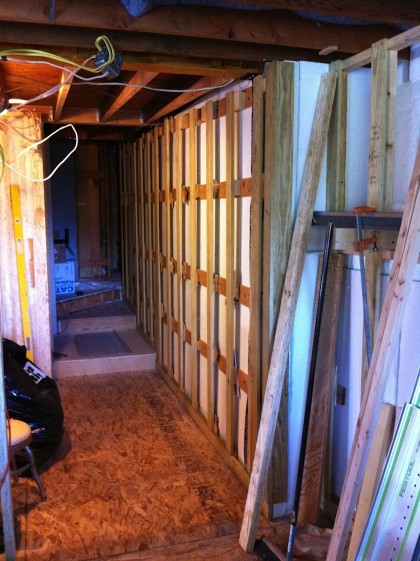
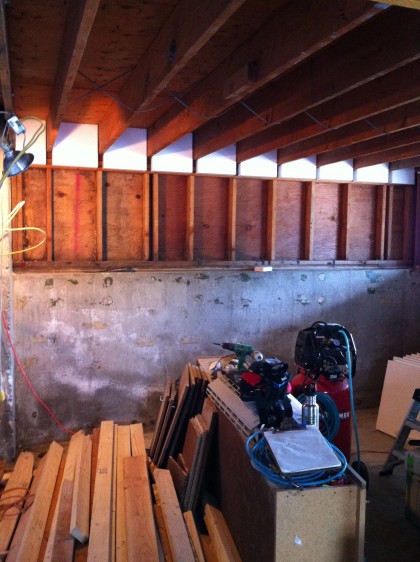
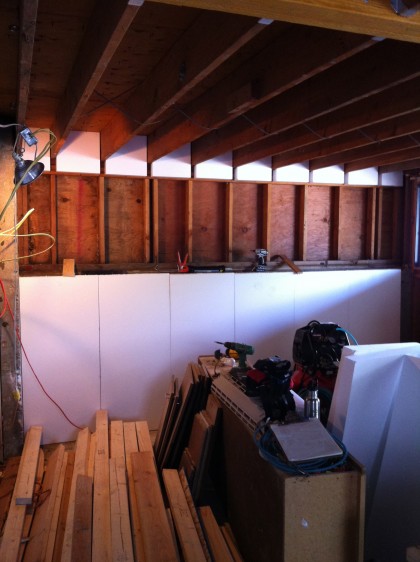
The walls downstairs are finally up and ready for the electrician to rough-in the wiring. Unfortunately, the foundation wasn’t poured dead plumb back in the ’70s (the crew was probably one toke over the line, if you know what I mean) so the furring had to be built out…

wall1


Seriously, take a closer look. I had to build out the blocking a full 1-1/2” in one place!

wall3


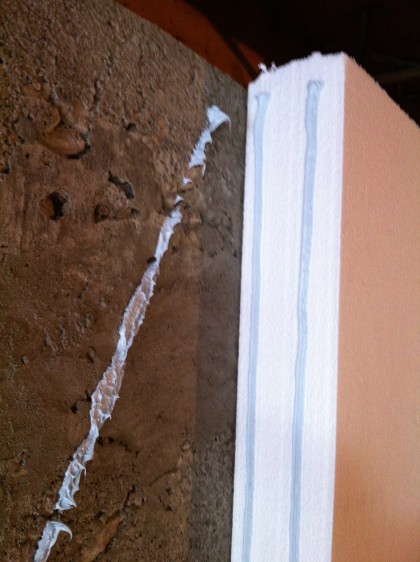
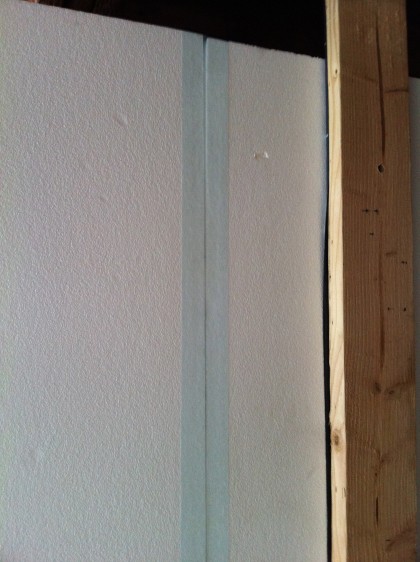
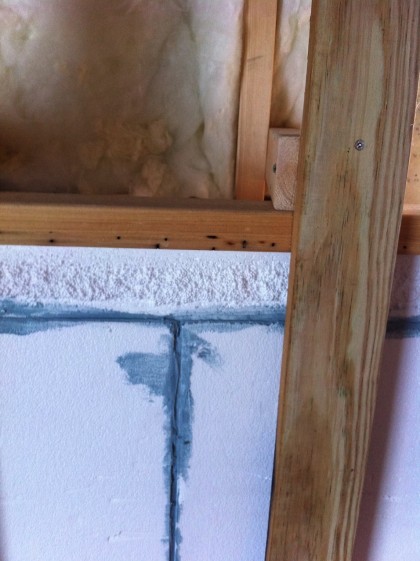
The special tape I was supposed to use for the Branch River Plastics EPS (styrofoam insulation) didn’t stick very well. By the time I’d pressed it down for the tenth time I realized I wouldn’t have access to it once the sheetrock was up. So I caulked all the joints with the PL300 I had used to glue it to the concrete and to itself…

wall2


That should keep the moisture in the concrete where it belongs. I know the system is working because I had to pull off a section to deal with a hole in the foundation that was leaking (well, shooting) water. So far, so good.

Want to know more about the insulation in those walls? It’s here.
 

rockin’ the double-denim ceiling

Wednesday, October 12th, 2011

This week, David Bettridge will catch us up on the downstairs progress. Drumroll, please…

———————————————————————————————————

When we moved in to this house, we noticed right away that sound travelled pretty well between the upstairs and downstairs. One of our goals is to fix that during the downstairs renovation. If you remember your physics, you know that sound travels as vibration. Usually we think of it as traveling through air but it can also be transmitted through other materials.

Working with Acoustical Supplies in Providence, we came up with a three-pronged attack on noise:

1. Insulation to absorb air-borne sound
2. Sealing to keep airborne sound from leaking through
3. Mass (weight) and mechanical separation to slow sound vibrating through the structure

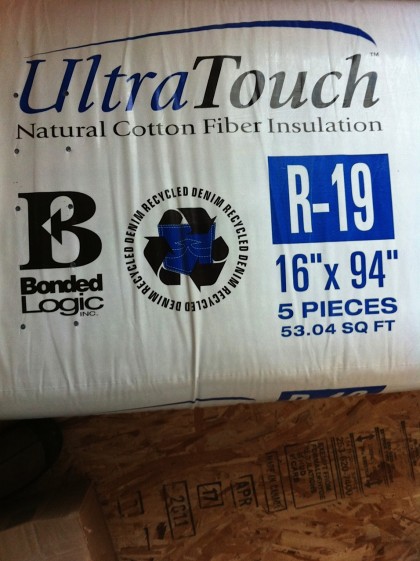
UltraTouch Demin Insulation batts have the same R-19 insulating rating as fiberglass but have a higher STC (sound transmission control) rating…

ultratouch denim insulation


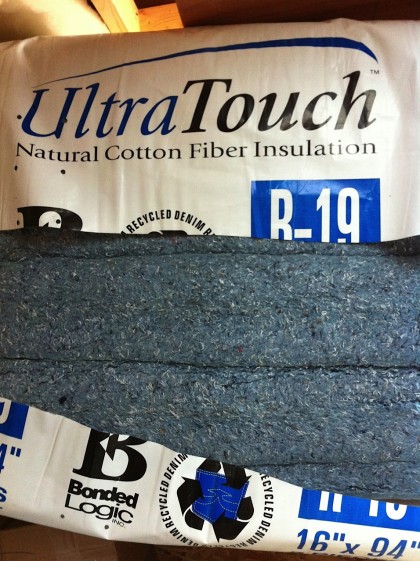
Being made of 80% post-consumer cotton, they also have several planet-friendly benefits — they don’t cause itching like fiberglass insulation, they don’t outgas formaldehyde or any other nasties and they qualify for LEED points. Plus it’s denim. How sexy American is that?

ultratouch insulation double denim ohyeahbaby


Once cut to the proper size the batts are pressed into place and fluffed so they aren’t too tight or too loose. Special wires are sprung into place to hold the batts so they don’t slip out of place…
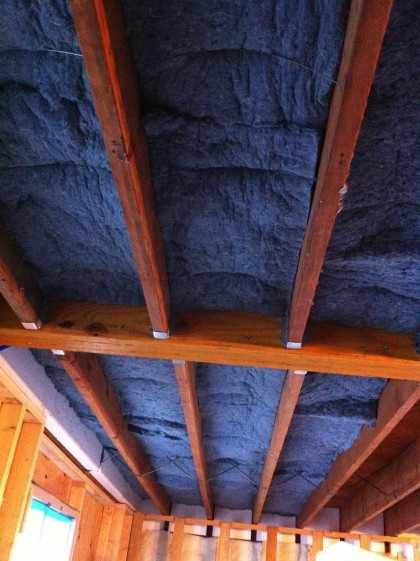
ultratouch insulation in place


UltraTouch is slightly heavier than fiberglass. But the main difference between the two is the prodigious amount of dust generated when handling the cotton and the difficulty in cutting it. Fiberglass is easy to cut with a utility knife, even while installed in a stud or rafter bay. The UltraTouch requires fairly careful measuring because it doesn’t compress nearly as much as fiberglass. Actually, this is a good thing because over-compressed insulation doesn’t work as well.
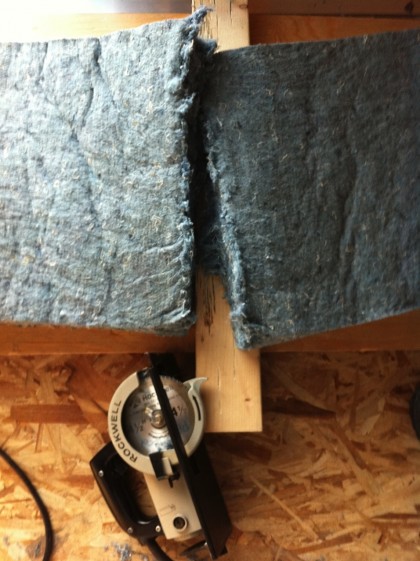
Bonded Logic, UltraTouch’s manufacturer, recommends several specialty tools for cutting it, but I didn’t plan ahead so was left trying their recommendation of a reversed fine-toothed blade in a circular saw. My grandfather’s old worm-drive trim saw fitted with a backwards plexiglass cutting blade works perfectly…

ultratouch and granddad’s circular saw


As the ceiling installation progresses, I’ll show two more methods we’ll use to control sound. In the meantime, my wife wants to know if this double-denim ceiling makes her butt look big?

what’s in your walls?

Wednesday, June 8th, 2011

So back to the downstairs, which is now in motion. David will tell you what he’s up to…

—————————————————————————————————-

One of the aims of these renovations is to cut our energy use, ideally by 60% or better. How will we achieve that lofty goal? By making the house air-tight and by adding insulation. Lots of insulation.

We ordered 3” of EPS (fancy name for styrofoam) made right here in Rhode Island by Branch River Plastics. Not only did it not have to ship from China, they make their foam in any size you like and they put boric acid in it to keep insects out  — which is handy seeing as we discovered there used to be termites in the walls. It weighs 2 pounds per cubic foot, so it’s denser than the shipping foam you’re used to. It is made with air instead of HCFCs so it’s better for the environment and holds its R-value over time unlike most other rigid foam insulation that slowly loses its effectiveness.

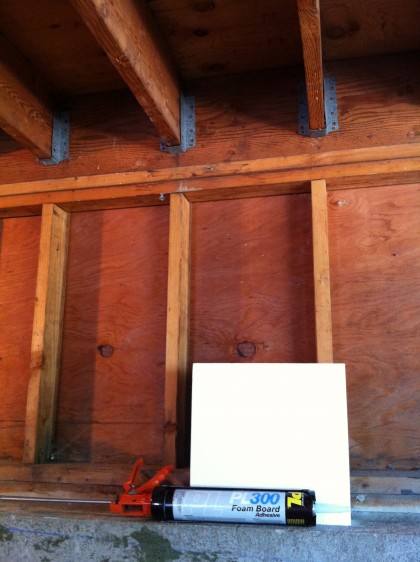
PL-300 adhesive holds it in place without dissolving it, don’t use anything that isn’t labelled specifically for foam…

foam glue


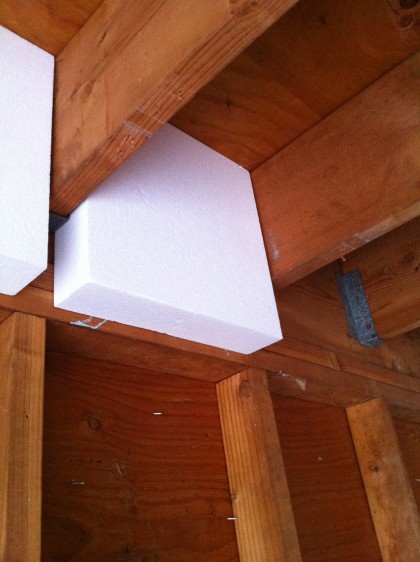
We had them cut pieces to fit between the floor joists…

rim joist foam

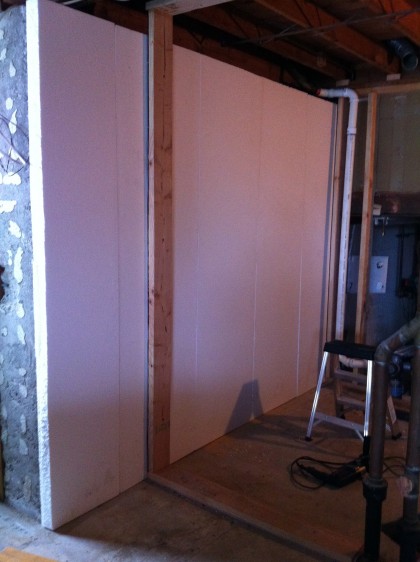
I wrapped it around the short walls on either end of the main space…

short wall before

short wall during

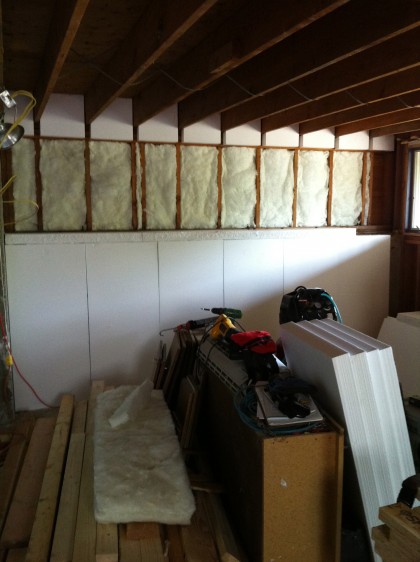
The wood-framed walls on top of the foundation receive two layers of un-faced fiberglass, here’s the first…

short wall after


When it’s done, the bathroom should be warm and cozy…

bath wall foam


I ran beads of the foam glue between the pieces to make them one big layer…

foam glue 2


Special tape seals the deal…

foam tape


I’ll be adding 3/4” furring strips screwed to the concrete. They’ll give us something to attach the sheetrock to, create a bit of air space to allow moisture to get out and give the electrician a place to run his wires. All that coming soon!


meanwhile, downstairs

Wednesday, May 18th, 2011

meanwhile, the downstairs awaits

Fabulous things happening outside the house. And inside? Not so much. As I mentioned weeks ago, we’ve been waiting for input from an expert before beginning to insulate the walls downstairs. Finally happened. So work resumes downstairs today.

And here I was starting to think we might never let Ann out of the box. Silly me.

this is getting ridiculous

Saturday, April 9th, 2011

And thus ends Week Two of A Blog Without Photos. Guess I’ll have to come up with a Plan Z cuz it looks like my troubleshooter is swamped with more pressing troubles. It happens. In the meantime, here’s an update to what you haven’t missed…

  • Downstairs is down to the studs and at a COMPLETE STANDSTILL until the house scientist dude can get details to David on how to proceed with insulation. Tick tick tick tick tick.
  • The bathroom sink arrived. Smashed. The toilet seat arrived. Smashed. Reordered both.
  • Bar sink and faucet just arrived and will pick them up today. Hope they fared better in their travels than SEE ABOVE.
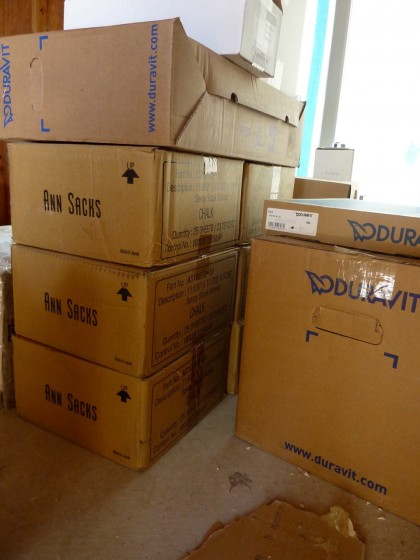
  • Ordered the bathroom tile at Ann Sacks NY on Thursday morning and OMG it all arrives on Tuesday morning. You rock, Ann Sacks! This will go on the floor (in Dove) and this will go on walls (stacked brick mosaic in Chalk). Should look pretty clean and understated when it’s done. I’d show you all the awesome tile pics I snapped while at the showroom but… yeah.
  • We went round and round on the shower and finally decided on something that will look pretty much like this, including the teak floor grid and skylight. It won’t suck. Plus David gets to avoid tiling the floor. Shower tray to be ordered asap.
  • As for the koi pond, we finally have a quote and a phone number for the liner guy so we’ll call him today. David’s on his way to meet with the pond equipment guy so we can get the details sorted out and parts ordered. The bridge steel should be ready any day now, I think. Things are finally moving.

I’ll leave it at that for now. Must send up another flare for WordPress help.