Posts Tagged ‘energy efficiency’

new year, new roof

Tuesday, January 15th, 2013

WE’RE BACK!

Where the heck have we been? Maybe we’ve been stuck in a time loop and just barely made it back to the present. Yeah, that’s it, time loop. That sounds so much better than man are things going slowly and we just don’t have anything to share with you.

But things are picking up again! What better way to start the New Year than with a sexy new rubber roof? David was up there when it all went down during the first couple of days of the year, so he can share the deets…

—————————————————————————————————–

Our old rubber roof was failing — not in a catastrophic way just yet, but who wants to tempt fate? Installed in ’85, it was past the end of its life and due to be replaced, plus it was leaking.

Just days after the New Year, I was surprised to hear from the roofers who said they were ready to roll. Talk about hardcore. The forecast called for  7 degrees the next morning and they showed up at dawn ready to rock. Removal of the recently fallen 8″ of snow was the first order of the day. The sun hadn’t even made it over the horizon…

8 degrees, 8" of snow to shovel off the roof.8 degrees, 8" of snow to shovel off the roof.


That was quickly followed by removing the gravel stop around the perimeter of the roof…

roof_2


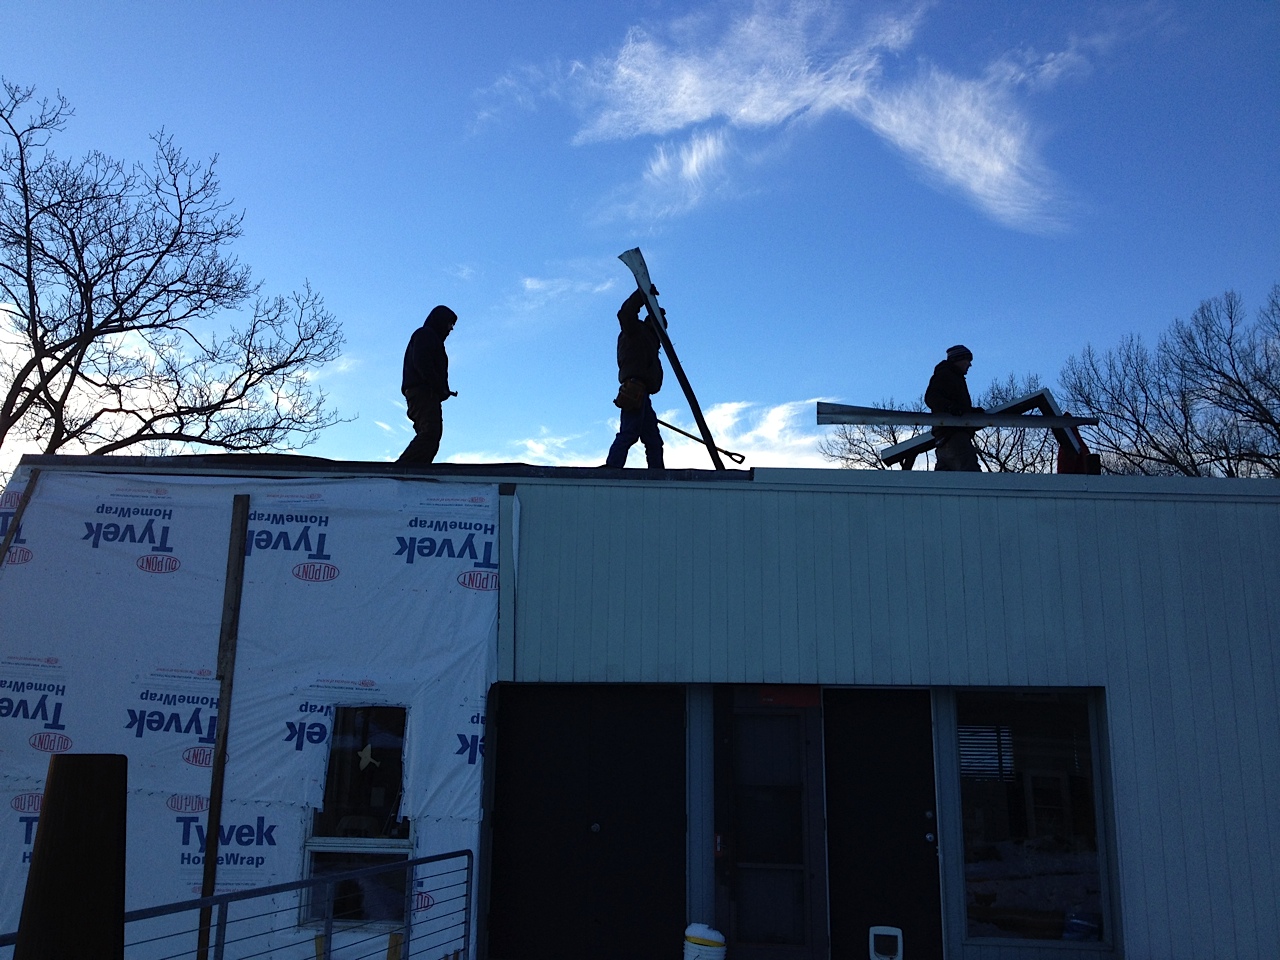
Next, cutting the aging rubber roof and exposing what lay underneath…

roof_3


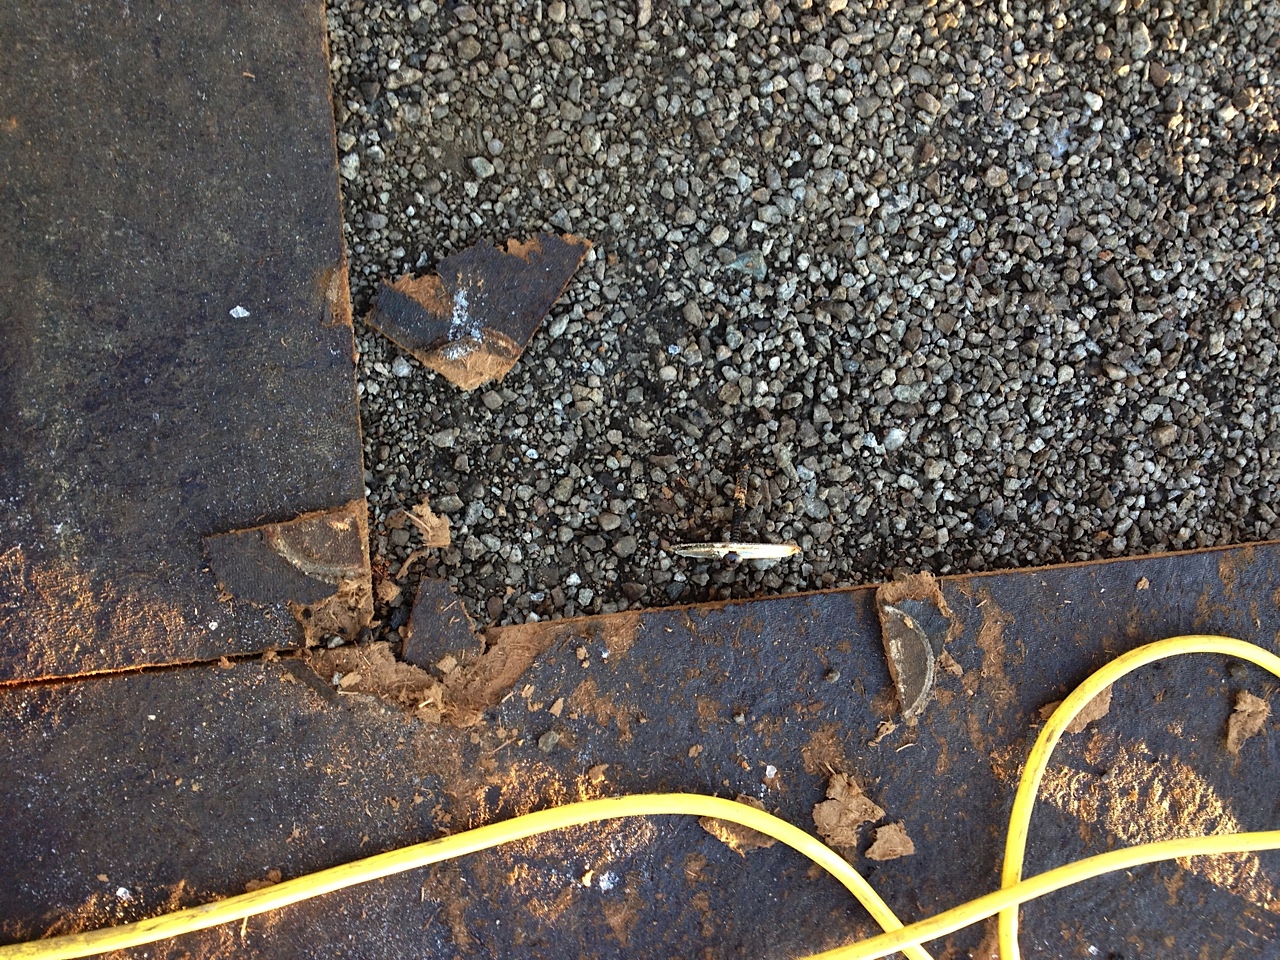
The original roof was pitch and gravel. Then in the mid-’80s, fiberboard with fully adhered rubber was installed directly over the top of it…

roof_4


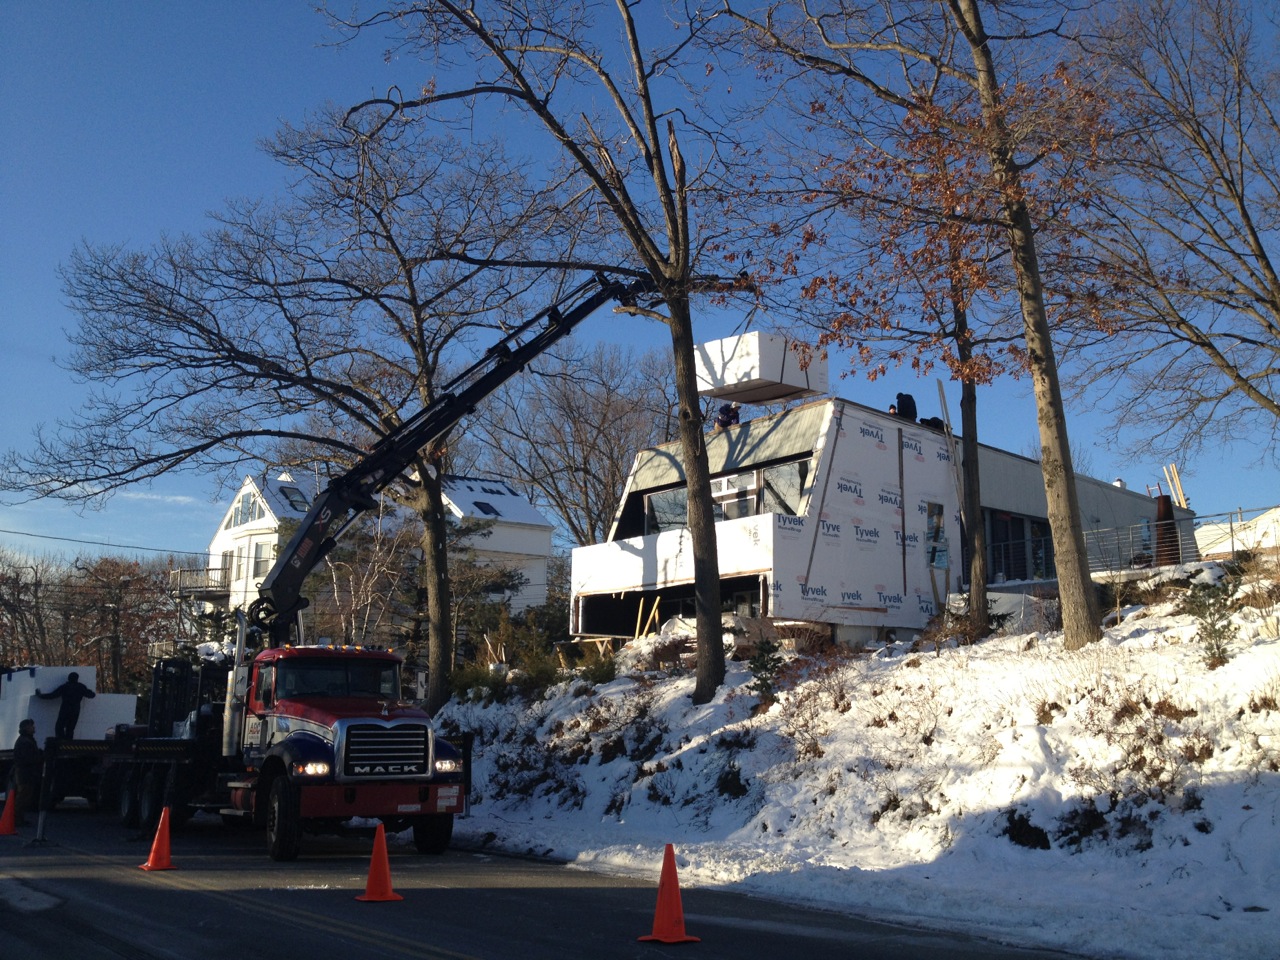
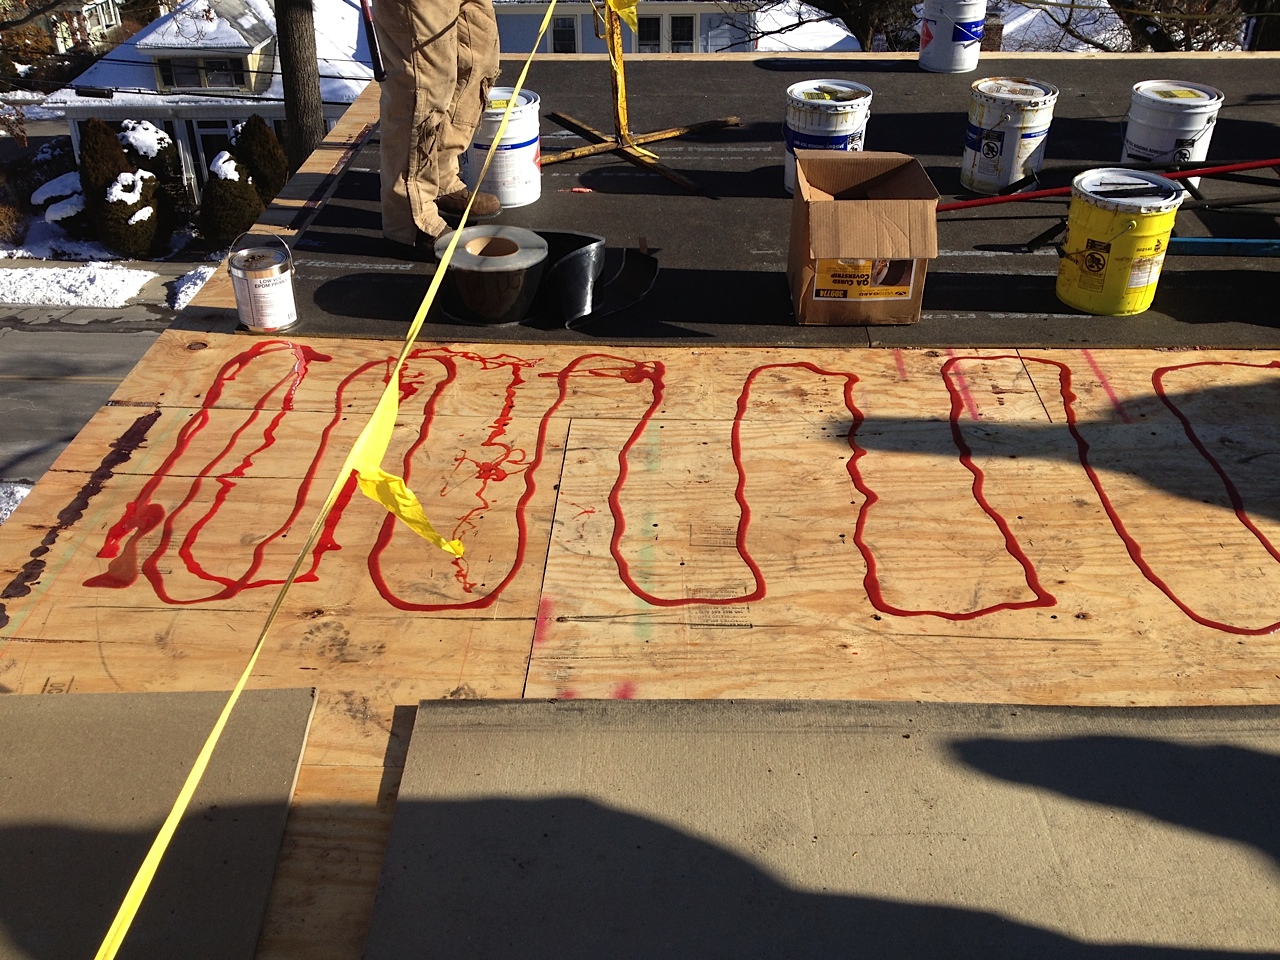
Once they had the roof clean down to the original plywood sheathing, the crane started hoisting up materials…

hoisting the EPS foam to insulate the roof.


The 3” EPS foam was then ready to be installed in two layers with overlapping joints…

roof_5


New fiber board was glued down onto new plywood…

roof_6


Fancy two-part polyurethane glue was applied to bond the new fiberboard to the new plywood, so there are no fasteners to telegraph through the rubber…

roof_7


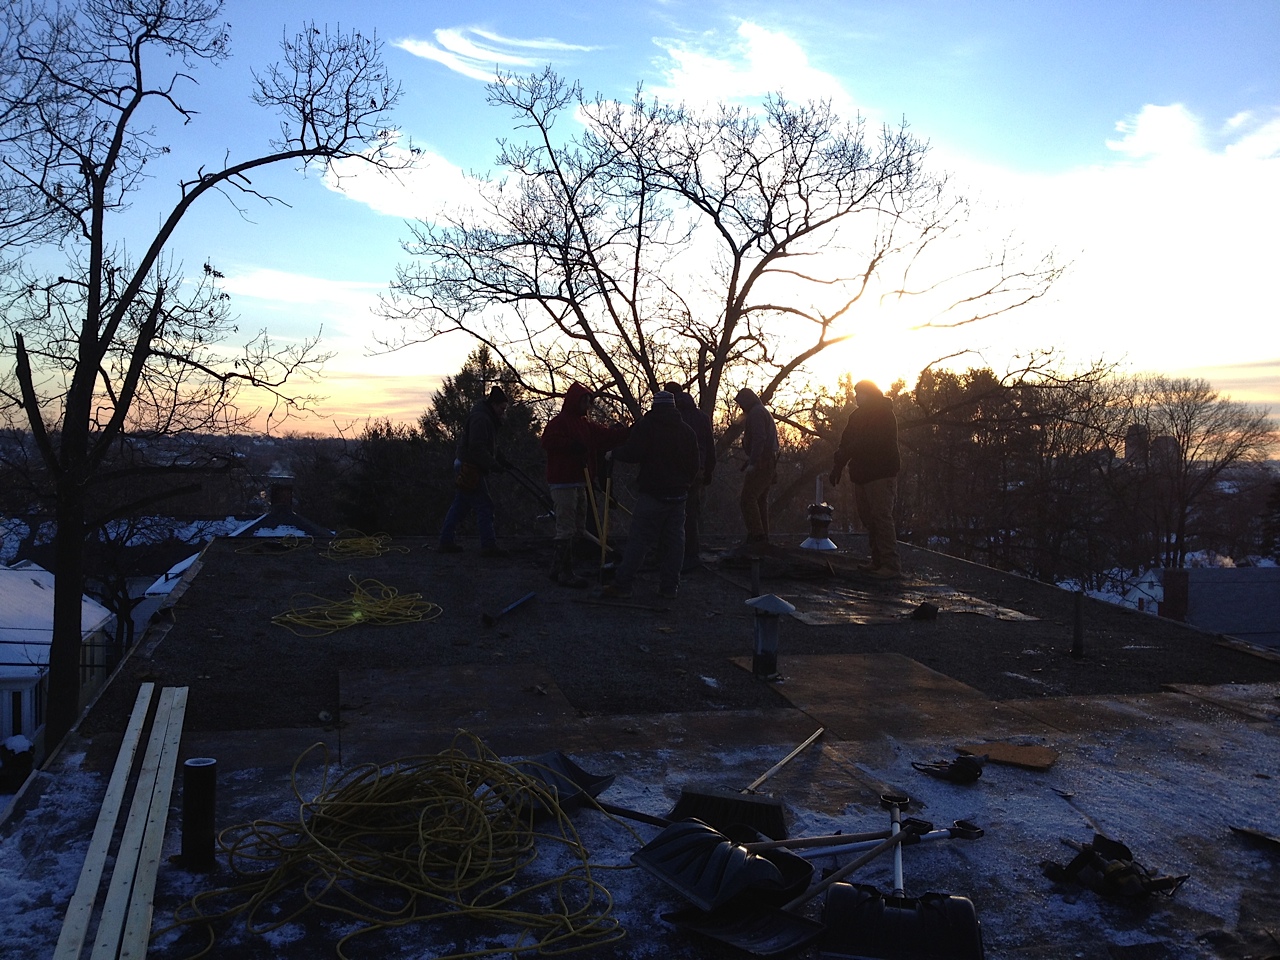
Day 2 dawned with half the roof left to do…

roof_8


Second verse same as the first, and then it was done!

new rubber — white to reflect the sun and save energy.


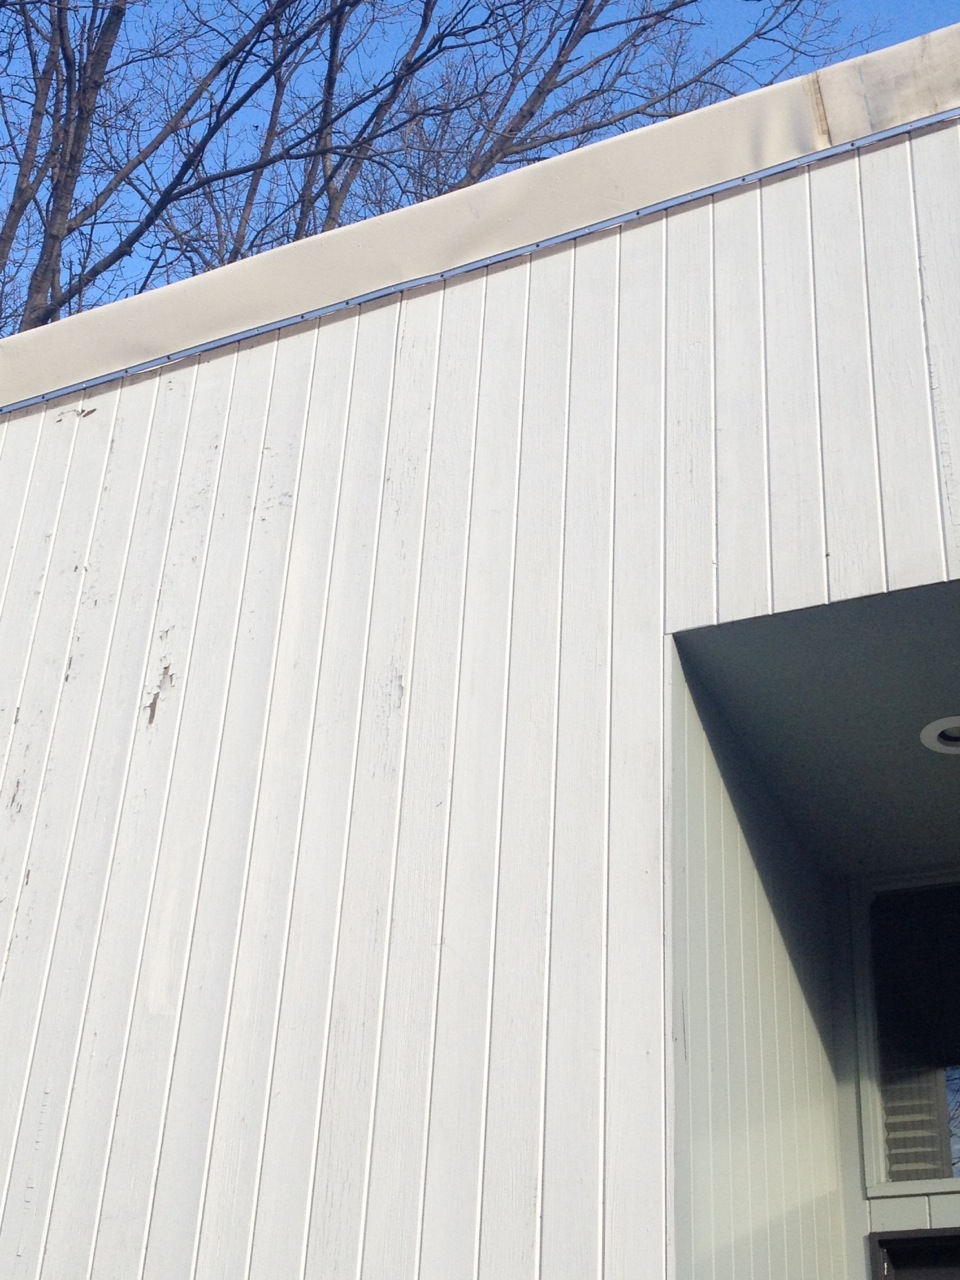
Well, almost done. We still have 3/4 of the sheathing to remove so we can finish insulating the exterior walls, which means the final edging detail will have to wait. What you see here is temporary. In fact, when Joe and I are done, you won’t even see the edge…

temporary roof edge.


One of the big goals of our remodel is energy efficiency, which is why we chose a white rubber roof rather than black. A lighter roof reflects the sun, which in turn reduces heat gain and lowers energy bills. In other words, white is the new black, and that makes it green.

We’ve also topped the house with 6″ of rigid EPS foam which, at R4.7 per inch = R28.2, increases our R-value and reduces our heat loss. That’s in addition to the existing 6″ of fiberglass (somewhere around R20) over which we layered the new roof.

Suffice it to say that we should be much cozier this winter.


downstairs check-in

Wednesday, January 18th, 2012

So what’s up down? Well, David and Joe have been busy since their last round of ceiling-up-putting with final prep for closing up the walls and ceiling.  Tell us all about it, David…

——————————————————————————————-

The hallway got its energy-efficient, eco-conscious makeover. Now fully denimated and insulated…

insulation down the hallway


That ridiculously frigid storage area under the stairs got the same treatment…

insulation under the stairs


And the bathroom will now be much warmer and cozier, too…

insulation in the bathroom ceiling


Including the shower…

insulation over the shower


[The concrete foundation wall was insulated earlier with 3″ EPS — the floor was also insulated, so it will definitely be more snug in here even after we tile. Gyp board (sheetrock) is the next step.]

Our electrician got all the new wiring roughed in downstairs — we passed inspection, which is why Joe and I are able to button things up. Our old electrical panel was code-compliant in 1971 but had since become outdated with a grounding system no longer acceptable. So we now have a nice shiny new 100-amp box.

All electrical boxes and ceiling lights are getting special soundproofing. Heavy putty pads are wrapped around them which block air (and noise) from getting through all the little holes and openings. The pads also add mass to the boxes so they won’t vibrate and transmit sound…

ceiling light can with insulating pad


This thing that looks like a boring old light is actually going to become a smoke and CO2 detector…

smoke/co detector


To complete the soundproofing, the gap between the detector’s electrical box and ceiling gyp board will be filled with non-hardening acoustical caulk. The box itself will be wired to another one by the upstairs bedrooms and to a heat sensor in the garage. If one unit is triggered all three will sound the alarm, giving us the best chance to get out and get the fire department here.

All pipe and wire penetrations are getting sealed against air and noise passage as well as against fire. Special fire-rated caulk first, then expanding foam where appropriate…

fire-rated caulk seals up the penetrations


Last minute additions to the A/V network: more smurf tube. One run from the desk area to the stereo cabinet to get digital music from the computer to the DAC, and a video cable to allow use of the TV as a monitor. Mmmmmm,  50” internets…

smurf tube for running cable and wires


The other run goes from behind the TV to the future home of the upstairs stereo to allow for AM/FM and TV signal wires…

smurf tube thru the ceiling


Someday soon we’re going to put antennas on the roof. That way we’ll be able to pull in distant radio stations and if the cable ever goes out we’ll still be able to get local TV channels.


hotted up, the sequel

Monday, December 5th, 2011

If you’ve been following along, the new heat was installed a week or so ago. Then came time to get it running. Jeff from RAM Mechanical came back to commission the HVAC system. First he checked that the 100 psi of nitrogen he put in the lines hadn’t leaked out…

hvac1


Next he double-checked all the wiring. Once he was sure everything was good to go, he turned it on. There was a problem with the amount of refrigerant in the compressor — it was charged assuming 150′ of pipe but we only had 52′, so the pressure got too high and everything shut down. A couple of phone calls later we had the right amount of pressure and things were heating up nicely.

Until we start on the upstairs construction and tear out the old electric baseboard, these two thermostats will be neighbors. 1971 meet 2011…

hvac2


The new thermostat is also a remote control… or is it a remote control that’s also a thermostat? It has all the features you might want except it’s not programmable to automatically reduce energy use during different times of the day…

hvac3


It does have a night-time setback mode which gradually reduces energy use (raising the temp in cooling season, lowering the temp in heating season), but it’s manual mode. We’ll see if there are any other thermostat options available for this system.

In any event, the new Sanyo units produce plenty of heat, the fans are very quiet even on high, and we can’t hear the compressor run. So far so good, we’ll see what the electric bill has to say next month.

window time: day 2

Friday, December 2nd, 2011

This is where we left off with windows. Now here’s where we pick up… The problem with just-in-time construction is it doesn’t allow for falling behind.

Tuesday we tried to stay ahead of the window and door installers by at least one opening. Here’s Joe applying house-wrap over the new foam+plywood and frames on the upstairs portion of the back wall…

window2_3


Joe installed the custom flashing, bending it up at the inside corners and then sealing it down with super-duper tape…

window2_4


Tape? For obvious reasons, you don’t want to put any fasteners through flashing — water has a way of getting into places you thought it couldn’t. The trick to keeping it out is to seal everything from the bottom up in order to shed the water back out. Bad flashing details can trap water and then it’s perfectly happy to cause  mold, mildew and rot — not something we want.

Next up: the two big fixed window frames. Waiting to go in, no glass in them yet…

window2_7


The aluminum window frames are thermally broken (they have a non-metallic connector between the inside and outside faces to limit heat transfer) but are ordinarily installed hollow. Joe and I decided leaving them hollow was a missed opportunity to be more energy-efficient, so I ripped 3/4″ EPS on the table saw to fit and we jammed it in there…

window2_8


Once the window frames were installed level and square (which was easy because we made the extension frames level and square), butyl rubber got applied to the inside face of the frame…

window2_14


Close-up of the frame almost ready for the glass…

window2_15


I was an honorary glass man for the day, helping hoist the new panels into place with a fancy suction cup handle. Those suckers were HEHVEE….

window2_1


Joe was the balance man…

window2_2


Once the glass was in against the butyl rubber, aluminum stops were snapped in on the outside and a rubber gasket was driven in-between the stops and the glass. No fasteners show so there’s a nice clean look.

That slot in the aluminum stop is a weep hole to let water out in case the wind drives it in there…

Glass panel installed.


Each glass panel has a low-e coating on the inner piece of glass (“lite” in technical jargon). It acts as sort of a one-way system for radiant heat — heat from the sun can come in but can’t get back out…

window2_6


The new sliders look great, perform great and slide like butter on a hot pan…

window2_9


A bump stop goes in at the top of the slider to keep fingers from being crushed…

window2_5


Digging the nice, clean look of the door hardware…

window2_10


All in all, looking great from the outside…

window2_12


But wait — not done yet! The gaps between the window and door frames and the house need to be filled. Caulk can bridge small gaps just fine but bigger gaps require that foam backer rod stuffed in. This stops the caulk from falling in to the gap…

Backer rod saves caulk!


Joe picked up a tube of this at Home Depot…

voccompliantmyass


DO NOT use this. It stank to high heaven and smelled up the whole house even though it clearly says “V.O.C. compliant.” Not good. I’ll find something braincell-friendlier for the rest of the project.

So here’s the finished caulking job. The caulk is clear so it’s hard to tell what’s happening but I promise it’s in there. You can clearly see the backer rod!

Clear caulk is freaky.


Backer rod didn’t fill the really big gaps at the tops of the two big windows so I put blue tape across them, pushed in a bit to leave room for caulk…

Blue tape has SO many uses.


Then I filled all the gaps with expanding foam from the inside. The smaller gaps now have caulk or backer rod and caulk to stop the foam. The big gaps have the blue tape for the foam to expand up against. Soon I’ll strip the tape and caulk them from the outside, easy peasy.

What did we do before expanding foam?


And that, my friends, was a long day.

hotted up

Monday, November 28th, 2011

Let’s talk briefly about how we’re going to heat our house. Currently, we have electric baseboard heat. It’s actually fairly efficient — it converts about 95% of the electricity into heat. But we’re investing in something even more efficient — and, key to a small house like ours, it allows us to use all the wall space that’s currently taken up with heaters.

So what is this wonder of which I speak? Officially known as an air-source heat pump, you may have heard it called a “mini-split.” Chances are you’ve seen one as the A/C-only units are popular in restaurants. This is the Sanyo unit we’ll be using (comes with a handy-dandy remote)…

KMHS0772-48857444 via sanyo.com


If you want a really good explanation of why it’s more energy efficient, you should read this. So our new heat pump was installed a few days ago…

hvachookup


With some aesthetic changes and the elimination of the dark purple paint, eventually that mildly unattractive white rectangle above the window will disappear from view. We hope.

There are two refrigerant lines, the electric cable and a small PVC drain line for any condensation that forms in the summer or in winter when the unit is in defrost mode. The connections run down inside the double wall…

hvac1


The hoses exit outside where they travel inside a piece of PVC over to the compressor…

hvac2


I’ll clean up that expanding foam and seal a piece of metal flashing over the hole to maintain our water and air infiltration integrity, and to keep out 4- and 6-legged vermin.

An outside unit (the compressor) takes heat out of the air and pumps it into refrigerant which is circulated through pipes to the indoor unit (in summer the process is reversed)…


hvac4


The compressor is relatively small considering it provides 32,000 BTUs of heat — and 34,000 BTUs of cooling. It can support up to four connections. We’ll be using just two: a 9,000 BTU unit downstairs and a 24,000 BTU unit in the upstairs living area. Each is connected to the compressor with two copper refrigerant lines wrapped in black foam insulation, and a 3-wire cable carrying electricity to the fans in the inside unit. The wire also carries signals from the inside units back to the compressor telling it whether to send heat or cooling, and how much to send. The compressor has a variable-speed DC motor which can run faster or slower as needed to suit demand. This makes it much more efficient than a simple on/off compressor.

Now that our electrician has made all the wiring connections, RAM Mechanical (our HVAC installer extraordinaire) will return to double-check the refrigerant connections for leaks. Before they left, they filled the hoses with nitrogen under pressure. If the pressure has dropped over the last week they’ll know something is amiss. Hopefully this is just a precaution and later this week we’ll have heat! In a month or two we’ll compare our past electric bills to the current ones and know just what we’re saving with the new system.

monday update

Monday, November 21st, 2011

Ooh, more construction than deconstruction today! Tell us how it went, David…

————————————————————————————–

Today Joe and I started putting the end of the house back to together. First we caulked the uneven joint between the concrete slab and the old plywood sheathing and applied ice and water barrier (a special super-sticky sealing tape). Joe bent up some aluminum into a J-shape which we attached to the old sheathing with a bead of caulk and nails. Then we cut pieces to fit from the 3” foam/plywood panels…


monday update


… and slipped them down into the channel.

monday update 1


They got attached to the existing 2” x 4” framing with 5” screws. The aluminum protects the foam and plywood from attack by water, ants and termites…

monday update 2


We ran the aluminum up the sides of the new foam/plywood sheathing at each end of the wall…

monday update 3


Then we taped the aluminum to the new sheathing with more ice and water barrier…

monday update 4


Here you can see why we added 2” x 4” frames around the window and door openings…

monday update 5


… we had to bring them out to the new face of the house, even with the new 3” foam/plywood sheathing!

Once the whole two-story wall has the foam/plywood layer applied, we’ll cover it with a vapor barrier. Then a layer of special breathable mesh goes on which allows air to dry the back of the siding and then the siding can go on. Whew.

Those two black hoses you see trailing down the wall…

monday update 6


Those and the white PVC pipe are part of the new HVAC system which also went in today. More on that later. Man it was hectic upstairs and down…

monday update 7


In a good way.


prepping the bathroom floor

Monday, November 7th, 2011

David Bettridge will now catch us up on the downstairs bathroom as he preps for tile. Try to contain your excitement, okay?

—————————————————————————-

The majority of the downstairs floor is insulated and ready for flooring but the bathroom is its own special case. Way back in March, I removed the old tiles from the floor…

the floor during


More recently, I removed the last of the thinset (tile ‘glue’, a kind of flexible mortar). A wide chisel bit in my trusty Bosch Bulldog made short work of it…

bathroom floor | bosch bulldog

The Bulldog is a light-duty rotary hammer that has settings for drill+hammer, just drill or just hammer. Hammer drills on the other hand only have settings for just drill or drill + hammer. The Bulldog drills into 40-year old concrete like a hot knife through butter.

Once the slab was clean and smoothish, I layed down 1” tongue and groove high-density foam insulation…

bathroom floor | foam insulation


It will act as a thermal and moisture break between the new tile floor and the slab (and planet earth) underneath. This will hopefully keep the bathroom floor more comfortable underfoot and keep the basement dry. And it will help the bathroom be more energy efficient as well.

I layed 1/2” cement board over the foam and screwed it down to the slab underneath, using Tapcon screws…

bathroom floor | cement board


Due to their special threads and lubricated coating, they actually cut into the concrete when installed into a pre-drilled hole. Technology, gotta love it. I used a lot of screws so there would be no movement under the floor tile, and therefore no cracking.

Some lucky tile installer will trowel thinset onto the cement board, lay Schluter Ditra tile membrane down before troweling on more thin set, then setting and grouting the floor tiles. The membrane acts as another moisture barrier but more importantly it separates the tile from the floor which lets things move a little bit before any cracking takes place. Again, technology at work.

Schluter will also be providing all the metal bits and pieces that allow tile to be installed up against other materials like cork flooring, wood cabinets, mirror, etc. A small prep detail but an important one. Like they say, do it right the first time.

what’s underfoot

Thursday, October 20th, 2011

After a week of posts from Mr. Bettridge on the downstairs progress, we might just be caught up! Take it away, David…

—————————————————————————————————-

To make the downstairs more comfortable (and cheaper to heat) in the winter, we decided to insulate the floor slab. Our house scientist wanted 2” of foam, but we didn’t think we could afford to give up that much headroom, so we decided to use 1” instead.

Then we became concerned that the foam alone might not be enough — its 20 psi load rating isn’t high enough to properly support furniture and whatnot. So we had local Branch River Plastics make us a bunch of these panels…

floor insulation panels


It’s the same EPS (styrofoam) we used at 3” thick to insulate the foundation walls, only these are made of 1/2” thick 4’ x 8’ OSB (oriented strand board) glued to 1” EPS….

floor insulation


The non-formaldehyde, non-outgassing OSB spreads out the weight of people and stuff on top of it and provides a nice stable surface for the finish floor to rest on…

floor insulation detail


Underneath the foam is 6 mil plastic that acts as a vapor barrier, keeping moisture out of the floor system. Even in its not-quite-completed state, the basement is down to 45% humidity which is great.

Eventually — well, soon — the cork floor planks will be installed over the top of the insulation panels. Until then, they wait…

cork tiles waiting in the driveway


Luckily, they’re no longer waiting in the driveway.

The last piece of sub-floor went in twice because of the leak in the foundation wall. On the right you can see the 6 mil vapor barrier coming out from under the sub-floor and up the wall. It got sealed to the 3” foam with non-hardening sealant (in that big caulking gun on the step)…

underflooring in front of steps


Give me a few more days and I’ll show you how we’re prepping the bathroom floor in a slightly different way.

getting into hot water

Wednesday, October 19th, 2011

Nope, no problems here. This is all about our new, high-tech, energy-saving hybrid water heater. Talk it up, David!

———————————————————————————————-

Some months back I told you about our house scientist and how we consulted with him on creating a greener, more energy-efficient home with this remodel. His recommendations resulted better insulation. But we’re also upgrading all of our equipment — starting with the water heater.

That meant out with the old and inefficient…

the old, inefficient water heater goes bye bye


And in with the new space-age unit we like to call HAL…

the new hybrid water heater arrives


Even in its crate, you can tell this Energy-Star rated, State Industries Premier Hybrid Electric water heater is the future. It can use as little as 30% of the electricity of a regular unit…

the hybrid water heater in crate


You can think of it as a traditional electric water heater with the addition of a heat pump on top. Or you can think of it as an electronic wizard of hot water, with multiple modes of operation…

electronic display on the hybrid water heater


Energy-saver mode: runs the heat pump to pull heat (and, bonus: moisture) out of the air and put it into the water inside the tank. Hybrid mode: uses the heat pump and the smaller upper electric coil to heat the water, still saving some electricity but giving a faster recovery time — handy if everyone needs hot water at once for some reason. All-coil mode: shuts out the heat pump and just uses the two heat coils like a traditional water heater. I guess it would come in handy if we had a house full of guests for a week. Vacation mode: go to the beach without running full-bore.

It has a 60 gallon tank — 10 gallons larger than we’d need with a traditional electric heater. Why? Because in energy-saver mode the recovery time (the time it needs to reheat the water in the tank) is slower.

hybrid water heater energy guide sticker


Hard to say at this point how much (if any) electricity we’re saving with the new water heater. However, I have noticed that it only runs once or twice per day for about an hour at a time. Its secondary function as a dehumidifier is working great though — it pulls the humidity down 2-3 percentage points every time it runs! That’ll be great when July rolls around.

It needs 750 cubic feet of 50+ deg F air to draw heat from, but the pantry/utility closet we have it in is much smaller than that…

water heater in place


Don’t worry, we figured that out. See that opening inside the wall on the left there? That’s for a duct that will allow the heat pump to draw in warm air  from the larger main space. In fact, Joe just hand-crafted said duct from sheet-metal, mass loaded soundproofing vinyl and foam. And yes, pixie dust…

joe and his duct


That man is awesome. And now we pop it into place. Like buttah…

duct slides into place


The intake grille will be up at the top, offset from the unit’s intake. The foam and vinyl were added to cut the amount of noise getting out (the unit is noisy as the heat pump is basically an air conditioner).

Want more info on this hybrid water heater? You’ll find it here.


what’s in your walls?

Wednesday, June 8th, 2011

So back to the downstairs, which is now in motion. David will tell you what he’s up to…

—————————————————————————————————-

One of the aims of these renovations is to cut our energy use, ideally by 60% or better. How will we achieve that lofty goal? By making the house air-tight and by adding insulation. Lots of insulation.

We ordered 3” of EPS (fancy name for styrofoam) made right here in Rhode Island by Branch River Plastics. Not only did it not have to ship from China, they make their foam in any size you like and they put boric acid in it to keep insects out  — which is handy seeing as we discovered there used to be termites in the walls. It weighs 2 pounds per cubic foot, so it’s denser than the shipping foam you’re used to. It is made with air instead of HCFCs so it’s better for the environment and holds its R-value over time unlike most other rigid foam insulation that slowly loses its effectiveness.

PL-300 adhesive holds it in place without dissolving it, don’t use anything that isn’t labelled specifically for foam…

foam glue


We had them cut pieces to fit between the floor joists…

rim joist foam

I wrapped it around the short walls on either end of the main space…

short wall before

short wall during

The wood-framed walls on top of the foundation receive two layers of un-faced fiberglass, here’s the first…

short wall after


When it’s done, the bathroom should be warm and cozy…

bath wall foam


I ran beads of the foam glue between the pieces to make them one big layer…

foam glue 2


Special tape seals the deal…

foam tape


I’ll be adding 3/4” furring strips screwed to the concrete. They’ll give us something to attach the sheetrock to, create a bit of air space to allow moisture to get out and give the electrician a place to run his wires. All that coming soon!