We’re back! … Making great progress and can’t wait to show you around. Working on an update now.
That is all. Keep yer pants on.
We’re back! … Making great progress and can’t wait to show you around. Working on an update now.
That is all. Keep yer pants on.
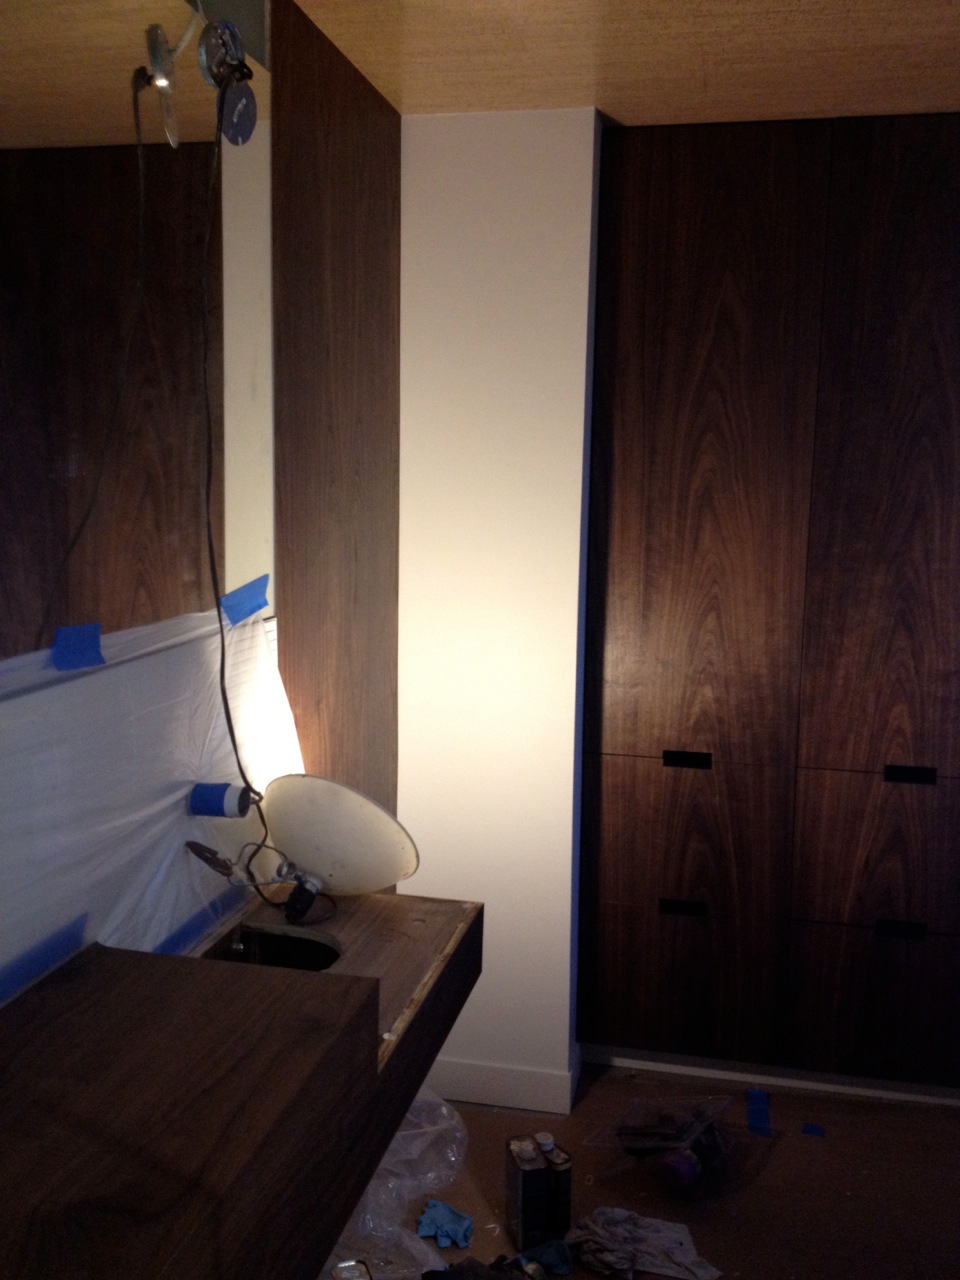
It’s been a while since we went to the bathroom together. David and Joe have been making progress on the built-ins in there, so maybe it’s time for a peek — even if it’s not quite done yet.
Let’s start at the beginning. A couple of years ago, I handed David a rudimentary scribble of what I pictured for our new bathroom vanity…
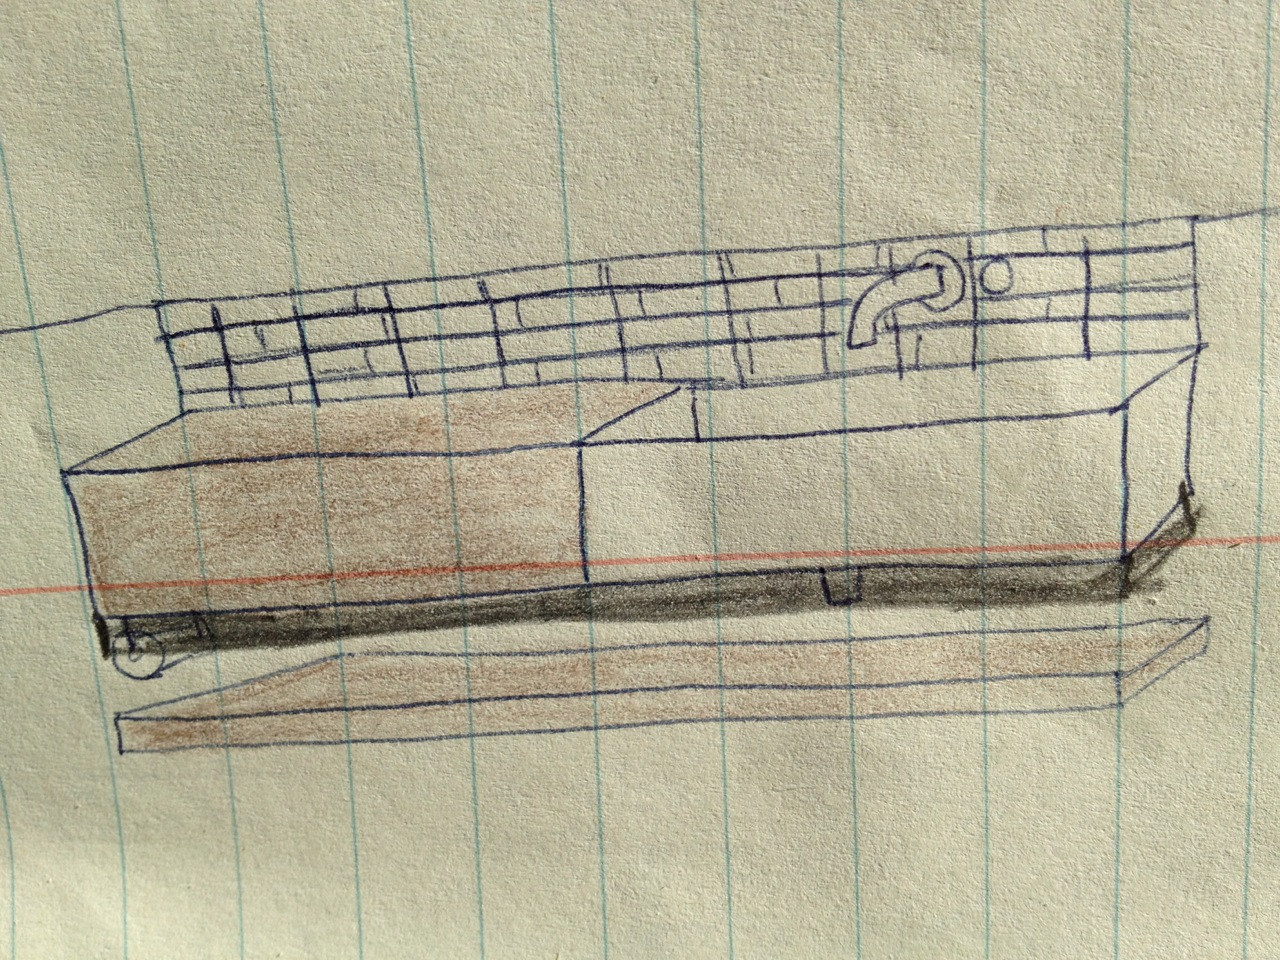
David drew it mo betta with measurements — I know I’ve shown you this before. This includes the shelf/bench and wall of walnut (to the right of the sink) that I was also hoping for…
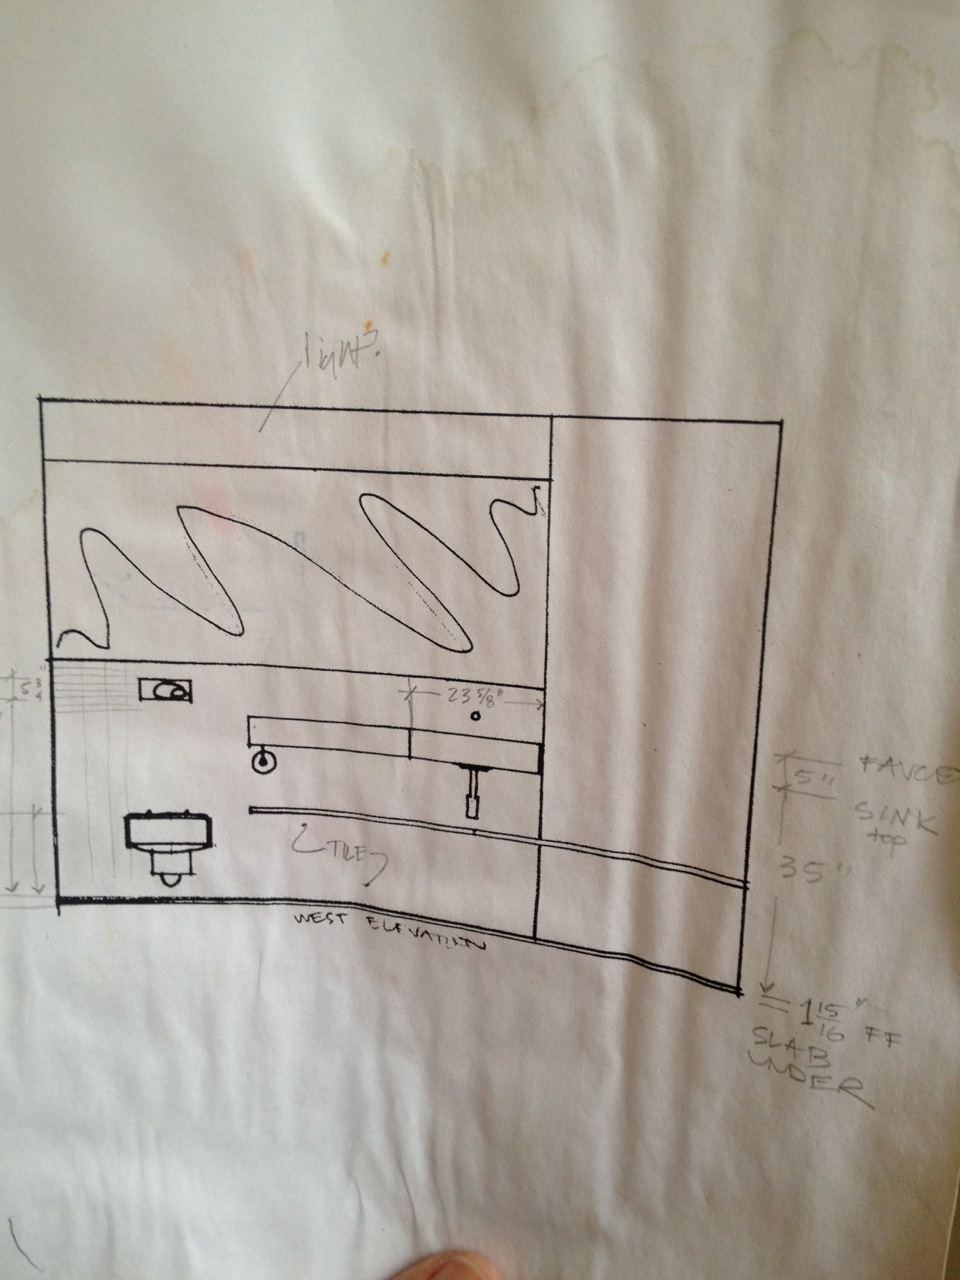
Drawing is SO much easier than building. Here comes the hard part.
First, there was figuring out the complex, irregular curves of an imperfect sink — not as right-angled as woodworker might hope — in order to get the wood to mate up with it…
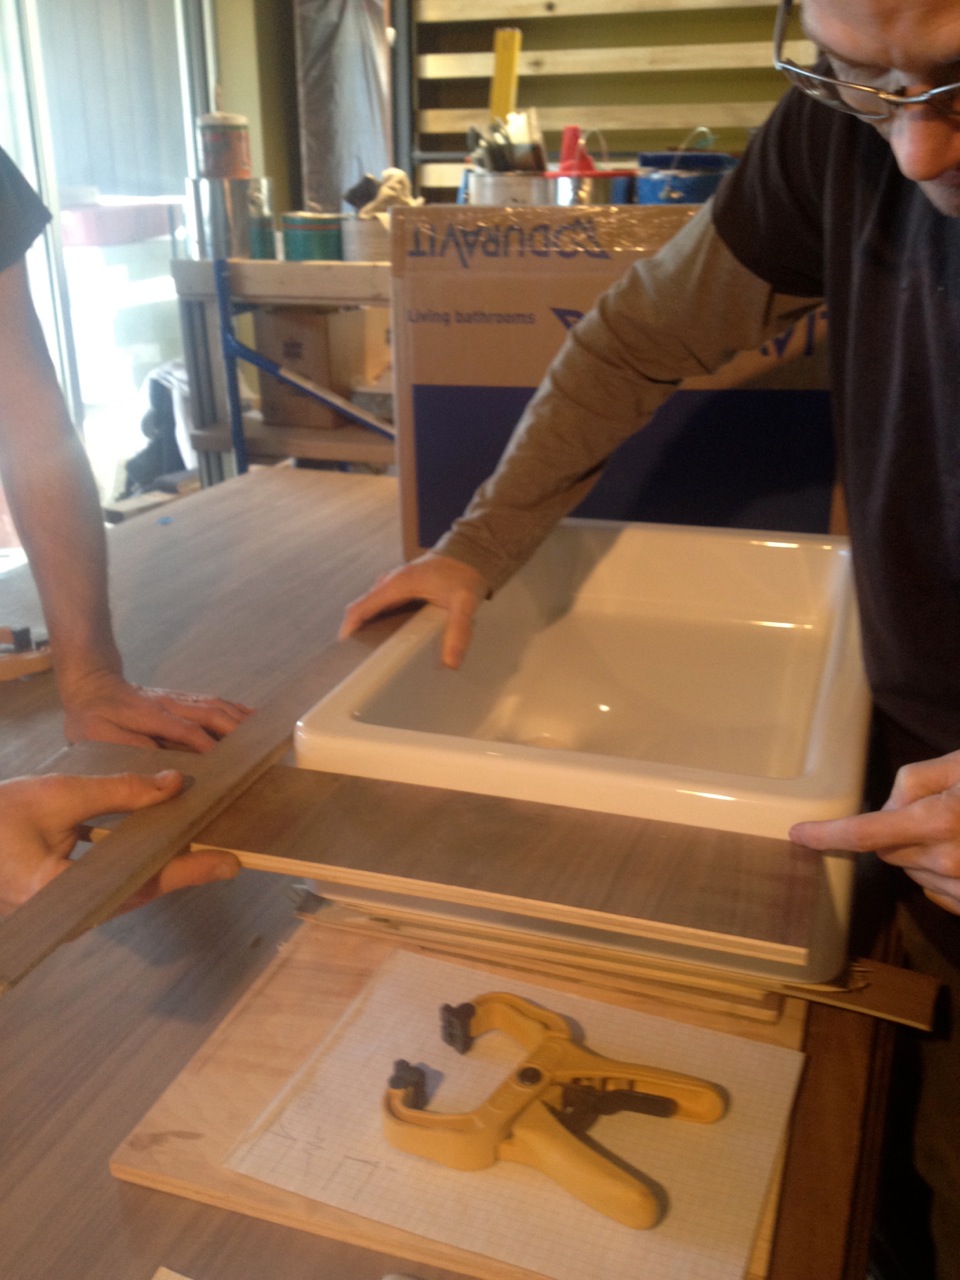
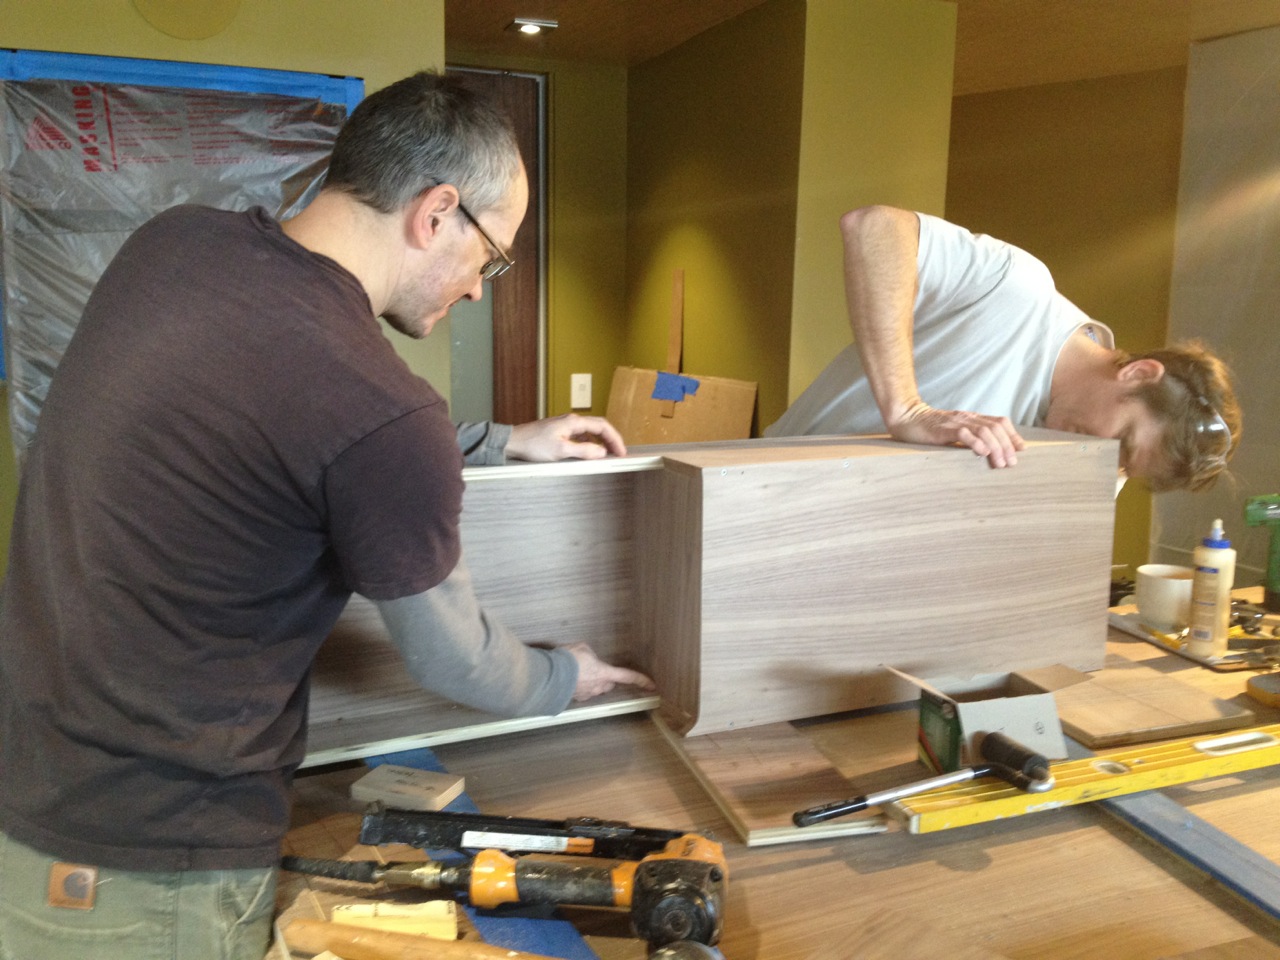
Required some math but they figured it out, as I trusted they would. So they continued on to constructing the vanity box…
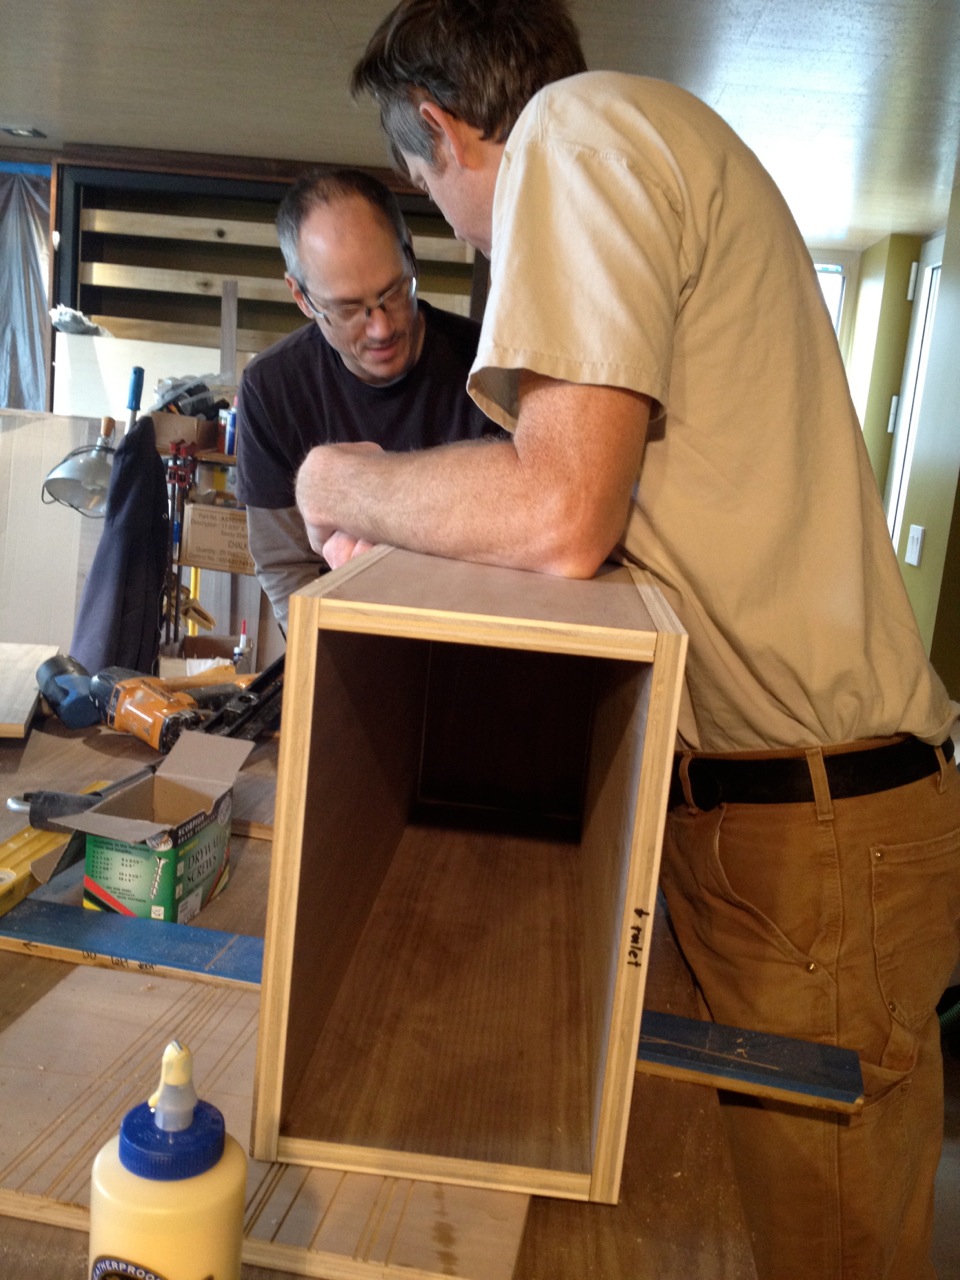
The open end will face the toilet. That’s where the toilet paper and the occasional book or magazine will hide to keep things from getting messy.
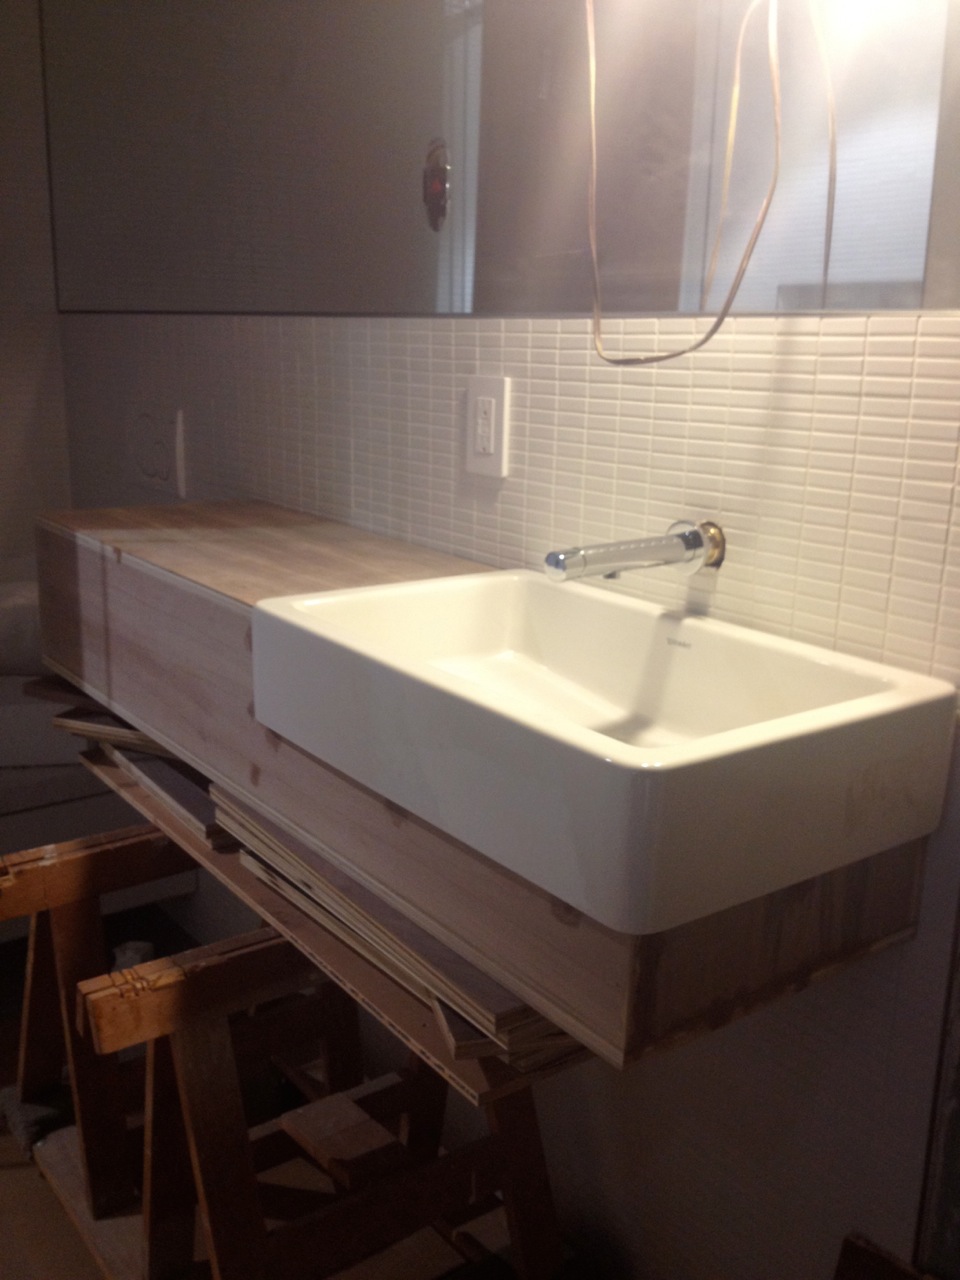
Once that was done, they propped the vanity up on sawhorses and made sure it fit the space as intended with the sink and the faucet roughly in place…
There was the tricky veneering stage…
And then they secured to the wall and made the necessary tweaks…

They stained it in place. Here it is with two coats — it still has to be made waterproof (that’s another story)…
Just to the right of the sink is the walnut panel that will eventually have three hooks on it for hanging up clothes…
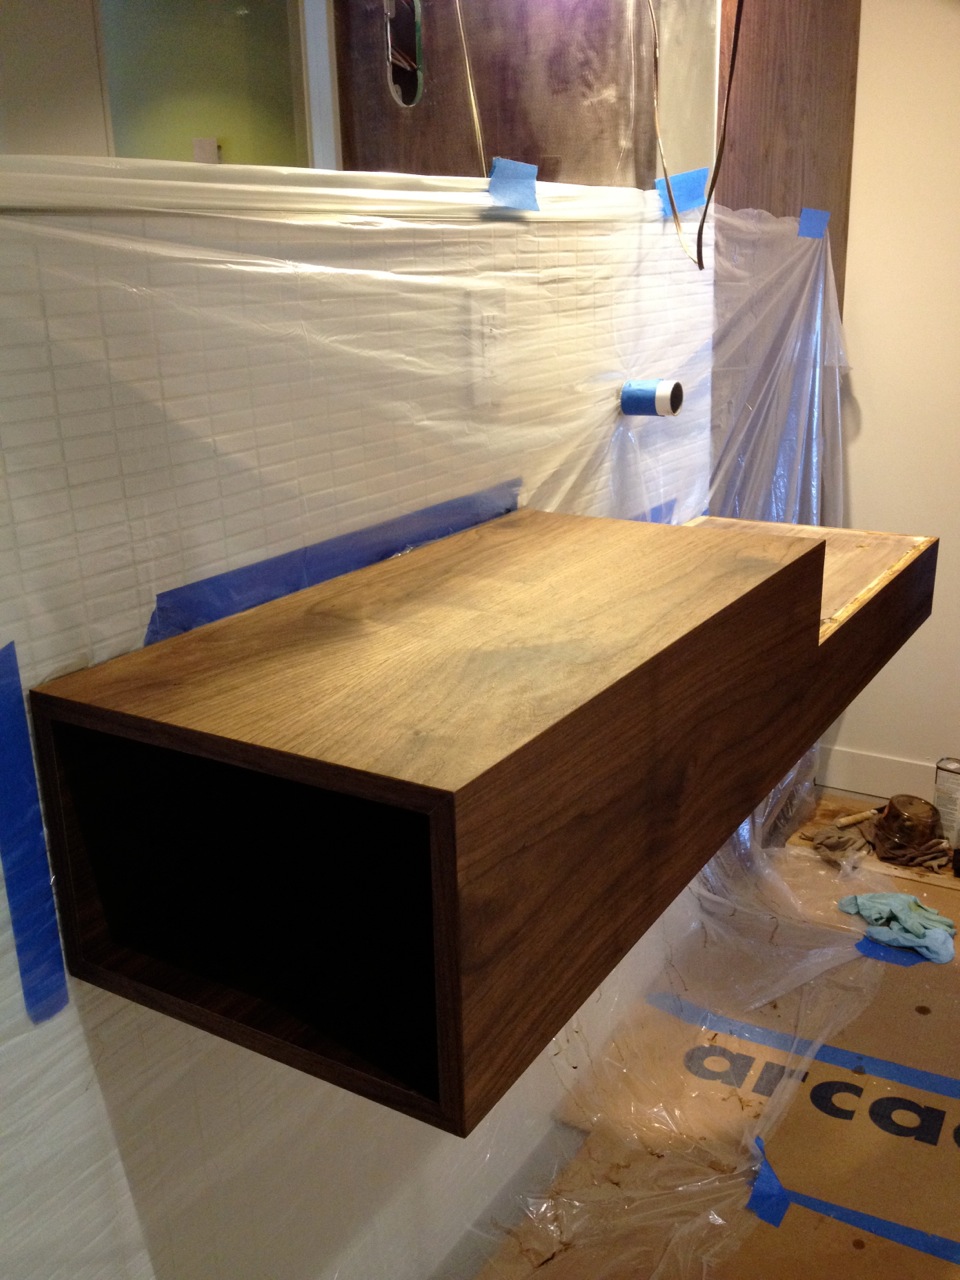
The bench/shelf that extends from below the sink still needs to be built. But isn’t that gorgeous?!
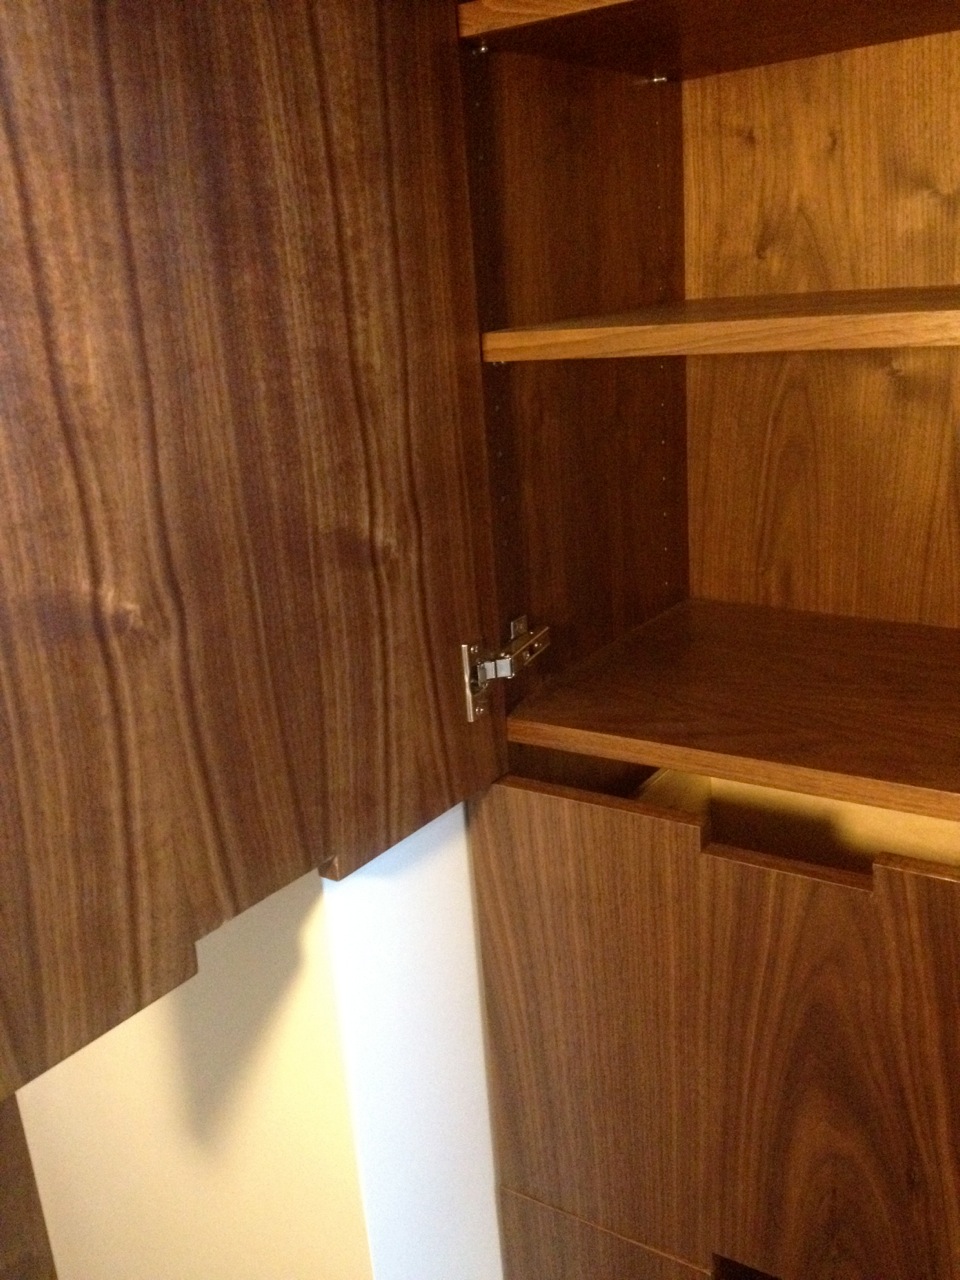
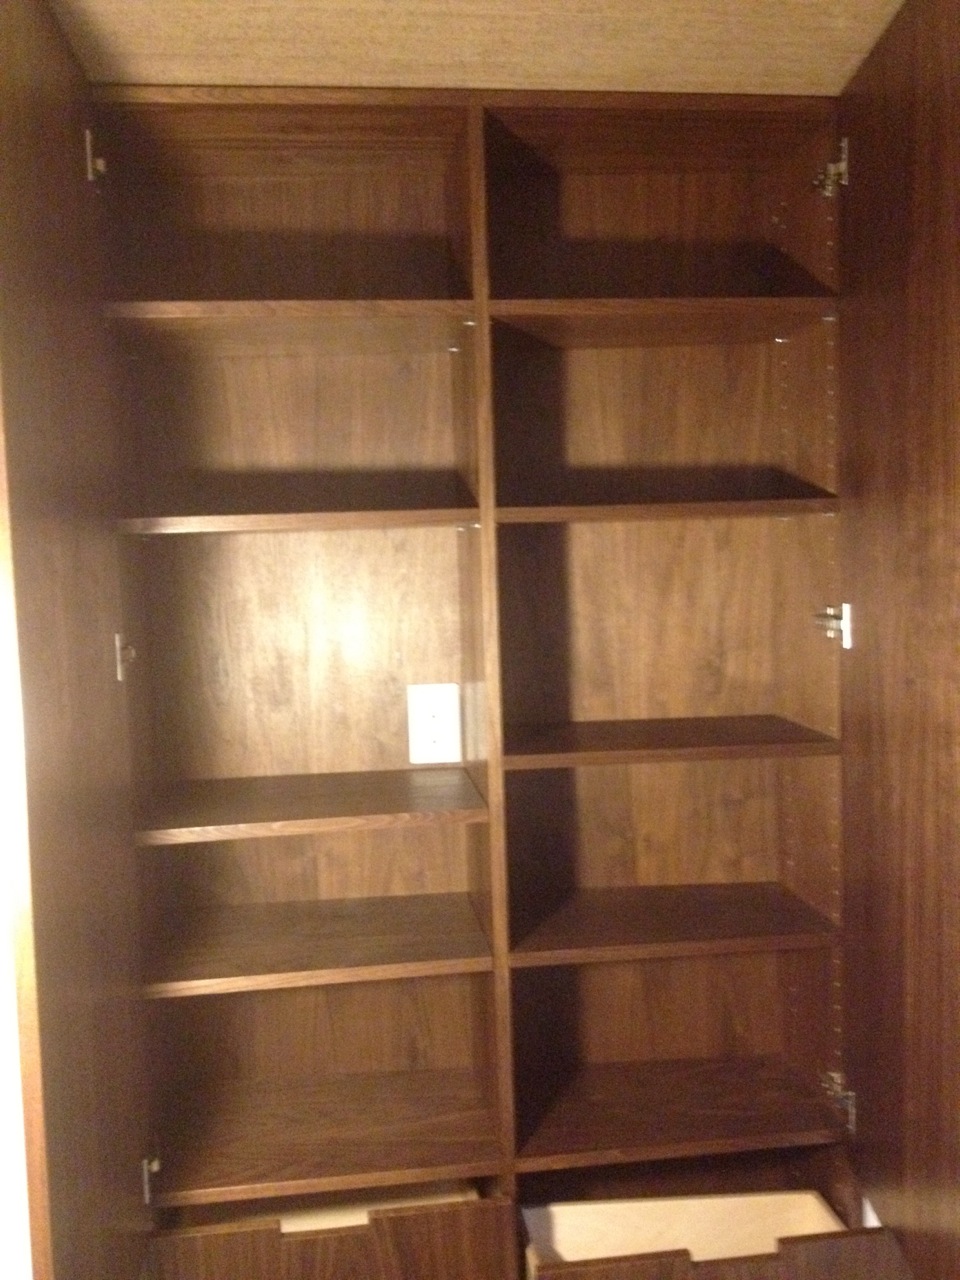
In that same corner there’s now the built-in linen cabinet that David began last June. Just look at that walnut! Love love love. Just needs a little tweak on that bottom drawer and it’s good to go…

Love how the minimal fingerpulls worked out. Perfect…
Inside, there’s plenty of room for towels and any bathroom paraphernalia…
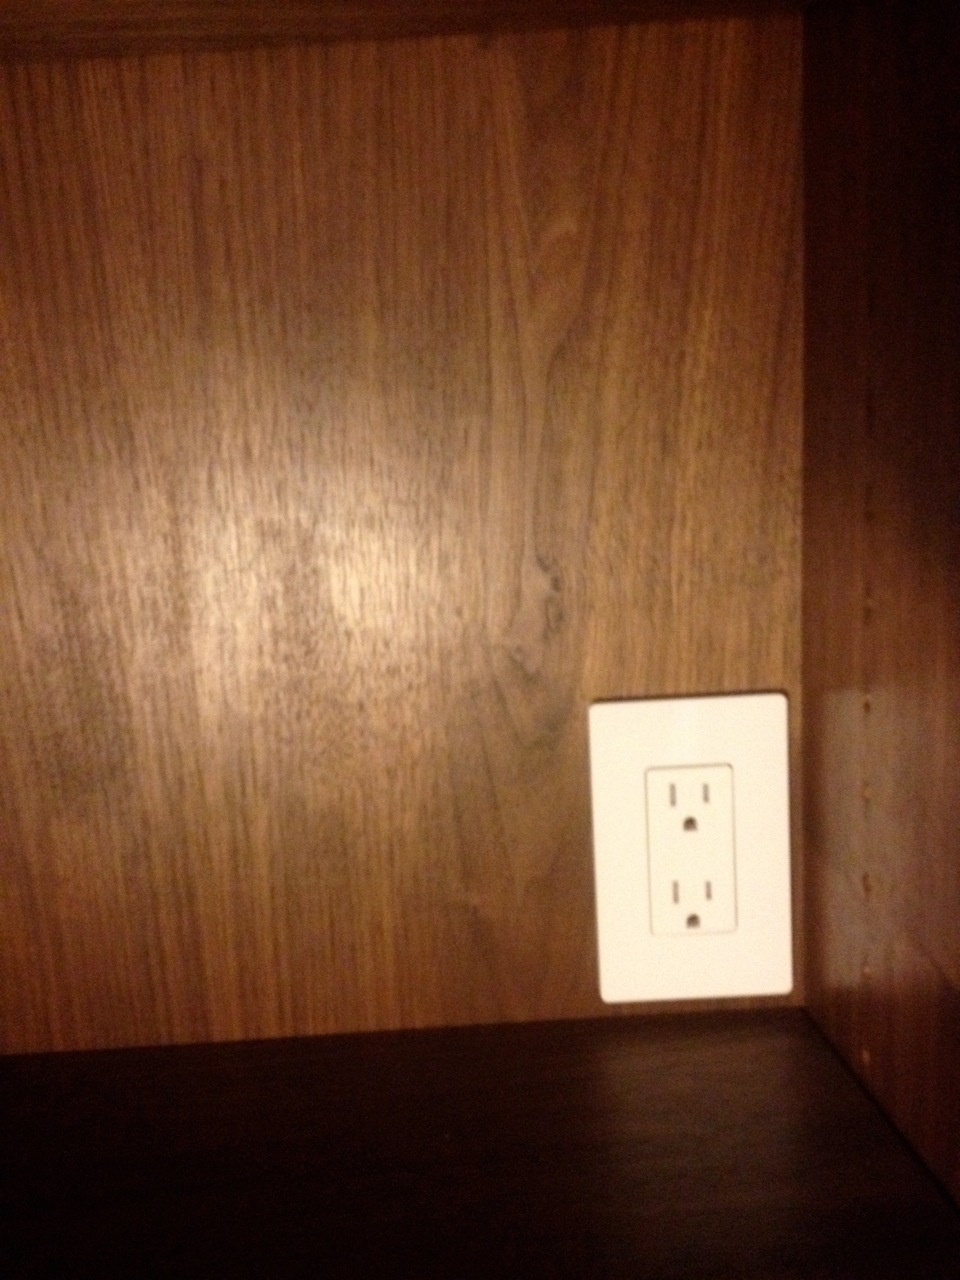
There’s even a recharging station for an electric shaver! So spoiled…
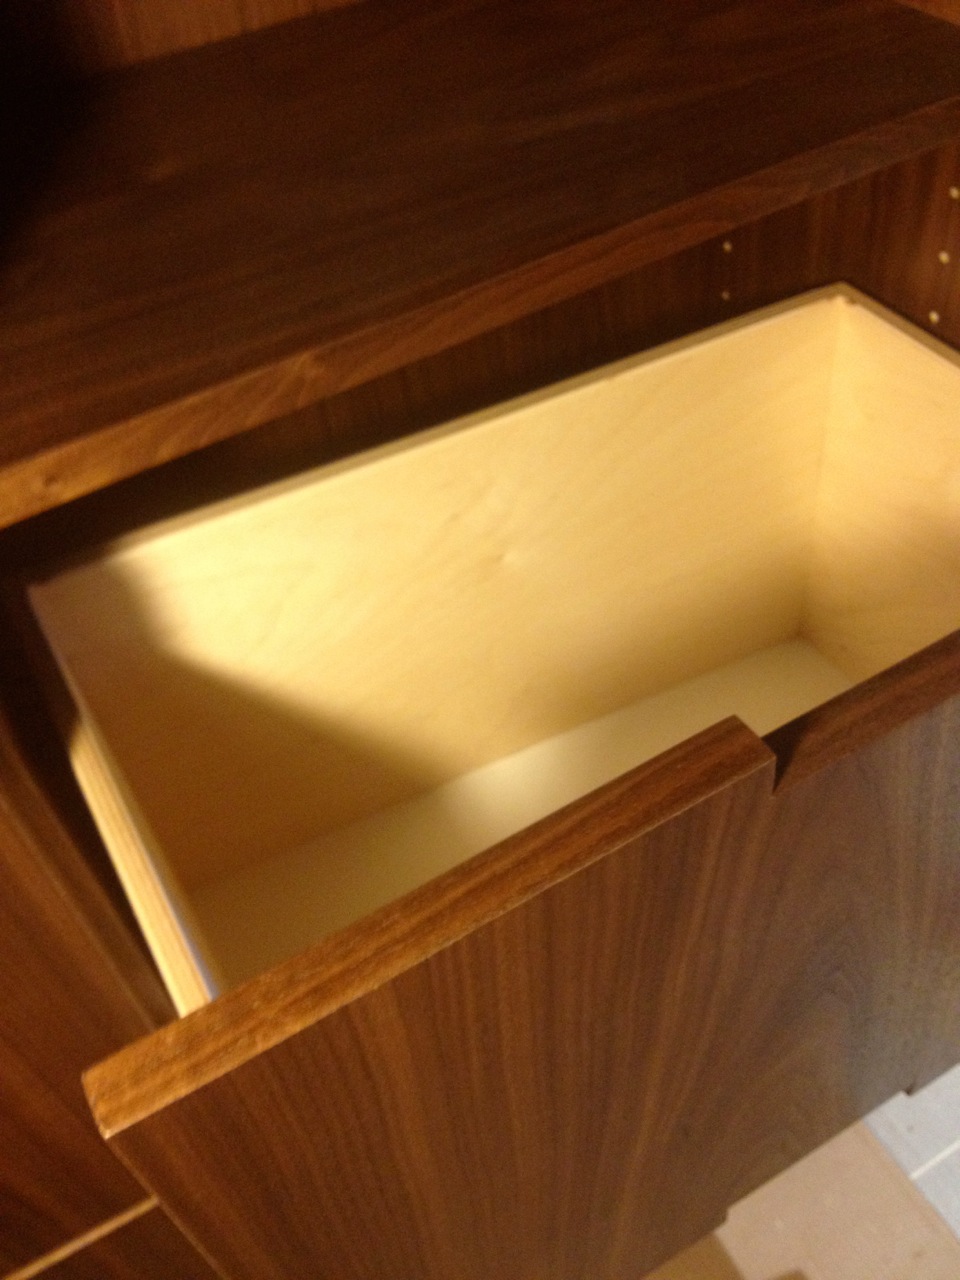
The drawers are nice and deep…
Yes, the back of the cabinet and the drawers are angled to accommodate our angled wall. This should give you a better idea of the wall when you look at the other side. See how the lights are on angle, too?

Btw, that’s the record storage wall, in progress. More on that another time.
So, back to the bathroom. Here you can begin to get an idea of how the walnut built-ins will look together — in an outage. I need light!
Argh. So impossible to take decent pictures in this tiny bathroom — especially when the lighting isn’t done yet. Oh well.
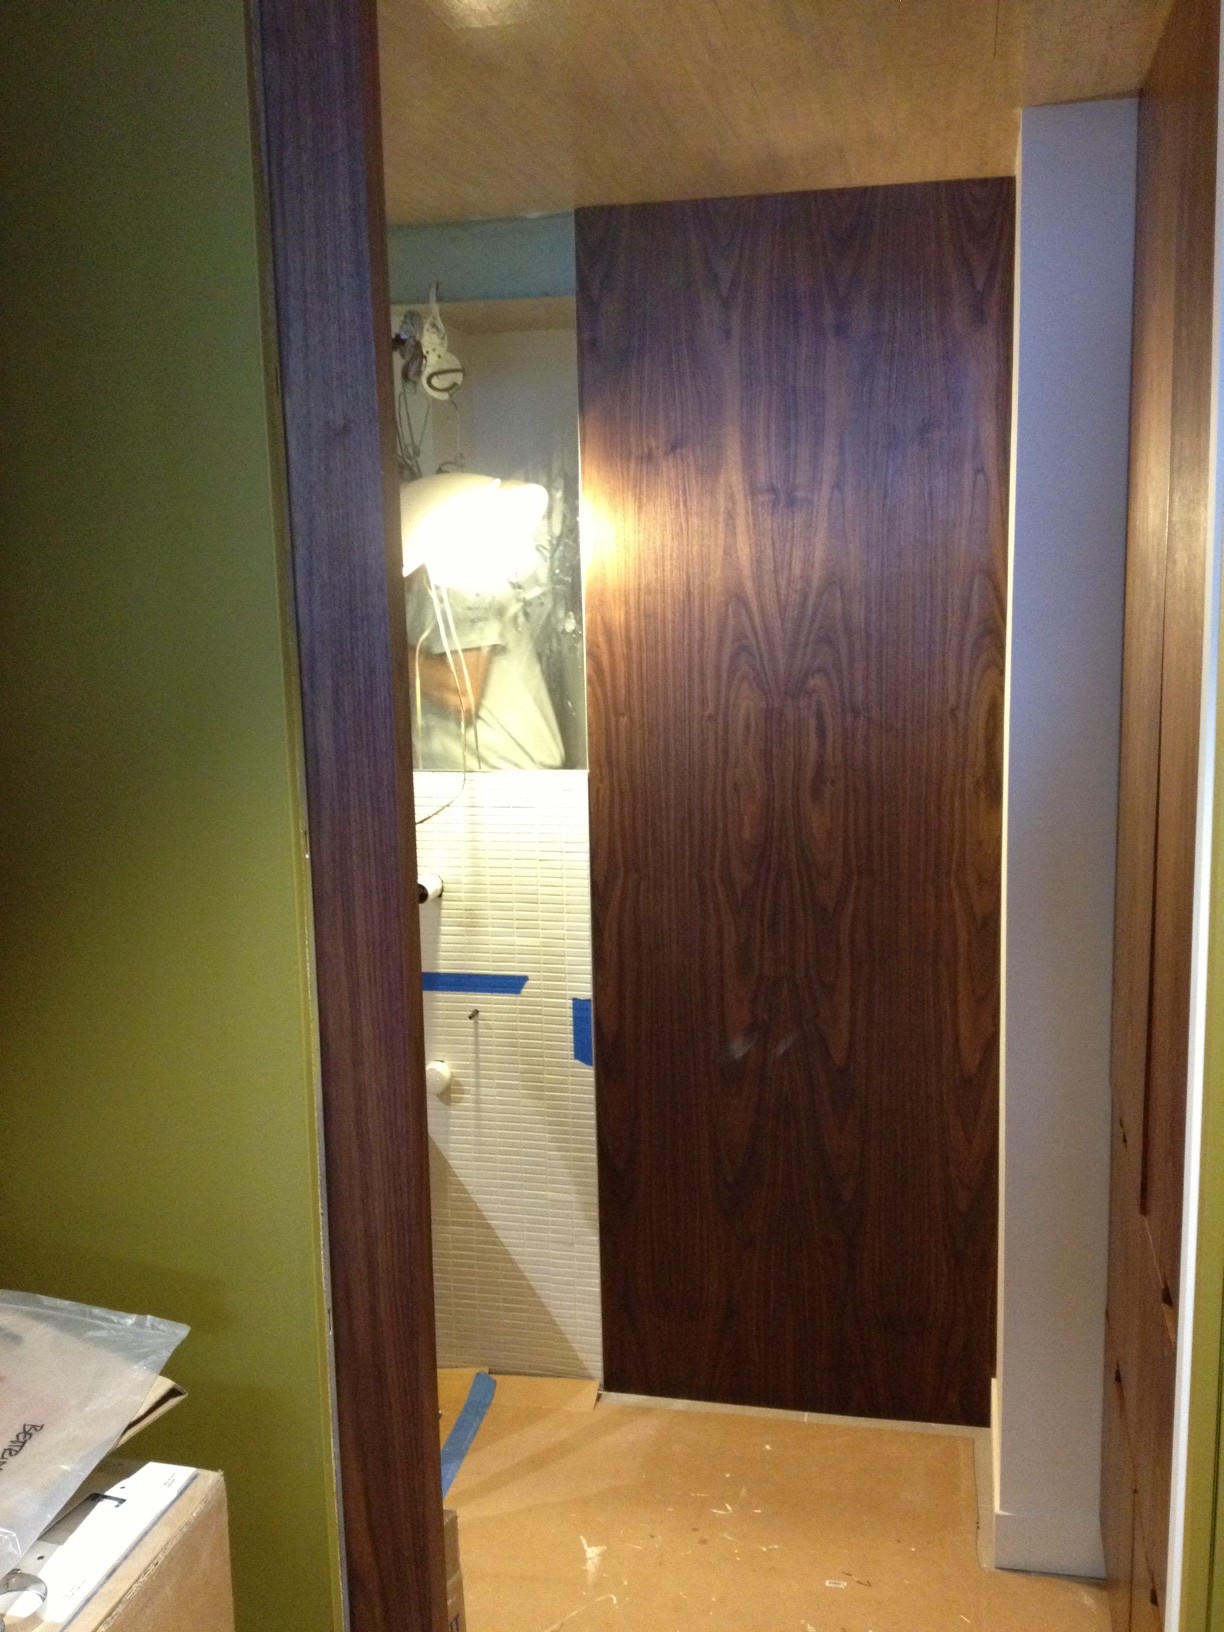
Before I go, take a peek at the fantastic custom pocket door David and Joe designed, built and installed…

A better look at the door project next week. That’s it for now.
Let’s just take a moment to marvel at the fact that the rosemary plants I put on the front hill last June are not only still alive, they seem to be doing really well! But wait, it’s mid-January and this is New England… right?
Rosmarinus officianalis ‘Prostratus’ (Creeping Rosemary) | Zone 7 and up:

Rosmarinus officinalis ‘Alcalde’ (Cold Hardy Rosemary) | Zone 6 and up:

Rosmarinus officinalis ‘Arp’ (Cold Hardy Rosemary) | Zone 6 and up:
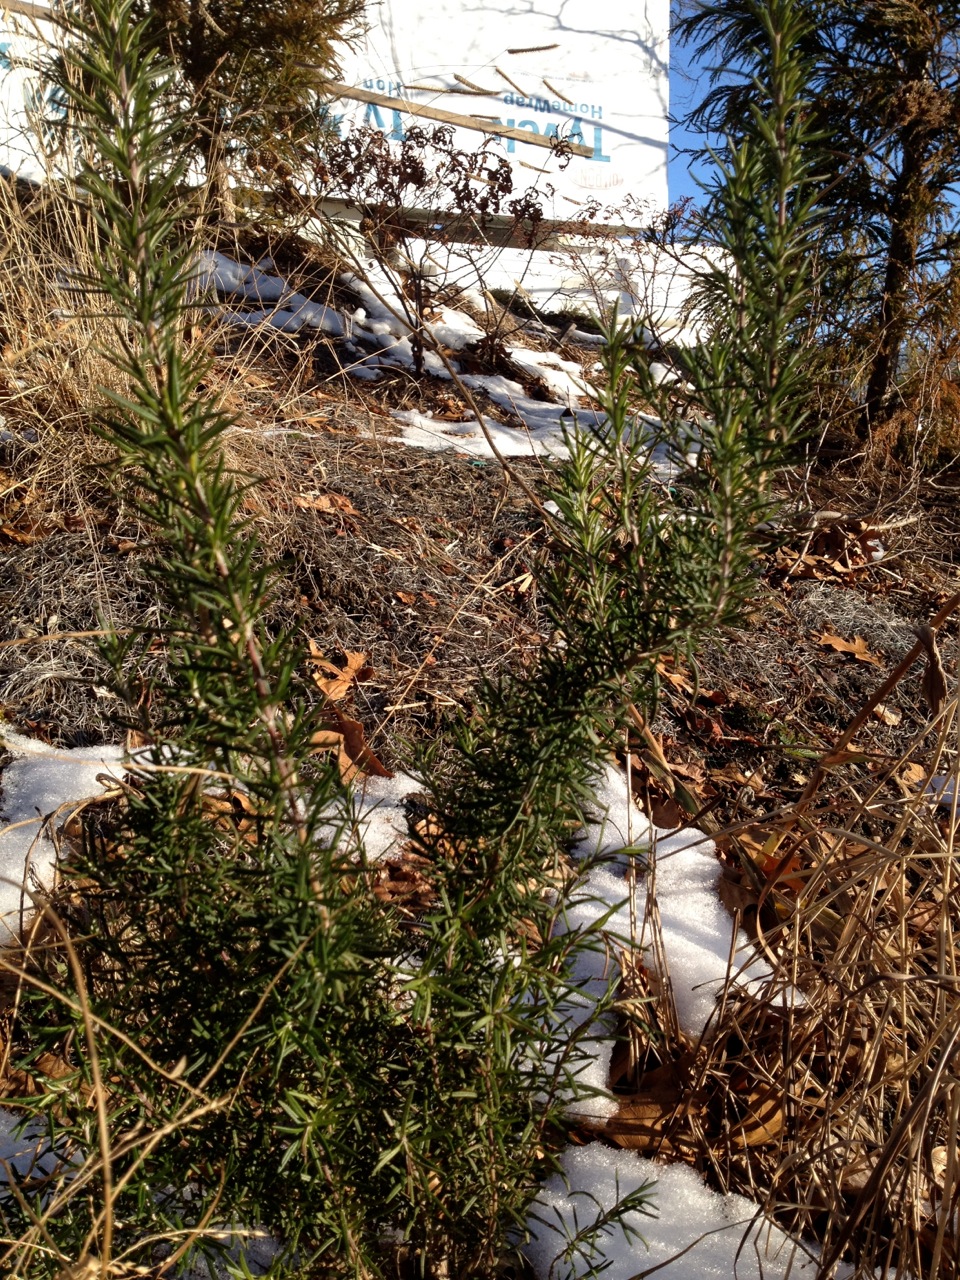
I realize I’m tempting fate here. Temps are about to dip down to 4 degrees in the next couple of nights, so we’ll see what happens. But so far so good! Come to think of it, this is the second winter outdoors for my three prostrate rosemary plants. Wow. I just realized that.
Luckily the hillside mostly protects them from the wicked north winds and the slope ensures that moisture drains away, which definitely helps. With any luck at all, they will continue to survive. No guarantees. We’ll followup in a month and see how they’re doing then.
For those who care, here’s a reminder of what’s on my front hill.
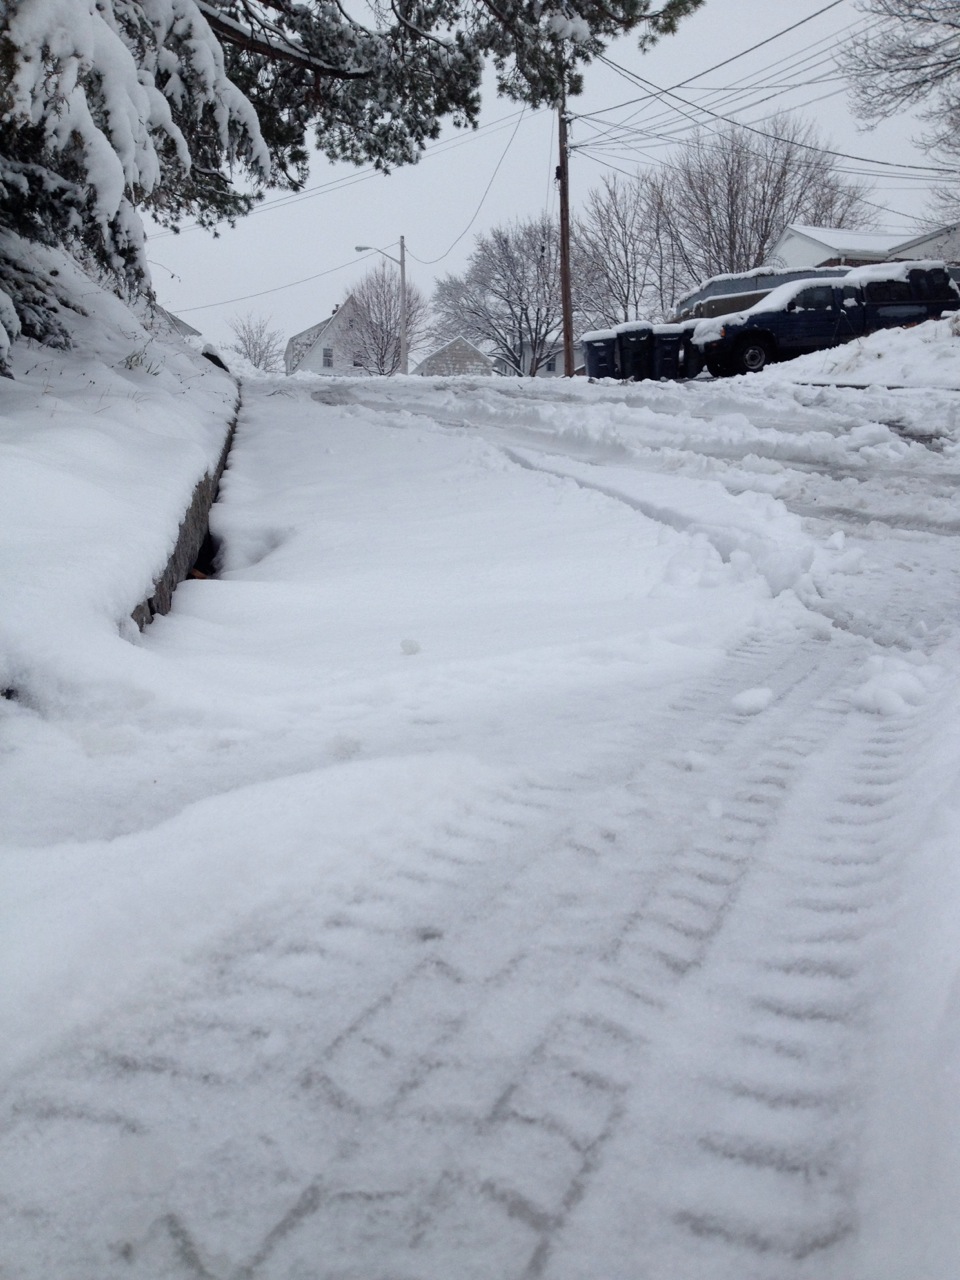
The best part of me sliding back down our unplowed street this morning in a car with snow tires and watching the world go by in reverse? The snowplow that backed into our street right next to me as I slid down. He did a 3-point turn and drove away. Nice.
I parked at the bottom of the hill. It’s almost lunchtime. Still no snowplow.
WE’RE BACK!
Where the heck have we been? Maybe we’ve been stuck in a time loop and just barely made it back to the present. Yeah, that’s it, time loop. That sounds so much better than man are things going slowly and we just don’t have anything to share with you.
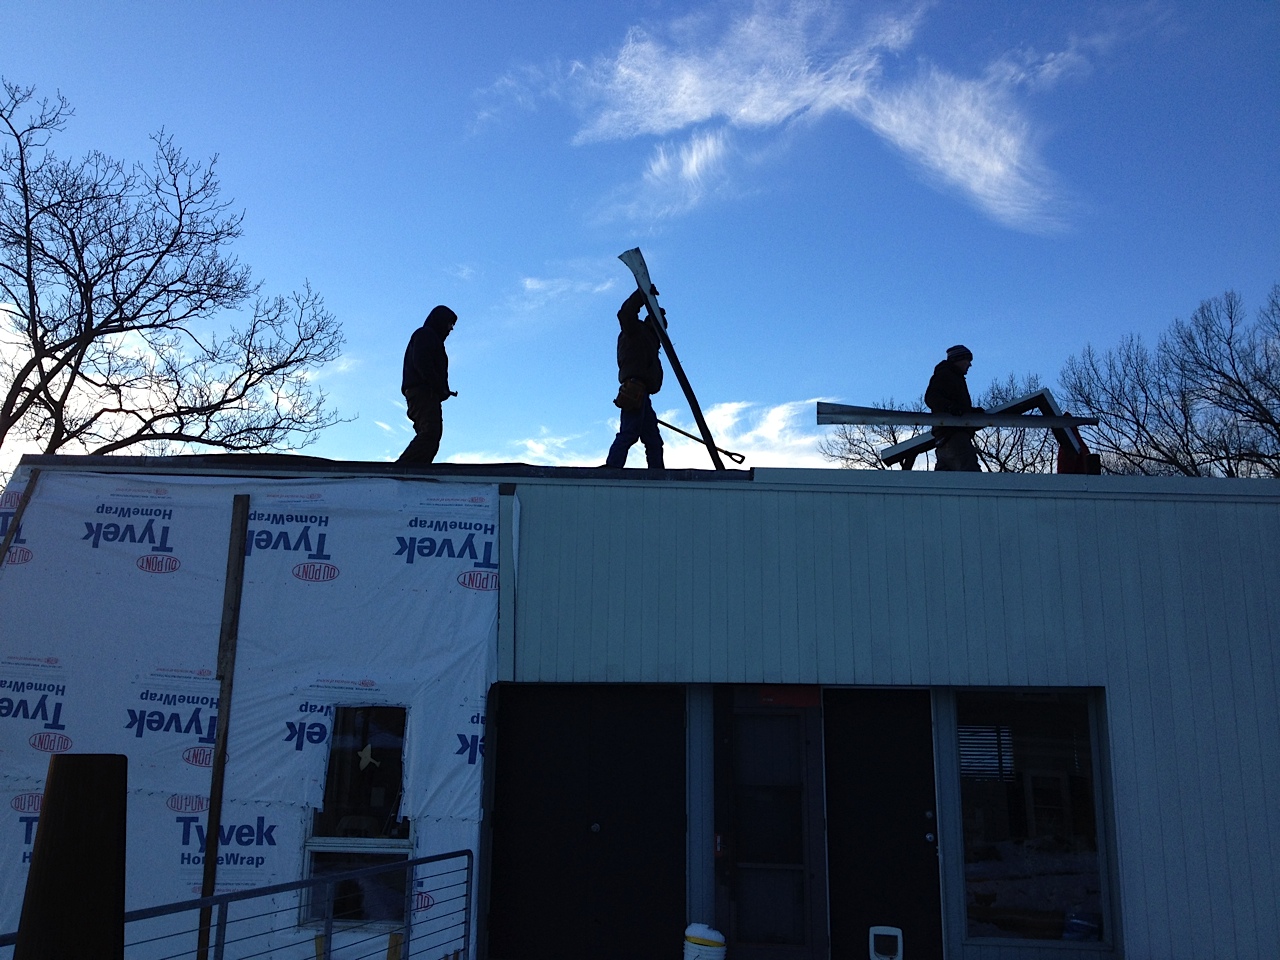
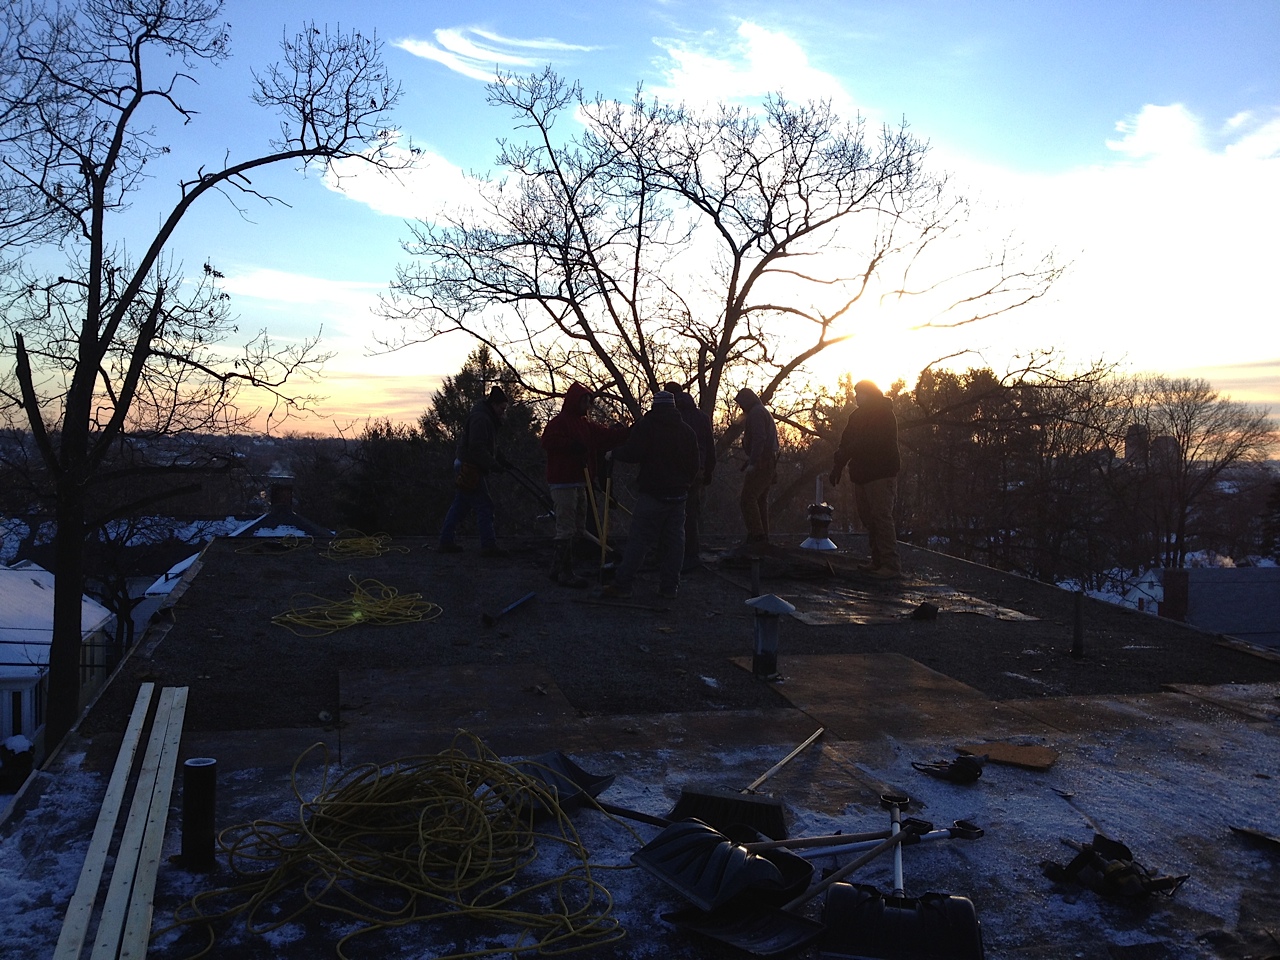
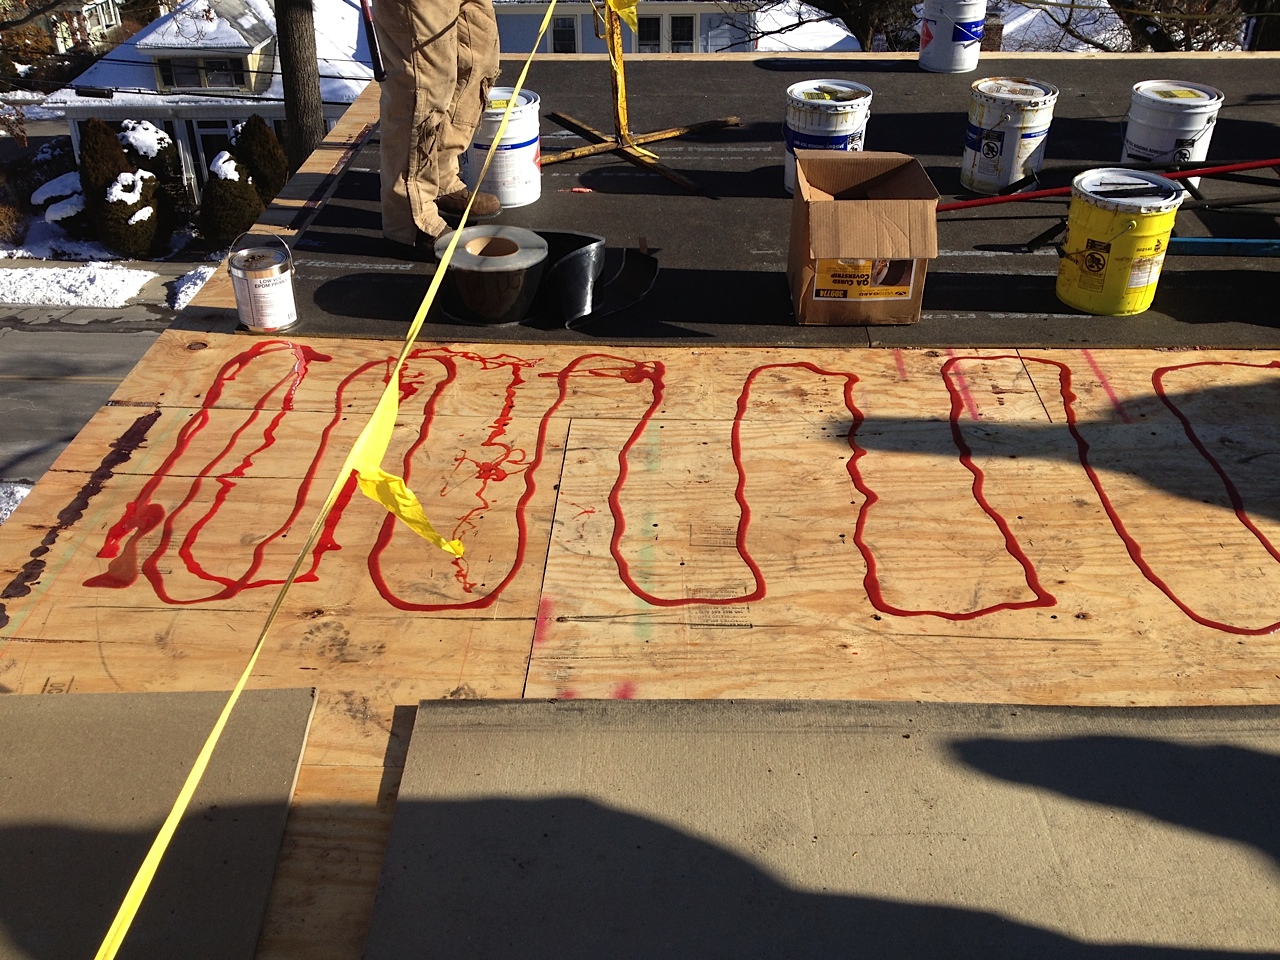
But things are picking up again! What better way to start the New Year than with a sexy new rubber roof? David was up there when it all went down during the first couple of days of the year, so he can share the deets…
—————————————————————————————————–
Our old rubber roof was failing — not in a catastrophic way just yet, but who wants to tempt fate? Installed in ’85, it was past the end of its life and due to be replaced, plus it was leaking.
Just days after the New Year, I was surprised to hear from the roofers who said they were ready to roll. Talk about hardcore. The forecast called for 7 degrees the next morning and they showed up at dawn ready to rock. Removal of the recently fallen 8″ of snow was the first order of the day. The sun hadn’t even made it over the horizon…

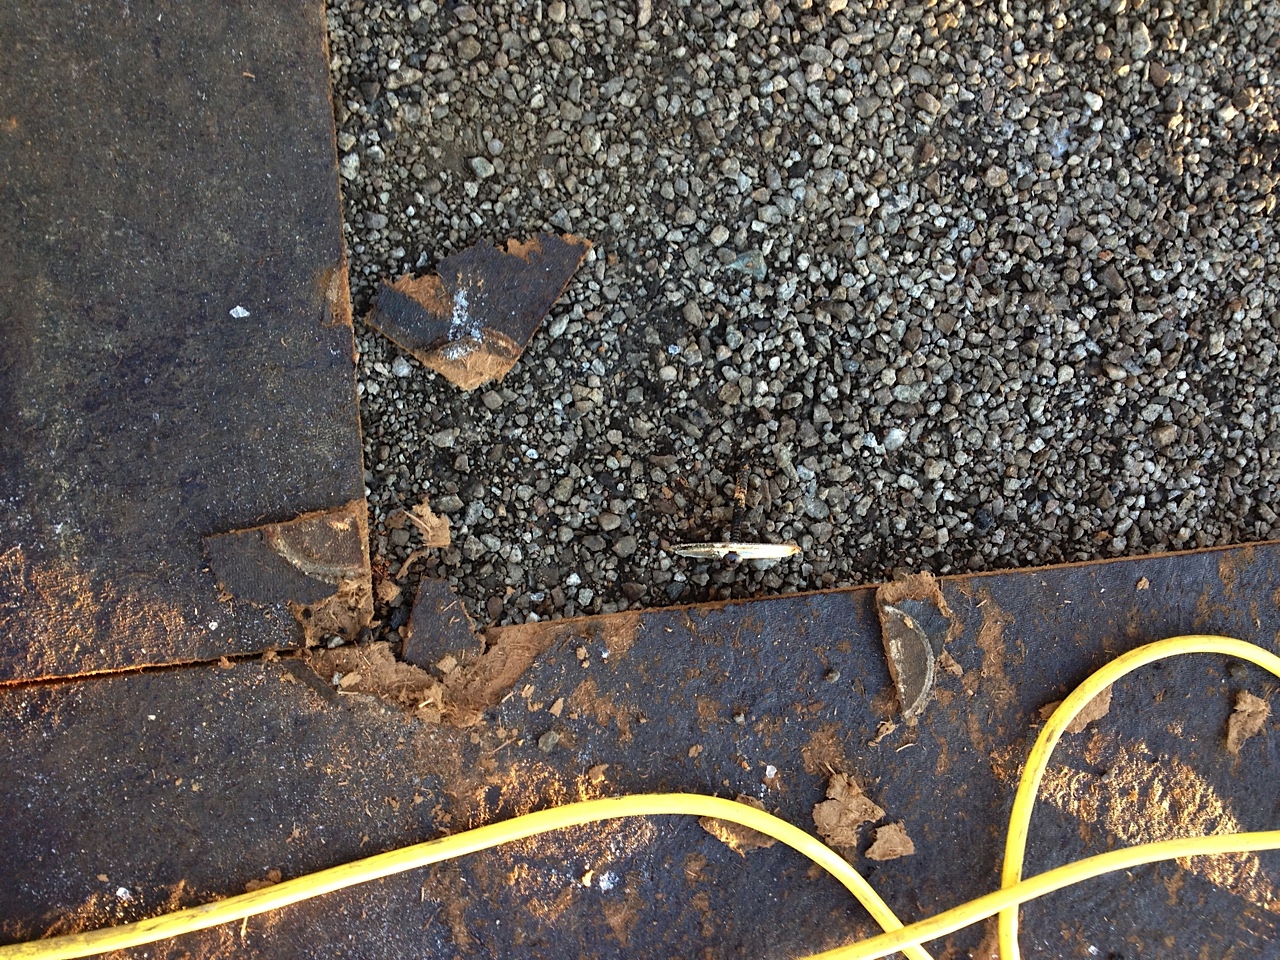
That was quickly followed by removing the gravel stop around the perimeter of the roof…
Next, cutting the aging rubber roof and exposing what lay underneath…
The original roof was pitch and gravel. Then in the mid-’80s, fiberboard with fully adhered rubber was installed directly over the top of it…
Once they had the roof clean down to the original plywood sheathing, the crane started hoisting up materials…
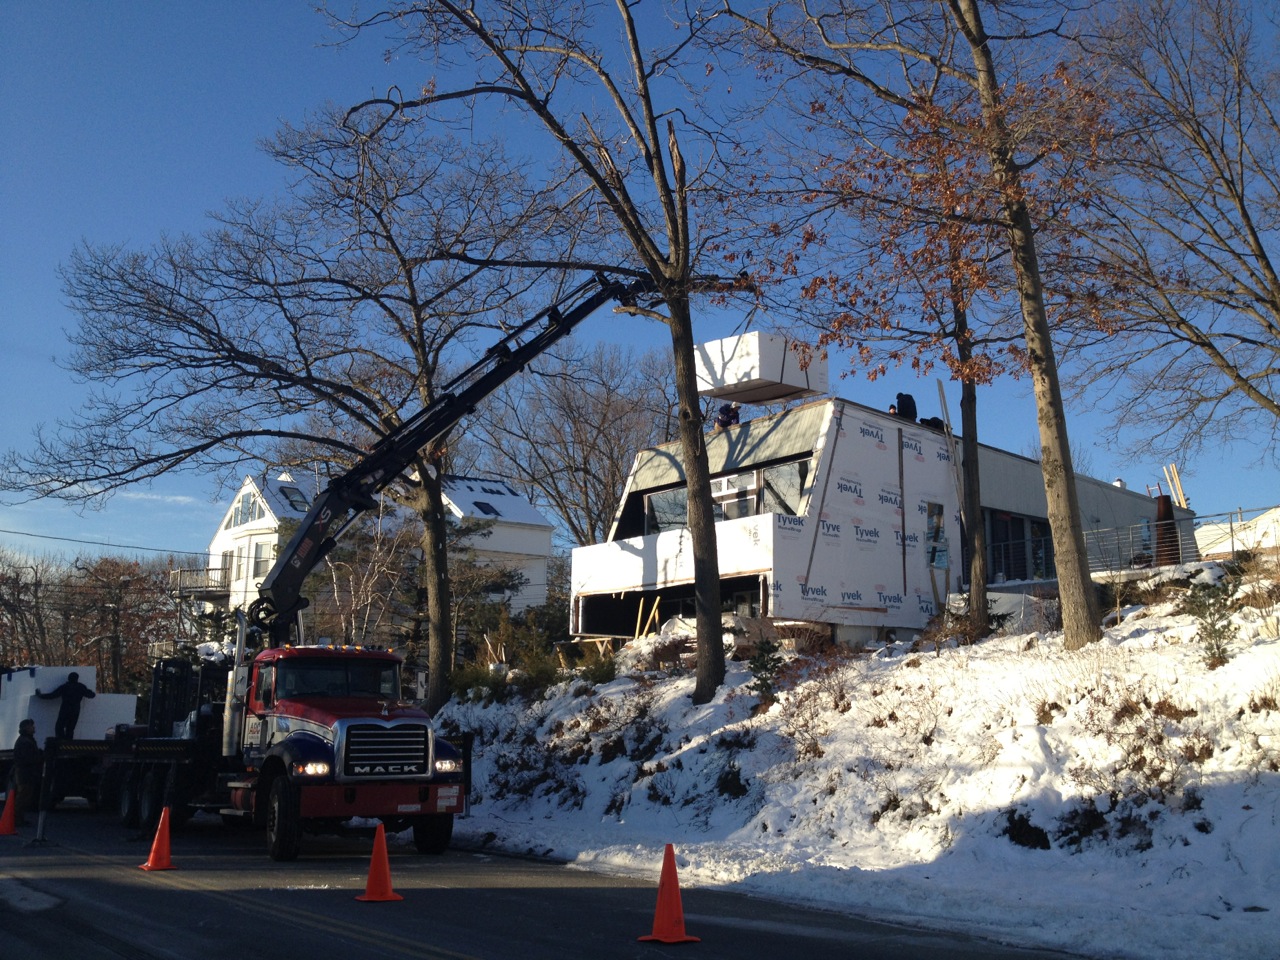
The 3” EPS foam was then ready to be installed in two layers with overlapping joints…

New fiber board was glued down onto new plywood…
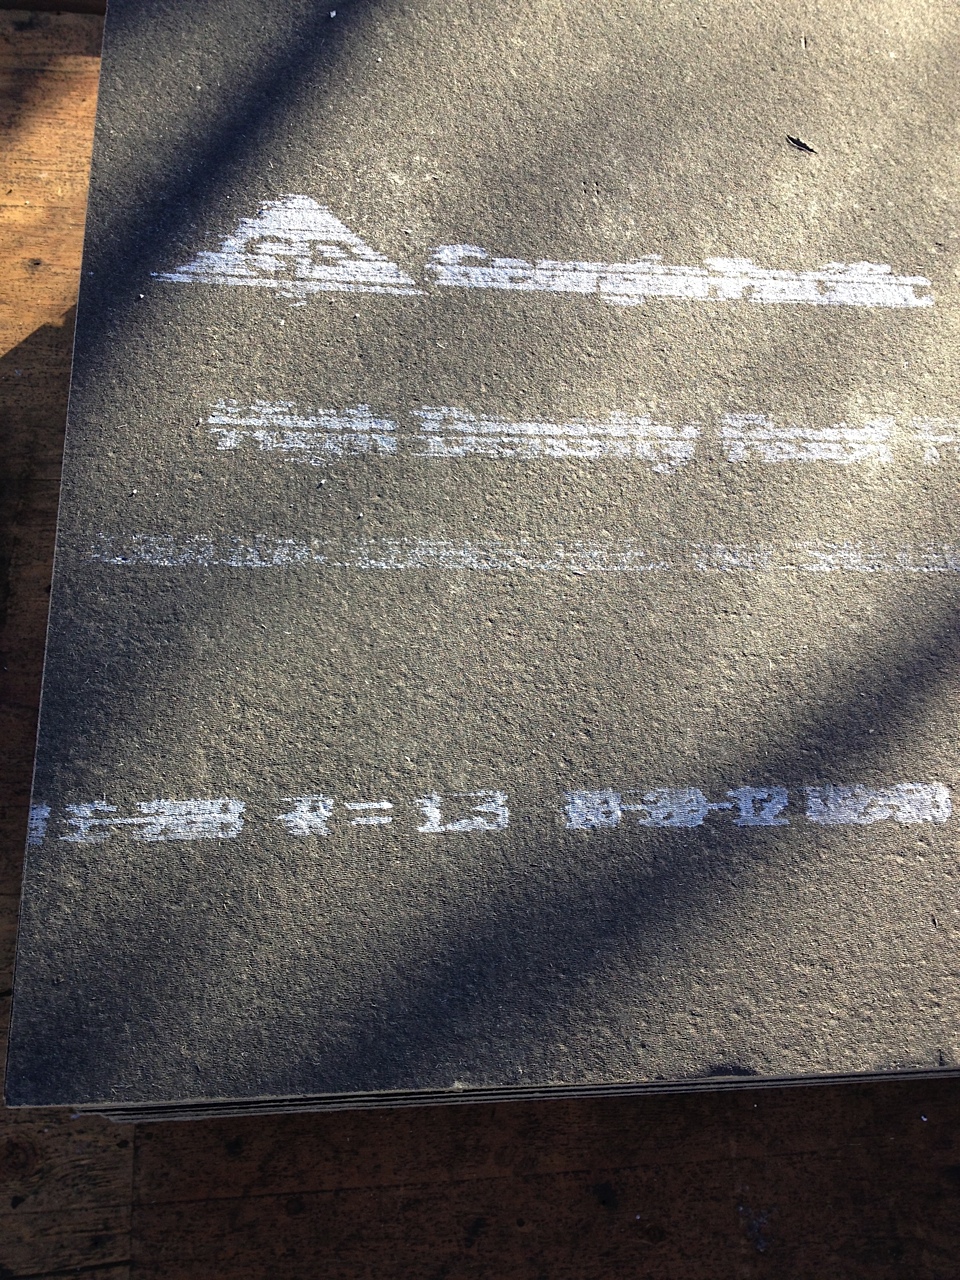
Fancy two-part polyurethane glue was applied to bond the new fiberboard to the new plywood, so there are no fasteners to telegraph through the rubber…
Day 2 dawned with half the roof left to do…

Second verse same as the first, and then it was done!

Well, almost done. We still have 3/4 of the sheathing to remove so we can finish insulating the exterior walls, which means the final edging detail will have to wait. What you see here is temporary. In fact, when Joe and I are done, you won’t even see the edge…
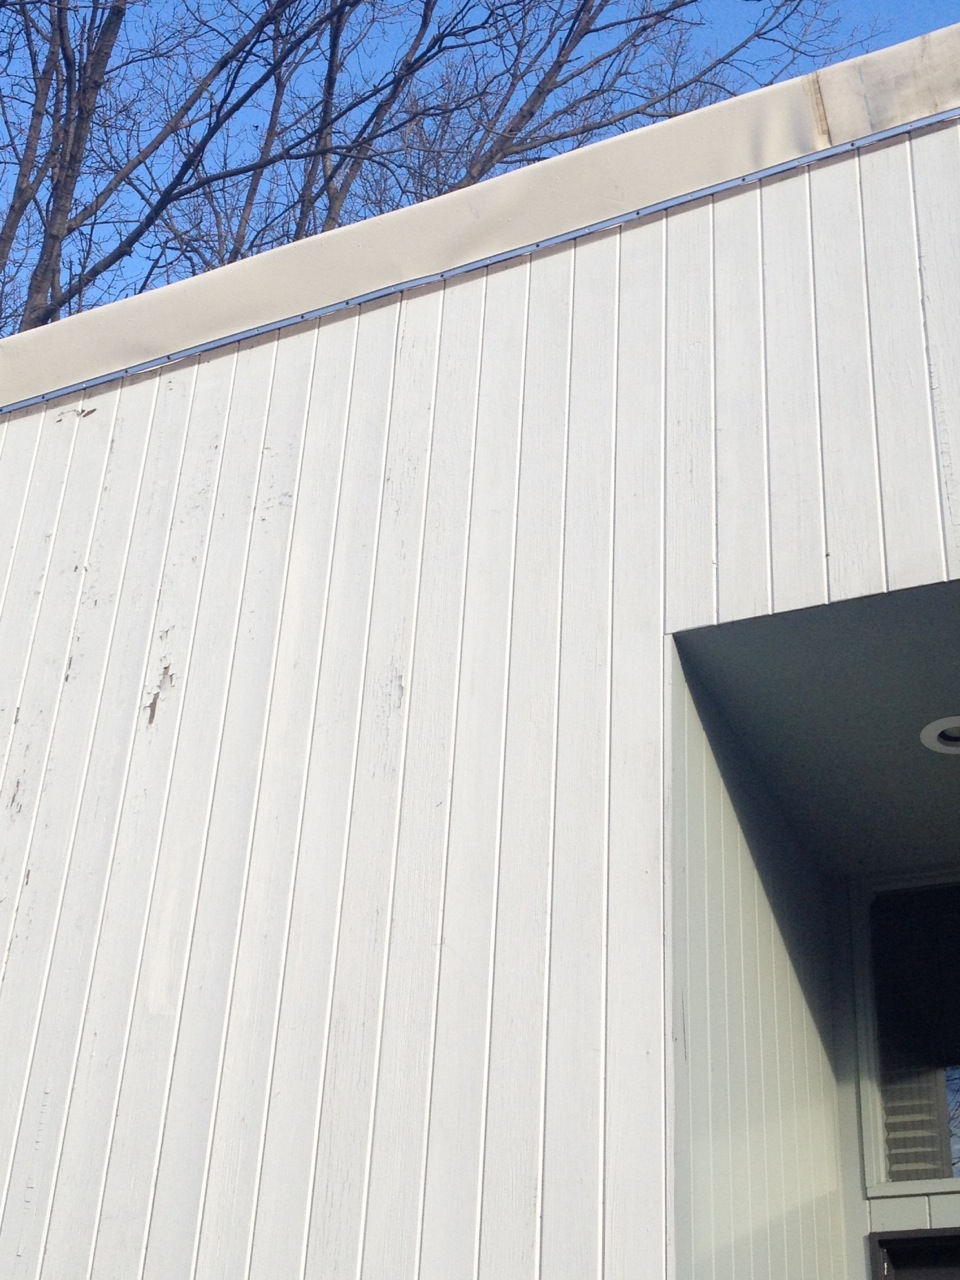
One of the big goals of our remodel is energy efficiency, which is why we chose a white rubber roof rather than black. A lighter roof reflects the sun, which in turn reduces heat gain and lowers energy bills. In other words, white is the new black, and that makes it green.
We’ve also topped the house with 6″ of rigid EPS foam which, at R4.7 per inch = R28.2, increases our R-value and reduces our heat loss. That’s in addition to the existing 6″ of fiberglass (somewhere around R20) over which we layered the new roof.
Suffice it to say that we should be much cozier this winter.
I haven’t talked about the work going on in the downstairs bathroom since back in September. I blame slow progress and work eating up all my time. Excuses, excuses. Now that my work is becoming more manageable again, let me show you what’s up down there.
Great news: our shiny new Hans Grohe shower hardware is now installed and working!


Ooh! Aah!
Caulking between the tile and the ceiling still needs to be attended to… all in due time. The shower controls are on the opposite wall…

The teak slatted shower tray still needs to be made, but that pretty much does it for the shower.
The wall-mounted Duravit Vero toilet is finally in, too. Rectangular! (Try to ignore the construction debris under the toilet.)


The water-saving dual-flush mechanism got set into the wall. You know, save the planet with every flush. The large button is for #2. The small button is for #1.

Still to come: the sink and vanity, plus a bench/storage cabinet. And then this room is ready to roll!
From this…

To this…

Well, that about does it for the autumn colors.
Brought to you by Mother Nature…

Don’t forget to breathe today.
Well, this past weekend it officially hit 32 degrees for the first time this season. Brrrrrrr. Luckily, I made a mad dash for the garden and brought in tomatoes tomatoes tomatoes tomatoes and peppers. So many tomatoes….

There are Orange Strawberry Oxhearts, Paul Robesons, Orange Fleshed Purple Smudge and others I’ve misplaced the names of. Even a few Sungolds — the only hybrids of the bunch but oh so amazingly good. They’re not all pictured here. I have bags and bags of green tomatoes as well. Like hundreds of them. Mostly Black Cherries and a number of Green Zebras. So good.
And destined for sauce.
Ladies and gentlemen, we are floating in space. Posts formerly holding up our deck are now completely removed.
Remember this?

When the boys pulled out the jacks, we were left with mysterious hanging posts for a while…

Cut off but not actually touching the ground. Mysteeeeeeerioussss…

David and Joe finally pulled out the posts they had sliced a few weeks back. So now we’re not only officially cantilevered, it actually looks like we’re officially cantilevered!


Magic! It’s happening!