Posts Tagged ‘hardscape’

pati o’leery

Friday, October 8th, 2010

Now that the cable railing is finito, we can move on to our next project: upper and lower patios. It does sound extravagant to have two, doesn’t it? But with a two-level house built into a hillside, we have two separate entries that need to step out onto something better than what we have now. Take a look…

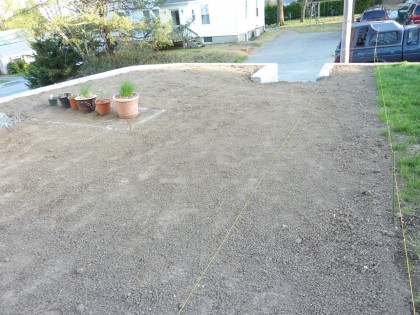
UPPER PATIO Crushed stone in place since the Savages set it down in April awaits the concrete pads we have in mind. Once pads are poured, the patio will be level with the top of the retaining wall and we’ll have plenty of room for entertaining…

current upper patio

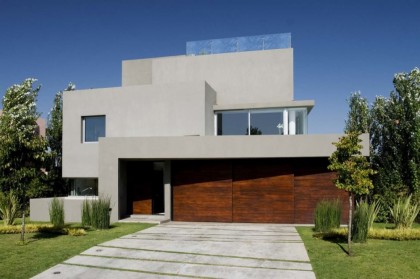
Wondering what the heck I mean by concrete pads? Remember this image that I showed you a few months back?

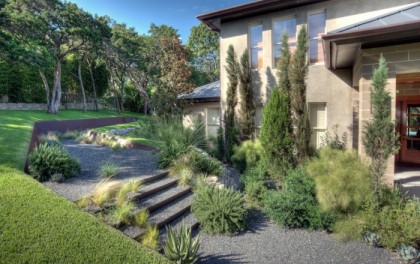
Waterfall House, Andrew Remy Arquitectos | archdaily.com

Waterfall House, Andrew Remy Arquitectos | archdaily.com

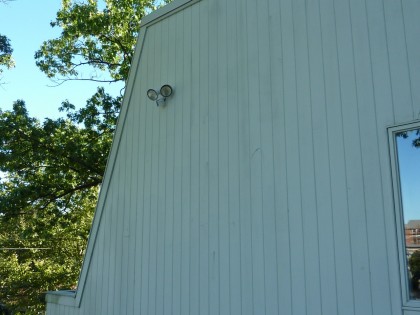
See how the concrete is cut into angles with grass in between? Yeah. Like that. Our first choice for patios is something akin to that only set into pea gravel. It would tie in nicely with the architecture of the house, which is very angular on the front face…

angle on house

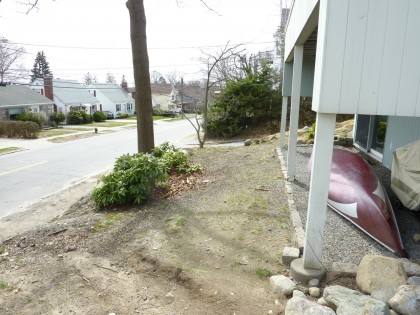
LOWER PATIO This shot is from April before landscaping improvements began, but it still basically consists of completely inhospitable sharp-edged gravel. Yucky…

view of lower patio from side

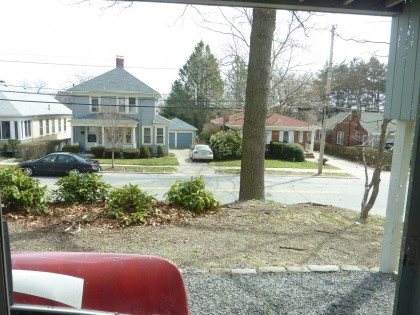
We’re envisioning the patio coming out from beneath the deck and into the pathway. As you can see, privacy is an issue…

view out to lower patio

Thankfully, landscaping will continue to change that — more on that later. Suffice it to say that we come out this door a lot, as will our guests (assuming we ever have a house fit for guests), and we’re eager for it to change.

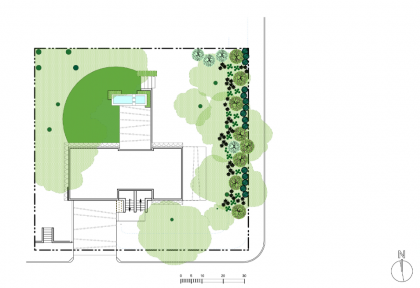
Months ago we created a patio plan so we could work the landscaping around it. Our buddy Shiva helped turn from scribble to jpg (click to biggify)…

original upper patio plan

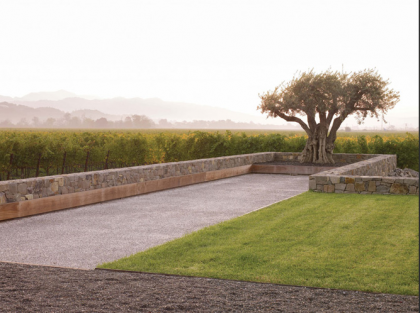
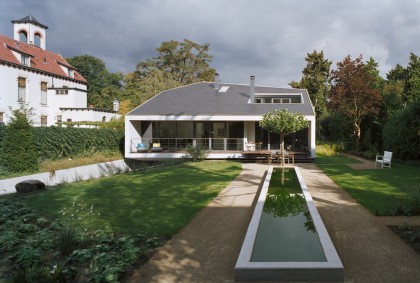
You can see in the original plan that the lower patio extended the length of the deck. We decided to cut that to half, hoping it would save a little money. The long rectangle at the top of the upper patio is a very low, shallow reflecting pool with an 8″ concrete foundation. Minimal. Kind of like this…

contemporist.com

contemporist.com

I’ve shared this and other examples previously. Really, really want that to happen.

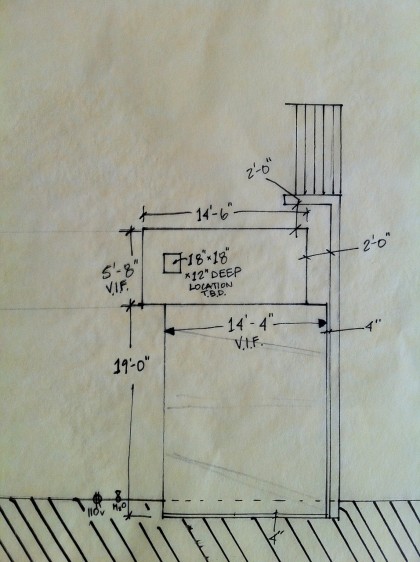
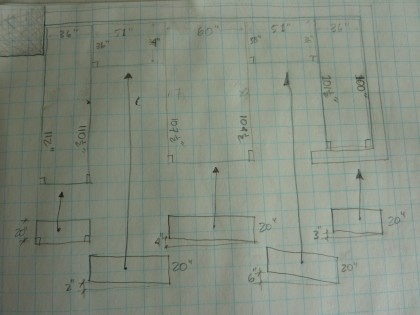
Our last meeting with Tom Zilian of MadStone Concrete sounded promising. We met again with him and it still sounded promising, so David whipped up exact measurements…

upper patio detail

Then we got the quote. And now we’re on the fence. Am sure the final product, after a laborious process of prepping the site, framing and pouring the pads, 10-day curing, sanding and sealing, would be exactly as we envisioned. Heck, probably better. The question is can we suck it up and just sink the money into patios when we have a whole house remod kicking off in the next few weeks? Argh.

going off the rails…

Monday, September 20th, 2010

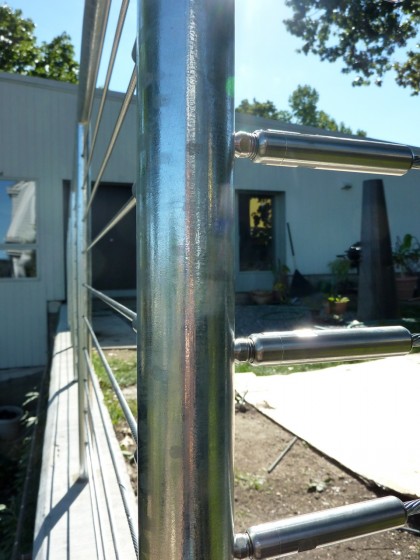
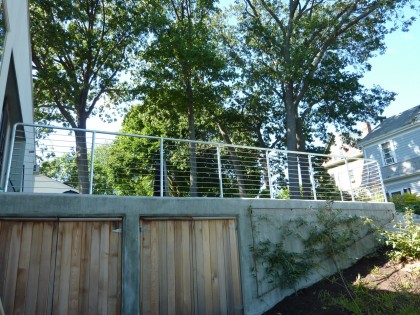
… on a crazy train. Thanks, Ozzy. So after weeks of waiting, the galvanized stainless steel cable railing finally went in on the back retaining wall today. Rhode Island Welding pulled up at 7:20 ready to rail. Here’s how it went down.

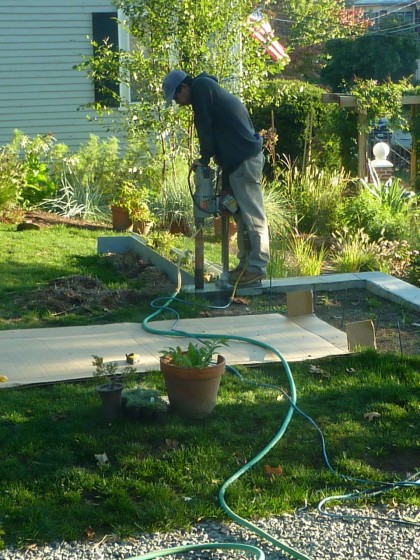
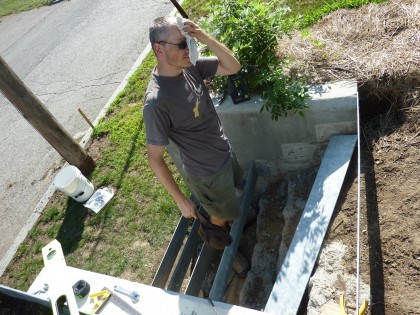
They drilled the holes for the railing posts…

drilling the holes

The railing arrived completely fabricated. They set the posts in place…

set in place

They added concrete to the holes…

concrete added

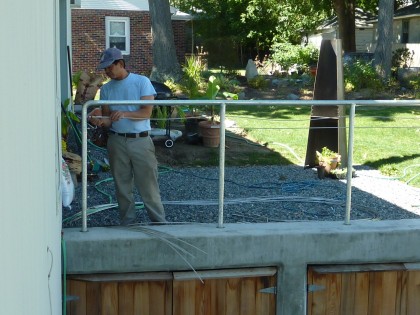
Threaded the cable through the pre-drilled holes…

threading the cable

They attached machine swaged fittings to the ends of the cables and tensioned the entire assembly to prevent sagging…

cable ends tensioned

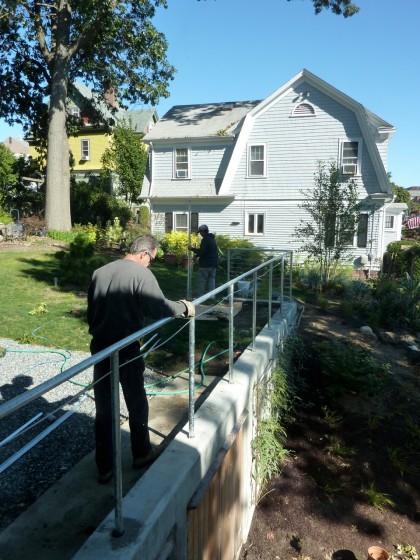
TA-DAAAAA!

railing as seen from below

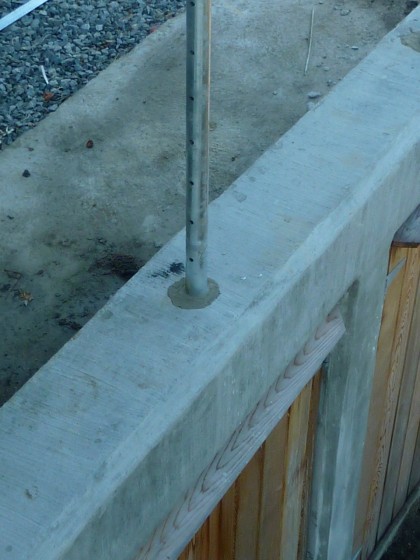
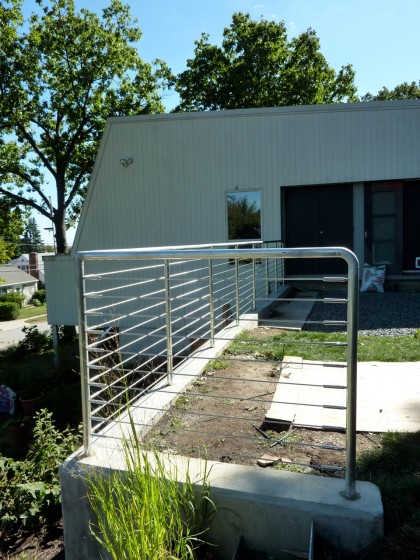
Am mostly pleased. Wishing I had dictated squared posts so that we hadn’t ended up with round. Also wishing there were right angles and no curves…

a side view

Bah. Me being a cable railing snob I guess. What’s done is done. Moving on. The next project: patios!

august, undone

Wednesday, August 25th, 2010

This month was a little disappointing. Lots of projects in the works but little actually finished. Or actually started. Let’s see…

THE BENCH, UNDONE

We left off with David taking a weekend welding class in July with the intention of creating a bench for our entryway. Here’s where it stands…
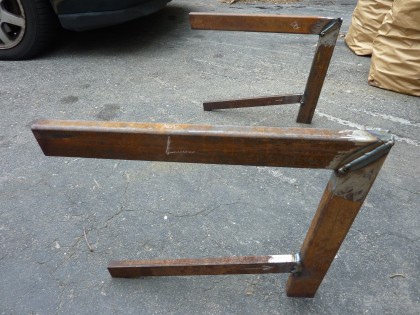
steel legs, welded up but not done

Still to come: the sanding down of the welds for a smooth leg…
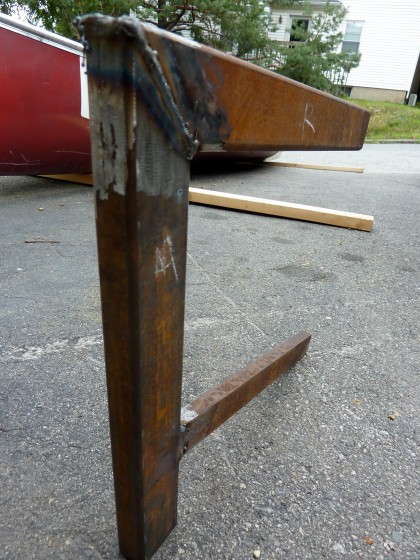
closeup of the weld

Also to come: the powder-coated finish. the wooden bench seat. and the satisfaction of being able to sit down and take off your muck boots at the door.

THE RAILING, UNDONE

The railing for our retaining wall out back is still not a reality. We need to keep people from tumbling over that 7′ drop! Rhode Island Welding helped us with the galvanized steel raised veggie beds and stairs, so we talked to them about the railing….
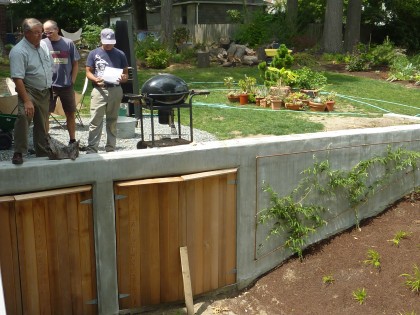
cable railing discussion with Rhode Island Welding

Prior to measuring and drawing up what we wanted, there was much discussion about what kind of railing would work best here. David and I agree that we want something:

  • minimal to complement the simple lines of the house
  • you can see through, as we don’t want to block our view
  • that isn’t the star but fades into the background
  • that is obviously an accessory to the design of the house rather than something that looks like construction — meaning that if it’s solid wood, it begins to look like our wood siding and we don’t want to take away from the original envelope of the house
  • that we can use on our indoor stairway as well — both railings are within viewing distance of each other and should be similar

So several options were up for consideration…
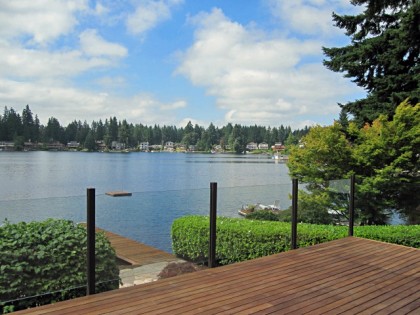
glass | aluminumrailing.com

glass | aluminumrailing.com

Glass, my first choice. And ridiculously, prohibitively expensive. Damn. Definitely my top pick for indoors, as well. Not gonna happen.
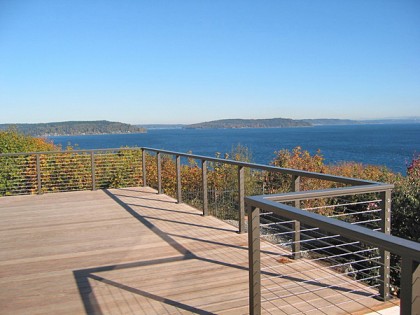
cable | aluminumrailing.com

cable | aluminumrailing.com

Cable railing. Second choice. Much cheaper than glass but still pricey. A very clean look. Zoning regs are very clear on height, necessity of a top rail, distance between cables, etc., so there’s no budging on that. We looked at a lot of cable railing systems in order to find ways to cut costs. Basically comes down to quality and endurance, which is why we ultimately decided to have RI Welding make it right for us.

Also considered…
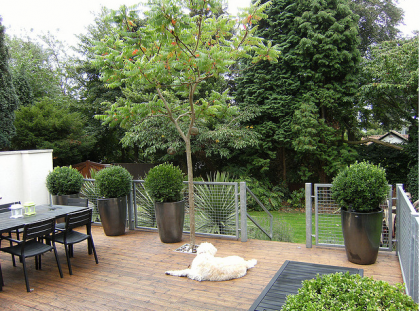
mesh | adesignandbuild.co.uk via flickr www.flickr.com/photos/db-gardendesign/3811605850

mesh | adesignandbuild.co.uk via flickr www.flickr.com/photos/db-gardendesign/3811605850

Galvanized steel mesh railing. Would still require the posts and top rail to be built by Rhode Island Welding (unless we went with wood supports and top rail) but the mesh would save us some cash — cable systems are pricey and cable system installation obviously takes longer. In the end, we decided the mesh grid just wasn’t something we wanted to repeat inside the house.

Wood. After looking at the cable railing price, we opened ourselves up to the possibilities of wood again… maybe slender, horizontal slats wouldn’t be too bad?  or even vertical?…
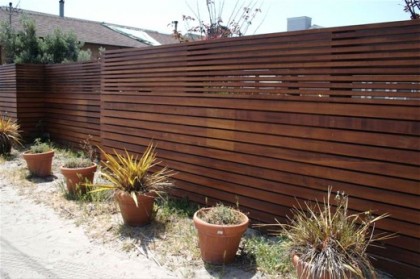
from apartment therapy | www.apartmenttherapy.com/sf/look/look-modern-fence-050175

from apartment therapy | www.apartmenttherapy.com/sf/look/look-modern-fence-050175

Something similar might be a good modern choice. But even a railing-height version would interrupt the view and force you to look at the fence. And it just wouldn’t work inside the house. So nix that. Cable railing it is!

Designs submitted to Rhode Island Welding. Fabrication in progress. Stay tuned.

THE STAIRS, UNDONE

So, the state of the stairs. The set in front, done except for the final addition of pea gravel…
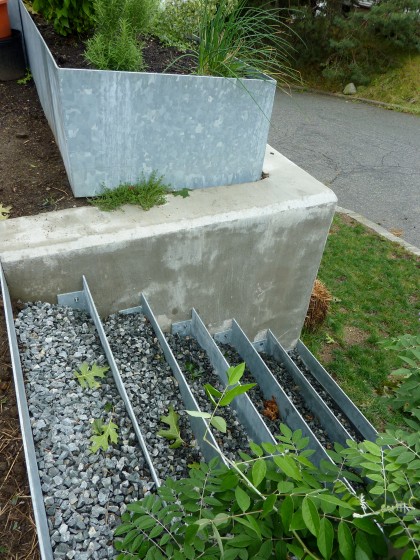
front stairs need pea gravel to top off crushed stone

Back stairs? *sigh* Don’t ask.

When it’s all said and done, they’re supposed to look kinda like this…
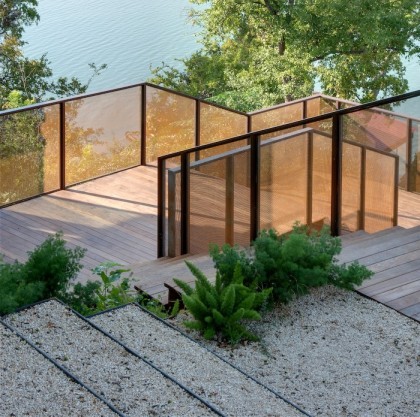
gravel and steel steps by D-Crain | d-crain.com

gravel and steel steps by D-Crain | d-crain.com

THE STORAGE AREA, UNDONE

The doors may be done but the insides of the storage closets aren’t yet outfitted for storing things. This is our current latching solution…
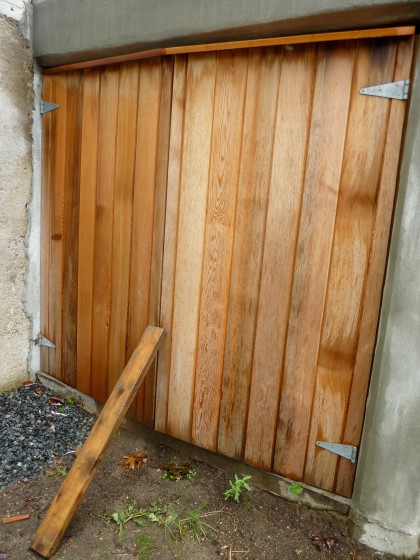
storage area lacks closure, heh heh

I seek closure. Before winter, please.

THE PATHS, UNDONE

The paths are all dug…
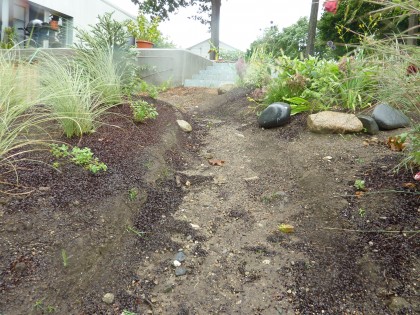
one of our uphill paths

They pretty much look like that, with the dirt washing down the sides of the beds and into the paths every time it rains because none of the plants have grown in enough to hold the soil.

No point in adding pea gravel to the paths until I can solve the constant erosion issue that comes with having a slope. I’ll save the details for another post but suffice it to say that standard edging isn’t tall enough and gabions look like the right solution.

THE STRAIGHT-RUN EDGING, UNDONE

Close to the house, we still need to turn this…
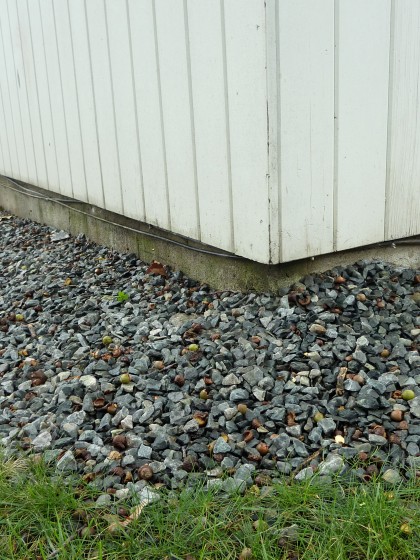
buffer around house needs edging and beach pebbles

… into this — minus the concrete edging and fabulousness of an iconic modernist house, of course.
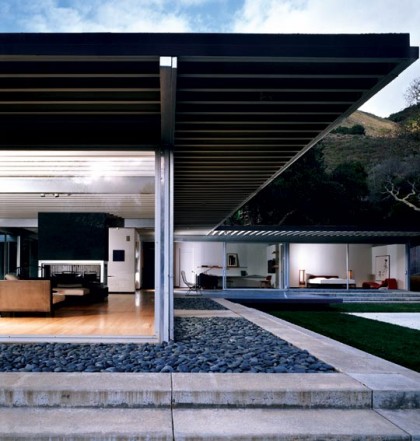
beach pebble buffer at Johnson House, Piere Koenig | eichlernetwork.com

beach pebble buffer at Johnson House, Piere Koenig | eichlernetwork.com

And make this…
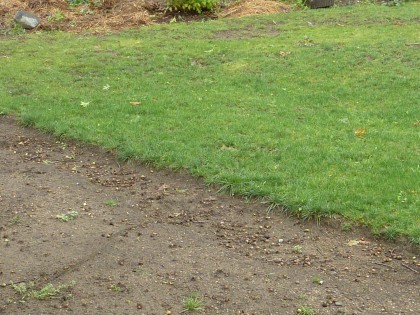
path needs edging

… look a little more like this:

steel edging by Andrea Cochran Landscape Architecture | acochran.com

steel edging by Andrea Cochran Landscape Architecture | acochran.com

The 2′ buffer around the house needs edging and topping off with beach pebbles. In the past, we’ve gotten them through Stoneyard in Massachusetts. Their Mexican Beach Pebbles are dark, flat and the classic choice. Their New England pebbles, more irregular and frequently egg-shaped. Blech. In Rhody, Watson Mulch has a nice, small, tumbled pea gravel but their pebbles, not so much.

Have spent an embarrassing amount of time researching edging. Plastic and rubber, yuck. Stone, too pricey, too cottagey. Metal is by far the most minimal. Aluminum looks cheap and insubstantial to me — like it’ll crimp if you breathe on it wrong. Yes, have looked at all the brands out there at various price points and don’t like any of them. Decided since we have steel in the rest of our hardscape, maybe that’s the best choice. I’ll save details for another entry but the best contender so far is Border Guard — it even comes in galvanized steel so it would tie in with the rest of our hardscape. Sold.

THE PATIOS, UNDONE

I won’t waste your time repeating my patio wishes. Let’s just leave it at “it ain’t done yet.” We did, however, manage to meet with Tom Zilion of Madstone Concrete to discuss what all this vision might cost. He’s all about the nuances of finish and color…
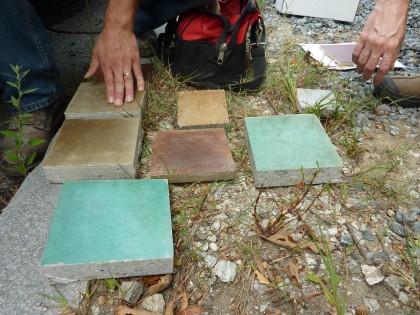
overwhelmed by colors

Any color, including black. And yet we find ourselves drawn to the straight-forward grey…
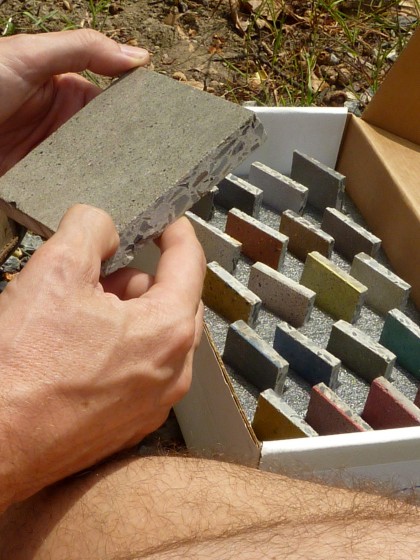
you just can’t go wrong with classic grey

God, we’re boring. But it just makes the most sense when you want the house to be the hero, not the patio. Black would look amazing, but it gets hot in the sun. Not ideal for bare kiddie feet. We’re still discussing possibilities with Tom. He does beautiful work, so expect to hear more about it.

See what you missed while I was out? Nothing. Just project after project, and all of them Undone.
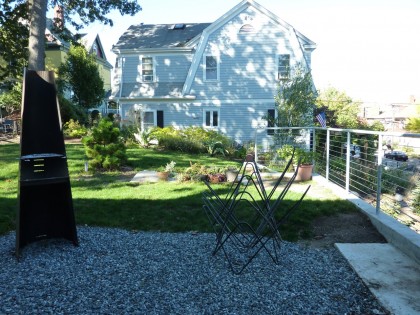
the last riser

Monday, July 12th, 2010

With grievous amounts of sweat and consternation…

shwetty

David got it on this weekend and bolted in the last of the hot dip galvanized steel risers for the stairs that lead up to the veggie garden…

the veggie garden steps are in!

front view

YES!! Still the stairs of death and completely impassable until we backfill them with pea gravel, but that should happen soon. Our wicked slope makes it look like the steps are crooked. Don’t worry, they’re squared up and it will all make sense when it’s done.
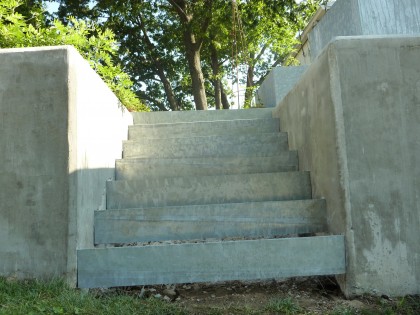
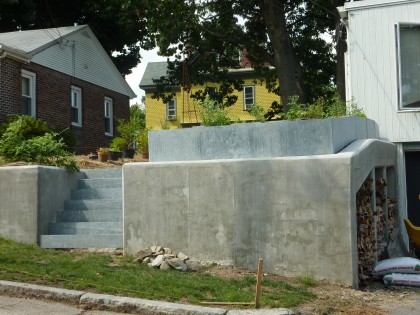
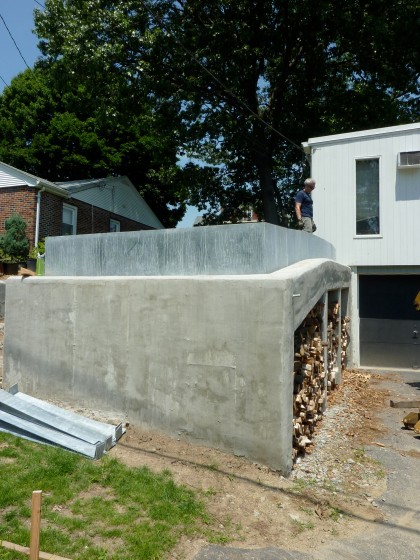
Easier to see how it starts to come together if you step back a little. See how the steps match the galvanized veggie beds?
view from across the street

Now picture it with the patchy grass filled in and a lovely espaliered asian pear across that long, empty concrete retaining wall surface. Perty.
baby steps

Tuesday, July 6th, 2010

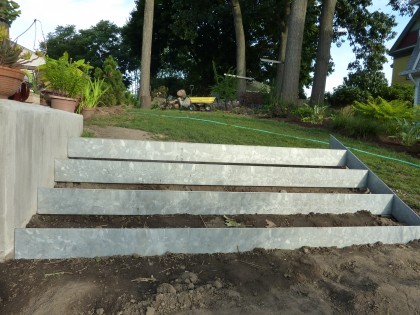
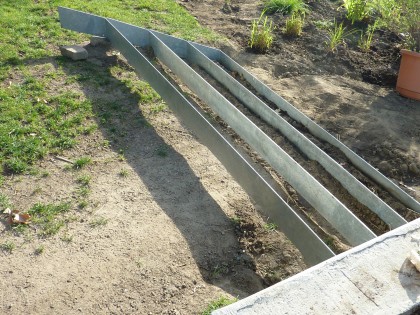
A very hot 4th of July weekend but David managed to make a little progress on our new steel steps out front and in back. Four of the six risers are now in by the back concrete retaining wall…

stair risers by back retaining wall

Still waiting for Rhode Island Welding and the hot dip galvanizer to remake the two that were too short.

As you can see from behind…

stair risers from behind

… we’ll have to do some regrading on that hillside so the stairs won’t be hanging there in space, a la Stairway to Heaven. Once the last two risers are in, we’ll take care of that. And order the pea gravel to fill the steps and the paths. So close!

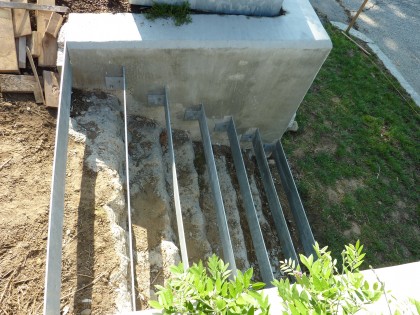
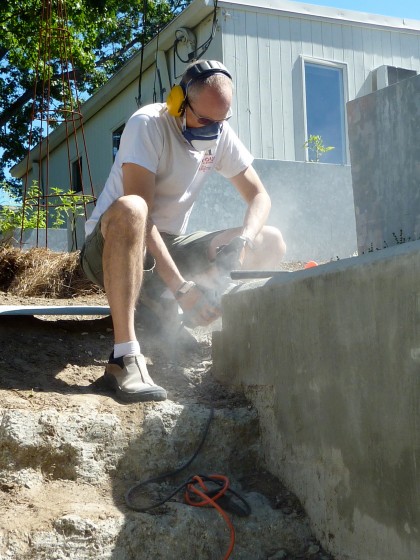
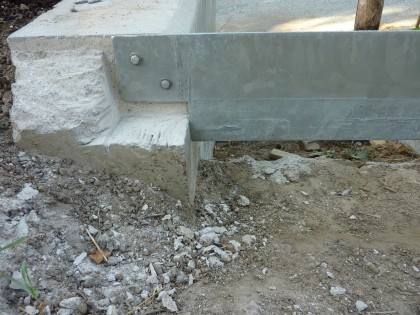
Meanwhile, out front by the veggie garden there was much chipping away of concrete in order to make the wonky ends of the walls line up so that the top riser could be squared up and bolted in…

a peek at those veg garden stair riser bolts

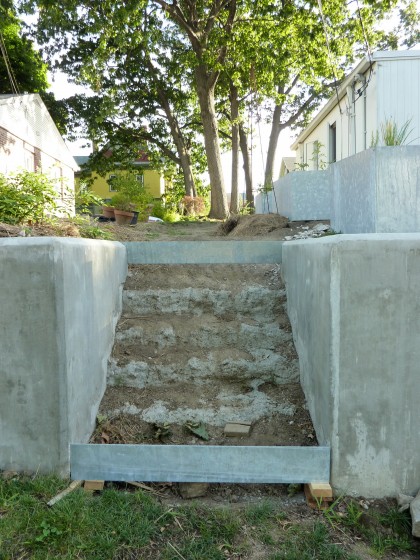
Risers are now in top and bottom on the stairs of death…

stair progress in the veggie garden

Many more left for David to tackle. Now where did I put my whip? Hmm…

stair fixie update

Thursday, July 1st, 2010

In progress! Those concrete stairs of death that lead up to the veggie garden are finally getting their makeover. Steel risers added soon…

david on the stair fixie

one step at a time

Monday, June 28th, 2010

Retaining wall, check. Hot dip galvanized steel risers for the stairs that go at the end of the retaining wall, check. Time to put them in, um…  Actually, after a fair amount of digging and cursing at the rocks, David did manage to get the first riser in.

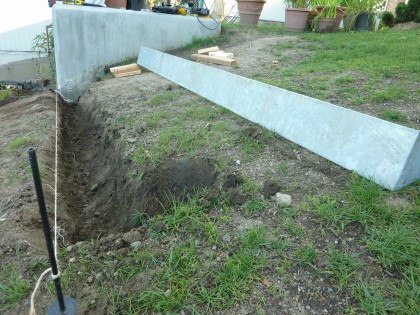
first riser dug for stairs

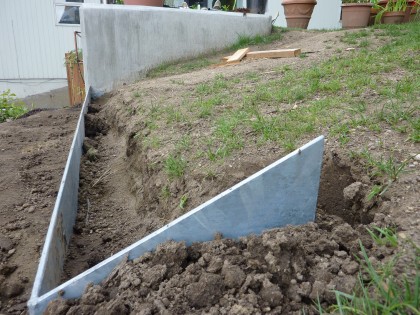
first riser in ground

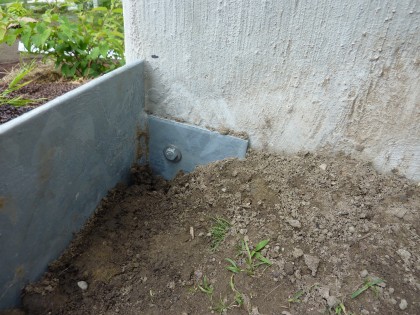
bolted to the wall

visions of things to come

Unfortunately, the risers are a little wonky along the length — which makes them practically impossible to put in straight without a fight. So the remainder went back to Rhode Island Welding to be put through their heavy-duty roller and unwonkified.

Oh, and then it turns out that they made two of the risers 2′ too short! So now two new ones have to be made and then sent to the galvinizer. Another three weeks. Oy.

the roots of a veggie garden

Thursday, June 24th, 2010

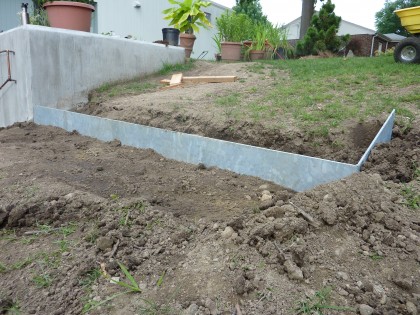
Progress! Our hot dip galvanized steel planter boxes and stair risers were delivered by Rhode Island Welding just a few days ago and our buddies at Savage Trucking helped us set them in place. Here’s all the heavy metal action you missed out on.

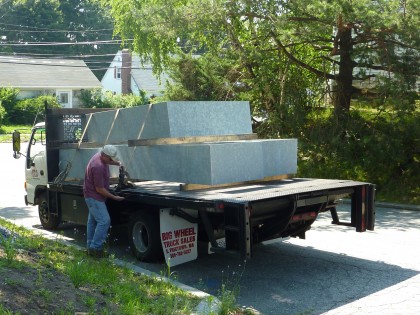
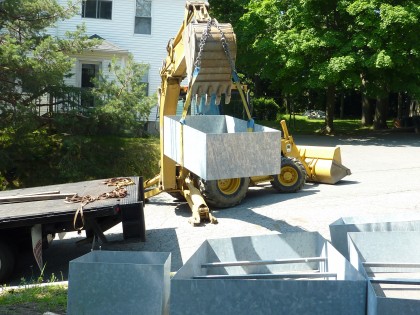
Rhode Island Welding drove up with our load of steel…

the boxes arrive

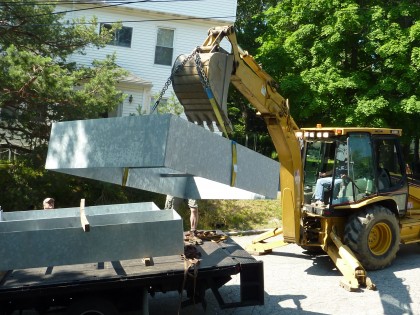
The Savages unloaded everything with their big digger…

boxes come off the truck

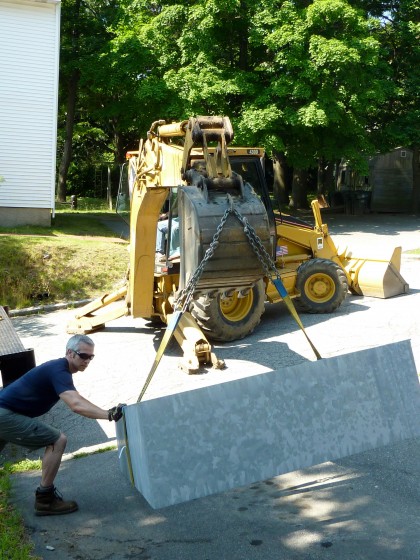
Rich helped maneuver the boxes into the driveway…

gratuitous beefcake shot of rich

It required a little layout to make sure everything pieced together correctly. Figuring out which end was “up” was a little challenging…

laying them out in the driveway

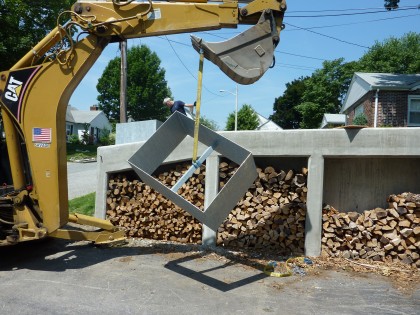
Then the boxes were hoisted up to the top of the retaining wall to their new home…

hoisting them up

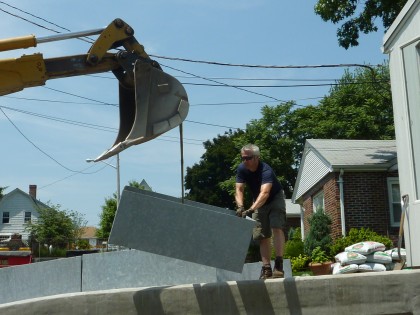
Each box was constructed to fit the angles of our crazy slope, so they had to be fitted together just right — like the pieces of a puzzle.

setting them in place

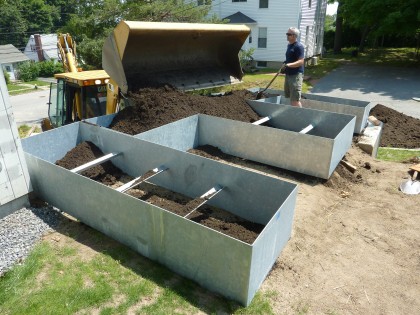
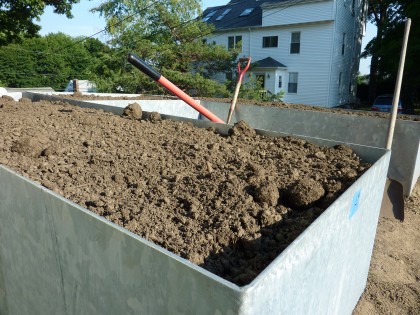
Once everything was in place, Smithfield Peat delivered 7 yards of planting soil — 60% compost, 40% screened loam, per my request. Since the backhoe was still there, we were able to avoid lugging the soil up the slope shovel by shovel. You rock, Savages!

adding soil

They’re a little bit taller than I’d pictured, but all in all the new steel boxes look awfully pretty…

boxes from across the stree

And they’ll probably last longer than I will.

ready for planting!

Ready for planting! Our tomatoes will be thrilled.

anticipation, galvanized

Thursday, June 17th, 2010

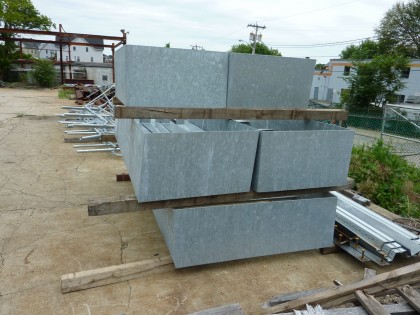
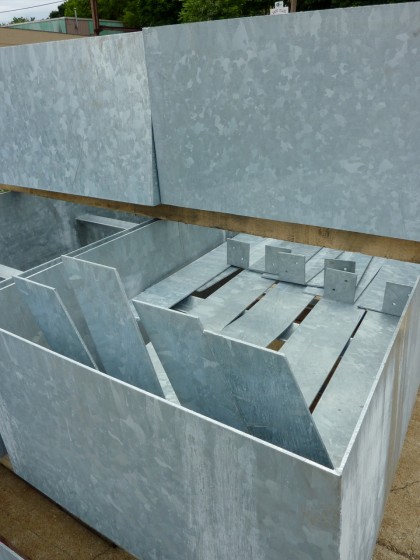
Our brand-new hot dip galvanized steel planter boxes waiting at Rhode Island Welding…

steel in waiting

And the risers for the stairs…

hot dip galvanized steel risers

Men with big toys required to move these. Savages to the rescue! Man, I love those guys.

hardening our hardscape

Wednesday, June 16th, 2010

So we haven’t talked hardscape in a while. Let’s. Remember how I like to dream big? No? Maybe this will refresh your memory…

d-crain corten steps | d-crain.com

d-crain corten steps | d-crain.com

Not so long ago, I confessed an unrequited love for Corten steel in the garden, like those steps backfilled with gravel. Gawgeous. Minimal. Streamlined. Perfect in a modern landscape. [Shot from above and many more examples on D-Crain’s site. And Andrea Cochran’s site. And Lutsko Associates’ site.]

With visions of steel in my head, I did a little research and learned that Corten lasts a long time in a Mediterranean climate — like in sunny California. Less so in New England with its damp, cold winters. The patina from the corrosion is what makes it appealing. But the rust can bleed onto other surfaces, including our brand-new concrete retaining walls. And burying the steel in the ground speeds up corrosion. So is there a way to make steel last longer, considering the investment?

The answer is hot dip galvanized steel. Hot dip? what the heck is that, you say? The steel is “… immersed in a kettle or vat of molten zinc, resulting in a metallurgically bonded alloy coating that protects the steel from corrosion.”

Zinc. Hmm. The American Galvanizers Association claims it’s sustainable — the zinc itself is 100% recyclable and the hot dip process protects steel for 50 years. 50 years! That’s a long time! That pretty much convinced me hot dip galvanized over Corten. So this is where we’ll be using it:

For steel planter boxes in the veggie garden area at the top of the retaining wall that runs along our front driveway…

veggie garden area

The layout (click to biggify)…

raised beds layout and dimensions

For risers on the steps up to the veggie garden that currently look like this…

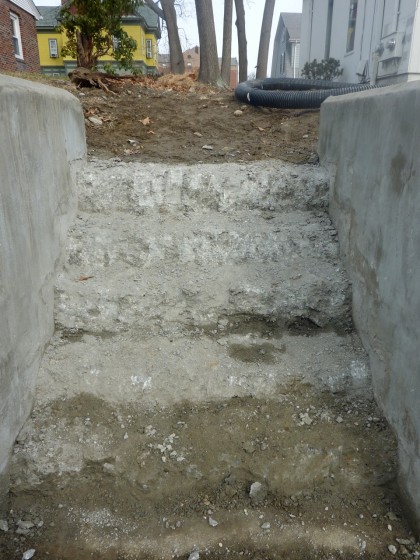
concrete stair disaster

Ugh. The concrete crew just could not get them right. We talked about repouring them ourselves. But then we decided the raised beds would be made of steel and it just seemed easier to make the risers out of the same material and backfill with gravel. So that’s the plan…

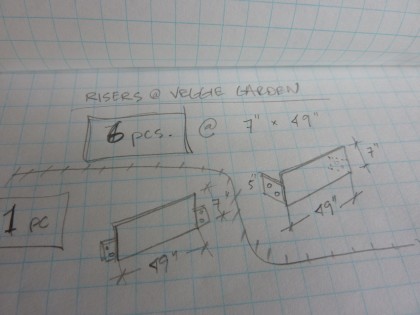
dimensions for steel risers for the veggie garden stairs

Which is perfect, because out back we want a full set of steel stairs at the end of the other retaining wall. Remember when I drew that?…

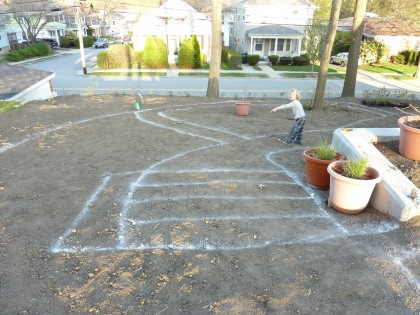
layout for stairs next to wall out back

Now imagine the chalklines in steel and backfilled with gravel. Looks nice, doesn’t it?

So the drawings went over to Rhode Island Welding a few weeks ago. They constructed the boxes and the stairs and then sent them off to a galvanizer in Massachusetts.

Expect to see the result — soon!