Posts Tagged ‘remodel’

prepping the bathroom floor

Monday, November 7th, 2011

David Bettridge will now catch us up on the downstairs bathroom as he preps for tile. Try to contain your excitement, okay?

—————————————————————————-

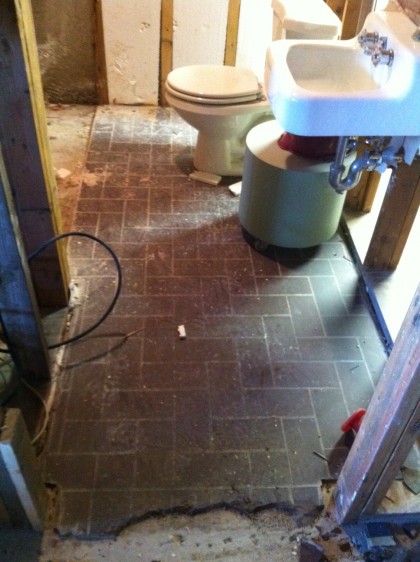
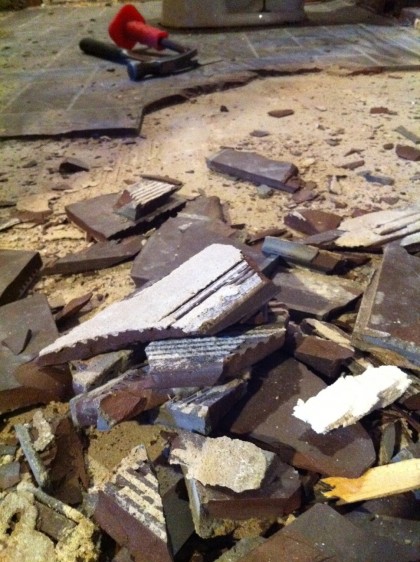
The majority of the downstairs floor is insulated and ready for flooring but the bathroom is its own special case. Way back in March, I removed the old tiles from the floor…

the floor during


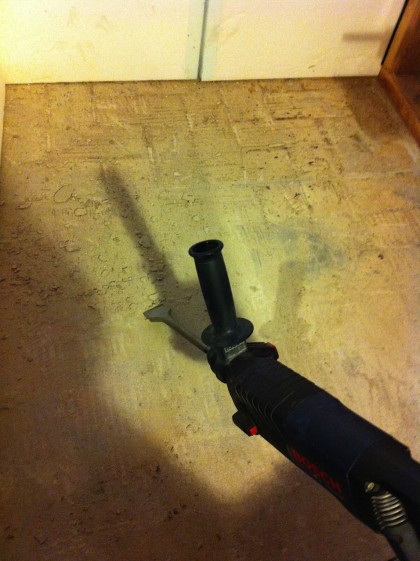
More recently, I removed the last of the thinset (tile ‘glue’, a kind of flexible mortar). A wide chisel bit in my trusty Bosch Bulldog made short work of it…

bathroom floor | bosch bulldog

The Bulldog is a light-duty rotary hammer that has settings for drill+hammer, just drill or just hammer. Hammer drills on the other hand only have settings for just drill or drill + hammer. The Bulldog drills into 40-year old concrete like a hot knife through butter.

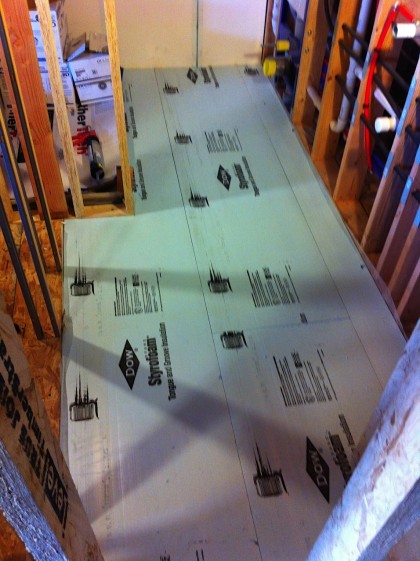
Once the slab was clean and smoothish, I layed down 1” tongue and groove high-density foam insulation…

bathroom floor | foam insulation


It will act as a thermal and moisture break between the new tile floor and the slab (and planet earth) underneath. This will hopefully keep the bathroom floor more comfortable underfoot and keep the basement dry. And it will help the bathroom be more energy efficient as well.

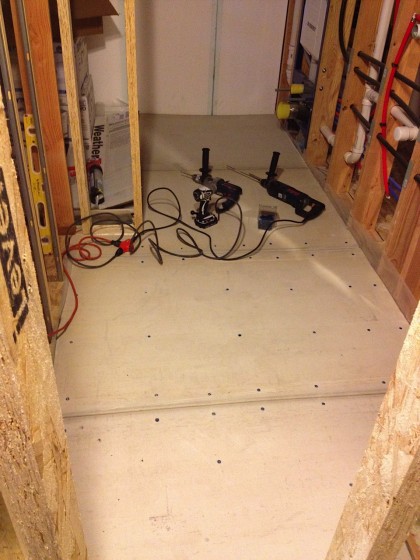
I layed 1/2” cement board over the foam and screwed it down to the slab underneath, using Tapcon screws…

bathroom floor | cement board


Due to their special threads and lubricated coating, they actually cut into the concrete when installed into a pre-drilled hole. Technology, gotta love it. I used a lot of screws so there would be no movement under the floor tile, and therefore no cracking.

Some lucky tile installer will trowel thinset onto the cement board, lay Schluter Ditra tile membrane down before troweling on more thin set, then setting and grouting the floor tiles. The membrane acts as another moisture barrier but more importantly it separates the tile from the floor which lets things move a little bit before any cracking takes place. Again, technology at work.

Schluter will also be providing all the metal bits and pieces that allow tile to be installed up against other materials like cork flooring, wood cabinets, mirror, etc. A small prep detail but an important one. Like they say, do it right the first time.
what’s underfoot

Thursday, October 20th, 2011

After a week of posts from Mr. Bettridge on the downstairs progress, we might just be caught up! Take it away, David…

—————————————————————————————————-

To make the downstairs more comfortable (and cheaper to heat) in the winter, we decided to insulate the floor slab. Our house scientist wanted 2” of foam, but we didn’t think we could afford to give up that much headroom, so we decided to use 1” instead.

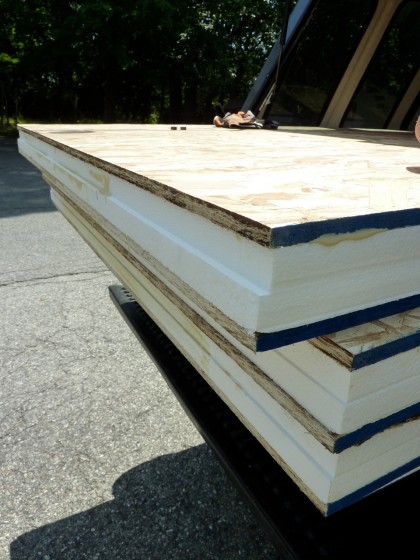
Then we became concerned that the foam alone might not be enough — its 20 psi load rating isn’t high enough to properly support furniture and whatnot. So we had local Branch River Plastics make us a bunch of these panels…

floor insulation panels


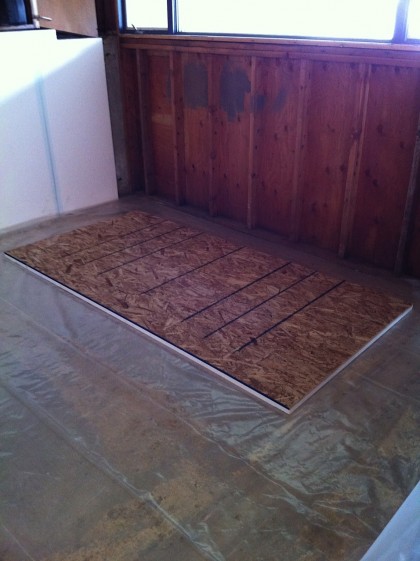
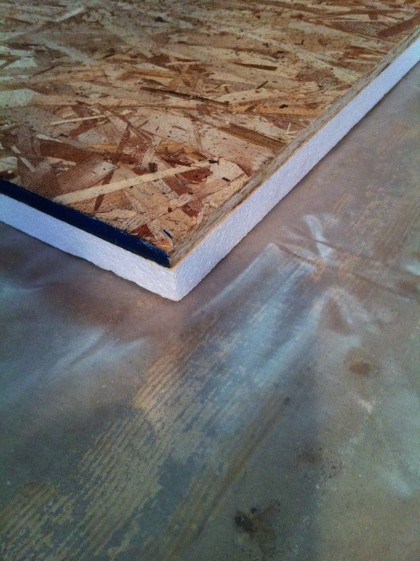
It’s the same EPS (styrofoam) we used at 3” thick to insulate the foundation walls, only these are made of 1/2” thick 4’ x 8’ OSB (oriented strand board) glued to 1” EPS….

floor insulation


The non-formaldehyde, non-outgassing OSB spreads out the weight of people and stuff on top of it and provides a nice stable surface for the finish floor to rest on…

floor insulation detail


Underneath the foam is 6 mil plastic that acts as a vapor barrier, keeping moisture out of the floor system. Even in its not-quite-completed state, the basement is down to 45% humidity which is great.

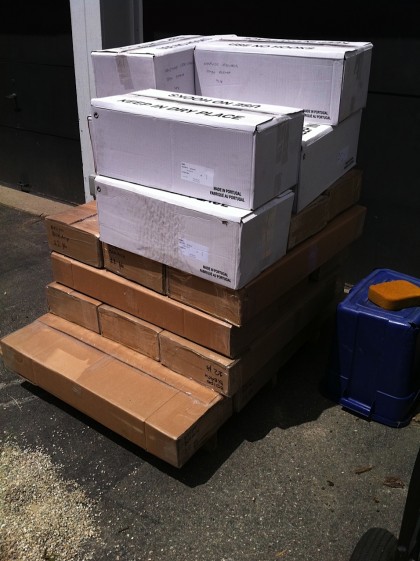
Eventually — well, soon — the cork floor planks will be installed over the top of the insulation panels. Until then, they wait…

cork tiles waiting in the driveway


Luckily, they’re no longer waiting in the driveway.

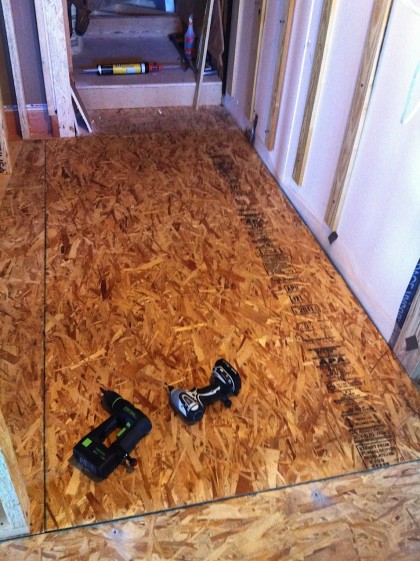
The last piece of sub-floor went in twice because of the leak in the foundation wall. On the right you can see the 6 mil vapor barrier coming out from under the sub-floor and up the wall. It got sealed to the 3” foam with non-hardening sealant (in that big caulking gun on the step)…

underflooring in front of steps


Give me a few more days and I’ll show you how we’re prepping the bathroom floor in a slightly different way.

running the plumbing

Tuesday, October 18th, 2011

David will now show you how we’re getting closer to having a bathroom downstairs…

—————————————————————————————————

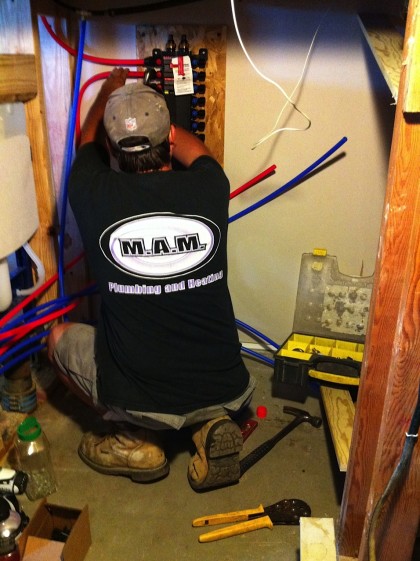
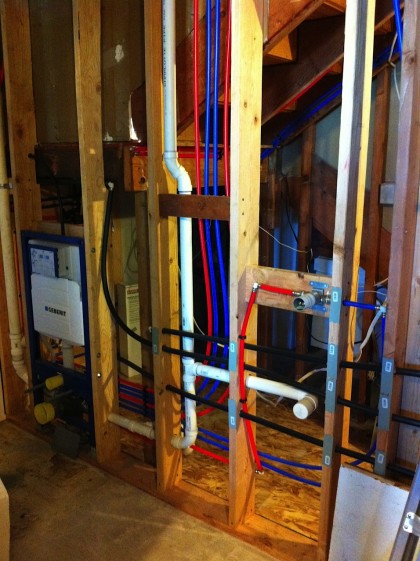
Things are really moving along down here. Once the bathroom framing was done, the plumber came in and ran all-new plastic pipe…

plumbing2

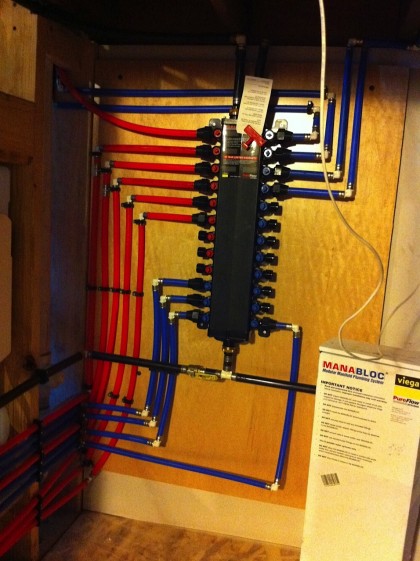
Rather than the traditional branch-style method of piping, with one shut-off for the whole house and individual shut-offs near some fixtures (but not usually all fixtures), we opted to have a manifold (think breaker panel for water) with all the piping in a home-run configuration. This means every fixture has its very own feed direct from the manifold and its very own shut-off…

plumbing4

Each of those little red and blue circles down the sides of the manifold is a shut-off. Eventually they’ll get labels so we know which is which.

There was just a sliver of space between our old, floor-mount toilet and the shower, so we’re going with wall-hung to gain some space back. That’s the precursor to our new Duravit wall-hung toilet on the left — its slim Gerberit tank (jah, German) hides away inside the wall framing…

plumbing5

The sink faucet rough-in with drain below is on the right.

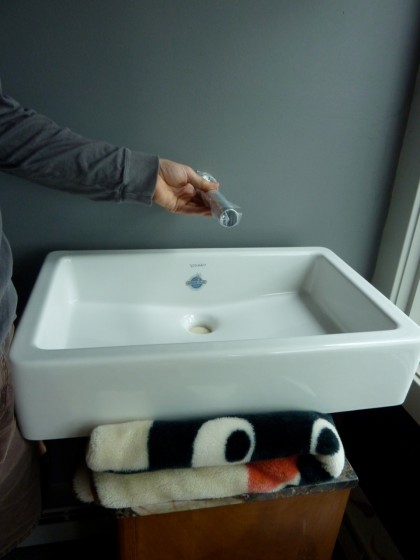
For the faucet above the sink, we also chose wall-mounted. You can’t resist playing with it when you open the box, it’s so cool….

playing with the sink and faucet


Modern. Simple. Not a bunch of fuss.

Then there’s the shower. Remember what it used to look like? Now we’re going for a much more minimal look. No more tub and the shower will have a partial glass wall with an open doorway for stepping in.

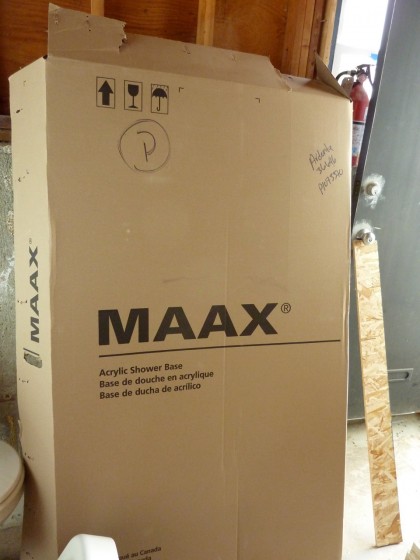
Brook wants a teak grid in the shower, so we went with this for the floor below it…

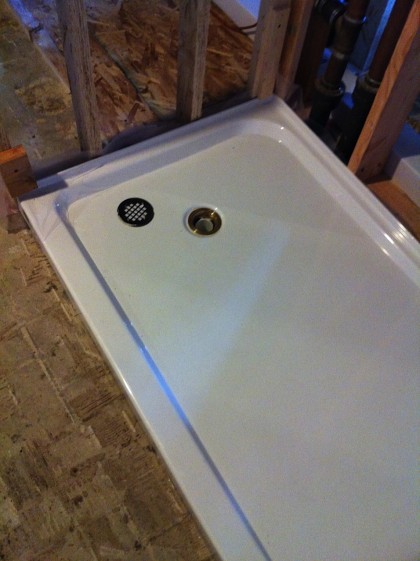
shower pan by Maax


The shower pan will save us big over having to create a tile shower floor. Comes already sloped for drainage…

plumbing3


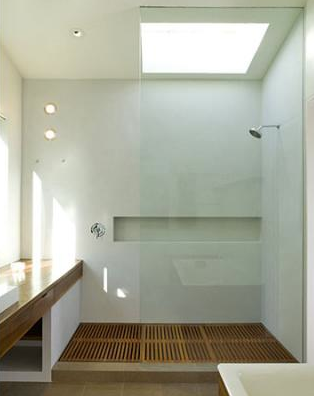
The plan is that the removable teak grid will sit inside the pan and look somewhat like this…

shower with teak floor, cary bernstein architect | houzz.com

shower with teak floor, cary bernstein architect | houzz.com


In fact, that’s pretty much the same idea we’re using for the glass wall, too. Should look very swank when it’s all said and done. Speaking of which, I should probably get it said and done right now!


back to the walls

Thursday, October 13th, 2011

More from David on the remodel progress…

——————————————————————————————-

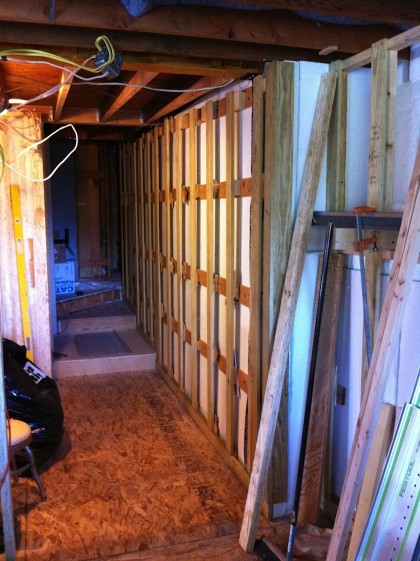
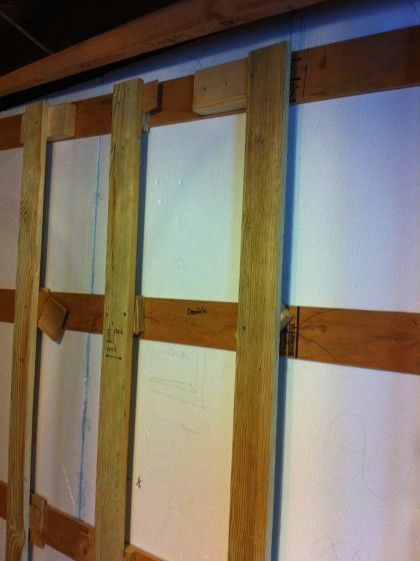
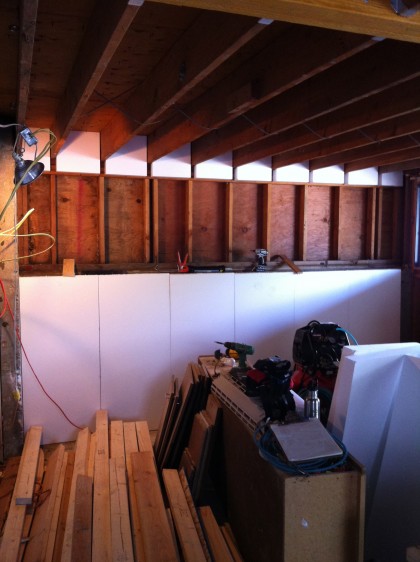
The walls downstairs are finally up and ready for the electrician to rough-in the wiring. Unfortunately, the foundation wasn’t poured dead plumb back in the ’70s (the crew was probably one toke over the line, if you know what I mean) so the furring had to be built out…

wall1


Seriously, take a closer look. I had to build out the blocking a full 1-1/2” in one place!

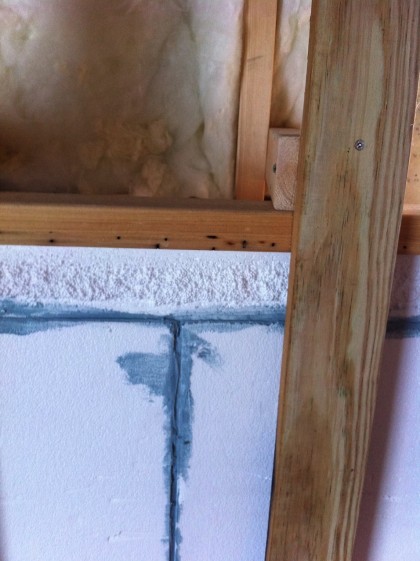
wall3


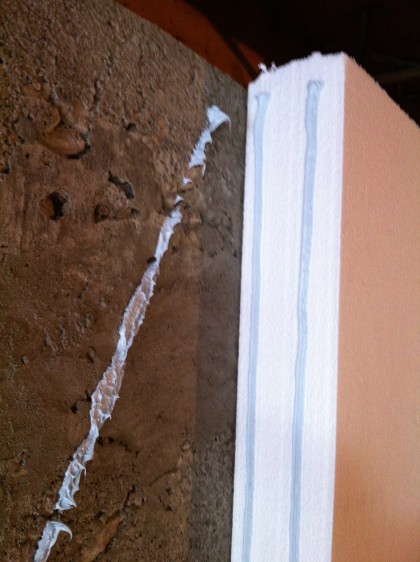
The special tape I was supposed to use for the Branch River Plastics EPS (styrofoam insulation) didn’t stick very well. By the time I’d pressed it down for the tenth time I realized I wouldn’t have access to it once the sheetrock was up. So I caulked all the joints with the PL300 I had used to glue it to the concrete and to itself…

wall2


That should keep the moisture in the concrete where it belongs. I know the system is working because I had to pull off a section to deal with a hole in the foundation that was leaking (well, shooting) water. So far, so good.

Want to know more about the insulation in those walls? It’s here.


rockin’ the double-denim ceiling

Wednesday, October 12th, 2011

This week, David Bettridge will catch us up on the downstairs progress. Drumroll, please…

———————————————————————————————————

When we moved in to this house, we noticed right away that sound travelled pretty well between the upstairs and downstairs. One of our goals is to fix that during the downstairs renovation. If you remember your physics, you know that sound travels as vibration. Usually we think of it as traveling through air but it can also be transmitted through other materials.

Working with Acoustical Supplies in Providence, we came up with a three-pronged attack on noise:

1. Insulation to absorb air-borne sound
2. Sealing to keep airborne sound from leaking through
3. Mass (weight) and mechanical separation to slow sound vibrating through the structure

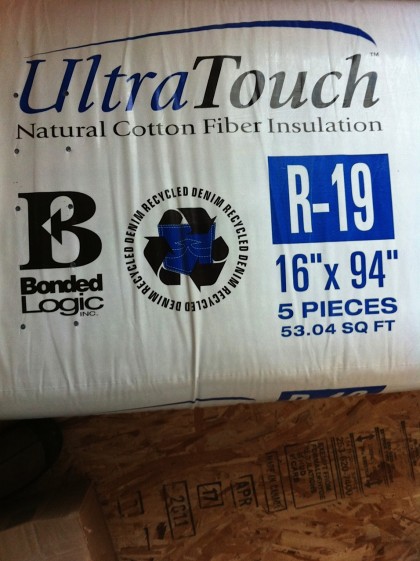
UltraTouch Demin Insulation batts have the same R-19 insulating rating as fiberglass but have a higher STC (sound transmission control) rating…

ultratouch denim insulation


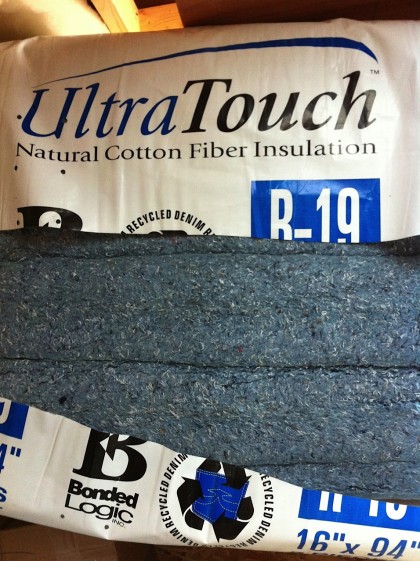
Being made of 80% post-consumer cotton, they also have several planet-friendly benefits — they don’t cause itching like fiberglass insulation, they don’t outgas formaldehyde or any other nasties and they qualify for LEED points. Plus it’s denim. How sexy American is that?

ultratouch insulation double denim ohyeahbaby


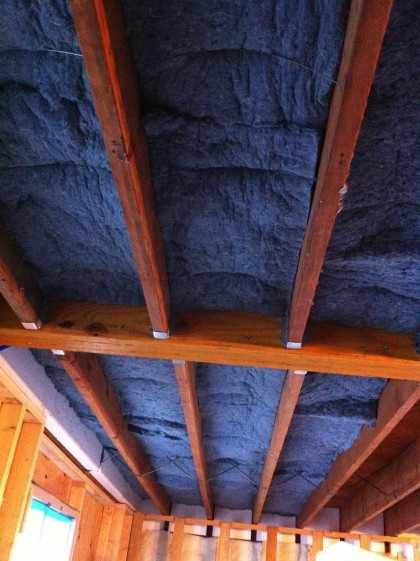
Once cut to the proper size the batts are pressed into place and fluffed so they aren’t too tight or too loose. Special wires are sprung into place to hold the batts so they don’t slip out of place…

ultratouch insulation in place


UltraTouch is slightly heavier than fiberglass. But the main difference between the two is the prodigious amount of dust generated when handling the cotton and the difficulty in cutting it. Fiberglass is easy to cut with a utility knife, even while installed in a stud or rafter bay. The UltraTouch requires fairly careful measuring because it doesn’t compress nearly as much as fiberglass. Actually, this is a good thing because over-compressed insulation doesn’t work as well.

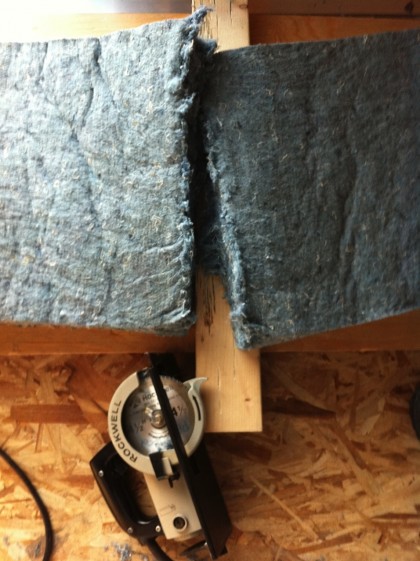
Bonded Logic, UltraTouch’s manufacturer, recommends several specialty tools for cutting it, but I didn’t plan ahead so was left trying their recommendation of a reversed fine-toothed blade in a circular saw. My grandfather’s old worm-drive trim saw fitted with a backwards plexiglass cutting blade works perfectly…

ultratouch and granddad’s circular saw


As the ceiling installation progresses, I’ll show two more methods we’ll use to control sound. In the meantime, my wife wants to know if this double-denim ceiling makes her butt look big?

what’s in your walls?

Wednesday, June 8th, 2011

So back to the downstairs, which is now in motion. David will tell you what he’s up to…

—————————————————————————————————-

One of the aims of these renovations is to cut our energy use, ideally by 60% or better. How will we achieve that lofty goal? By making the house air-tight and by adding insulation. Lots of insulation.

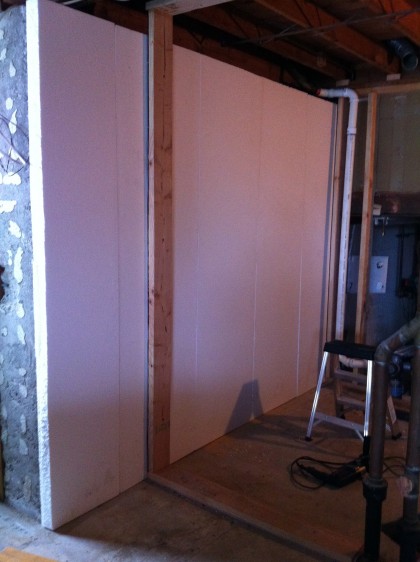
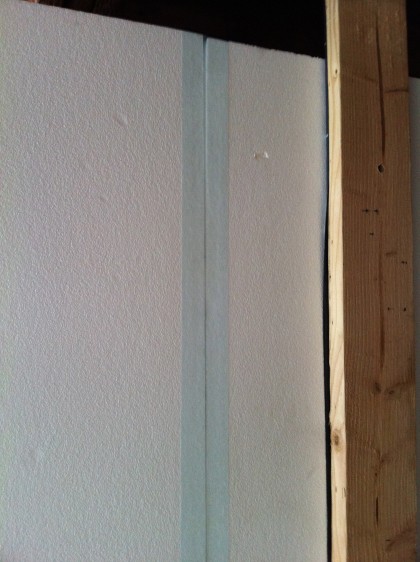
We ordered 3” of EPS (fancy name for styrofoam) made right here in Rhode Island by Branch River Plastics. Not only did it not have to ship from China, they make their foam in any size you like and they put boric acid in it to keep insects out  — which is handy seeing as we discovered there used to be termites in the walls. It weighs 2 pounds per cubic foot, so it’s denser than the shipping foam you’re used to. It is made with air instead of HCFCs so it’s better for the environment and holds its R-value over time unlike most other rigid foam insulation that slowly loses its effectiveness.

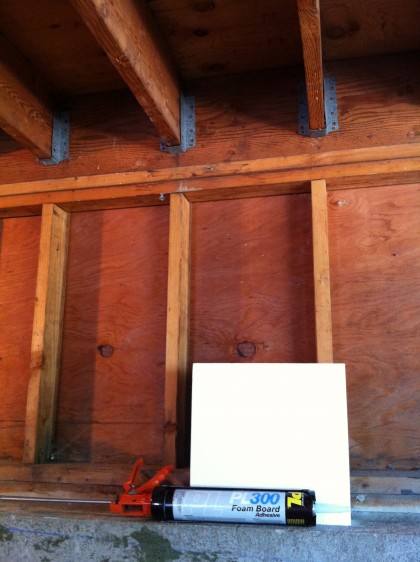
PL-300 adhesive holds it in place without dissolving it, don’t use anything that isn’t labelled specifically for foam…

foam glue


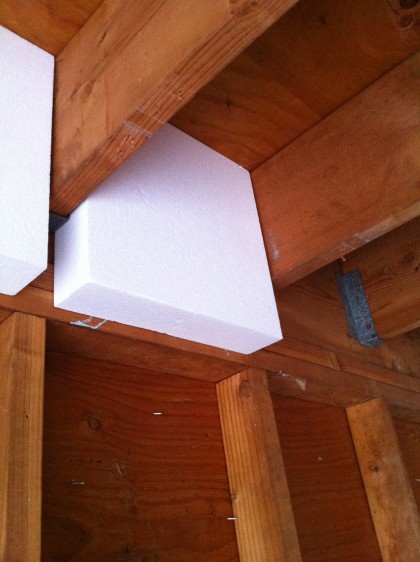
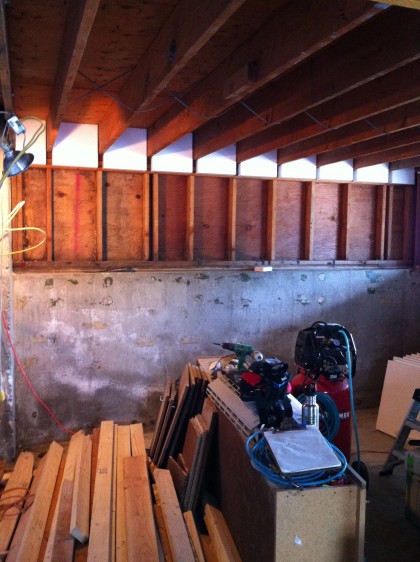
We had them cut pieces to fit between the floor joists…

rim joist foam

I wrapped it around the short walls on either end of the main space…

short wall before

short wall during

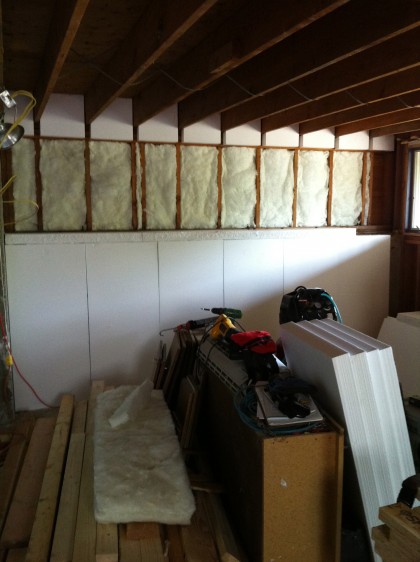
The wood-framed walls on top of the foundation receive two layers of un-faced fiberglass, here’s the first…

short wall after


When it’s done, the bathroom should be warm and cozy…

bath wall foam


I ran beads of the foam glue between the pieces to make them one big layer…

foam glue 2


Special tape seals the deal…

foam tape


I’ll be adding 3/4” furring strips screwed to the concrete. They’ll give us something to attach the sheetrock to, create a bit of air space to allow moisture to get out and give the electrician a place to run his wires. All that coming soon!


meanwhile, downstairs

Wednesday, May 18th, 2011

meanwhile, the downstairs awaits

Fabulous things happening outside the house. And inside? Not so much. As I mentioned weeks ago, we’ve been waiting for input from an expert before beginning to insulate the walls downstairs. Finally happened. So work resumes downstairs today.

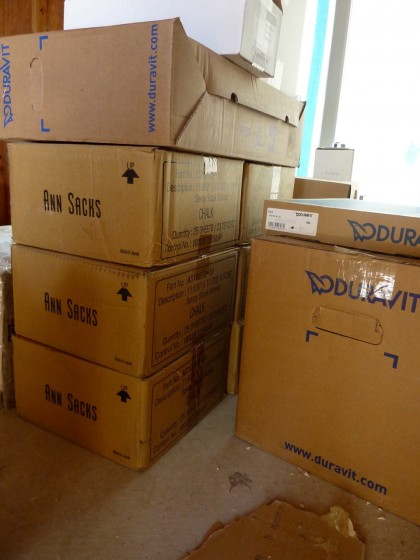
And here I was starting to think we might never let Ann out of the box. Silly me.

prepping the pond

Monday, May 2nd, 2011

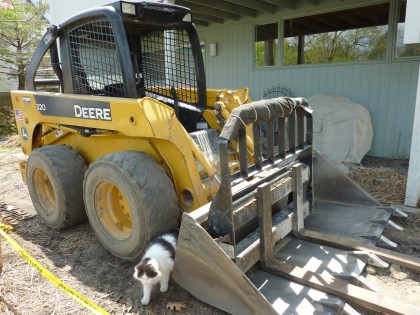
May 2. Much like the robins in springtime, the heavy machinery returns to the garden…

the big machinery arrives

We have machinery here so often that apparently the cat is no longer terrified of it.

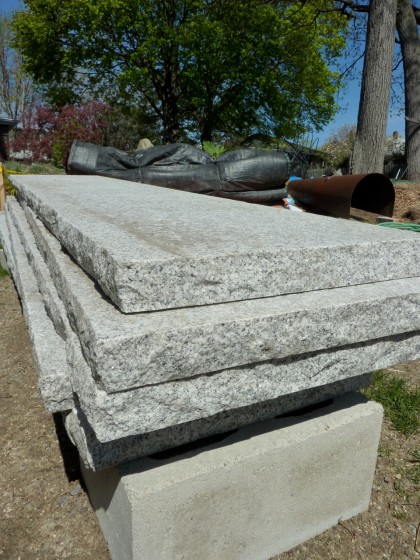
Pond liner guy says he needs more sand on the bottom of the pond. And this morning he got more sand on the bottom of the pond. Sand was carted up the hill, as well as the granite slabs that will be used to cap the pond wall…

granite slabs arrive

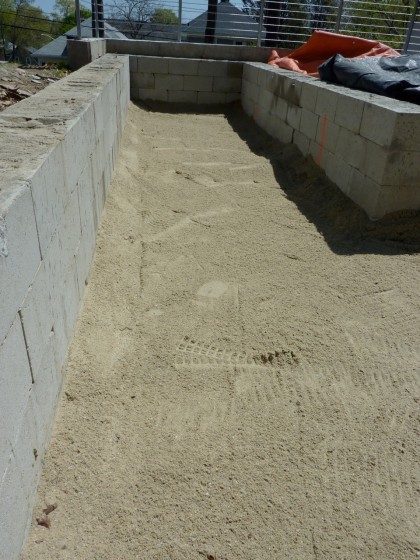
The boys raked out about an inch of clean sand on the bottom of the pond, curving it slightly up the walls so there will be less of an angle for the rubber liner…

pond prep... AGAIN

That sandy bottom is now like buttah. Buttah!

sand added to the pond bottom

Pond liner guy is expected at about 6:30 a.m. on Wednesday morning. Shall we open the wagering on his next excuse for not being able to begin?

progress you’ll have to imagine

Thursday, March 31st, 2011

Sorry, still no ability to post photos. Argh. Hoping this is resolved soon. In any case, here’s what you haven’t really been missing…

  • No decision on windows yet. And man oh man, that really needs to happen soon.
  • The first orders for bath fixtures for downstairs have been placed. This is a good thing. Means we can soon schedule the plumber to do the rough-ins.
  • Bar sink and faucet ordered. Just need to settle on a mini fridge so we have proper measurements.
  • We were pondering tankless water heaters because they take up so little space. But the expense and the not-ready-for-primetimeness of tankless means we’ve decided to go with a heat pump/hybrid water heater set-up. More on specifics another time.
  • The electrician is lined up to get the downstairs moving. Yay!
  • Need to order the cork for the downstairs floor and ceiling soon. Soundproofing materials for the ceiling decided on.
  • We’ve gone round and round on the wood we’d like to use on all the built-ins in order to simplify finishes and create continuity throughout the house. And the winner: FSC walnut. Surprise! I thought it might be bamboo. First room to set the tone for the rest of the house: the downstairs bath. Would have preferred to start with the living area and work our way down but oh well.
  • Speaking of built-ins, we better decide which Murphy bed system to go with for our fabulous new guest accommodations downstairs — lots of time spent researching. More on that another time.
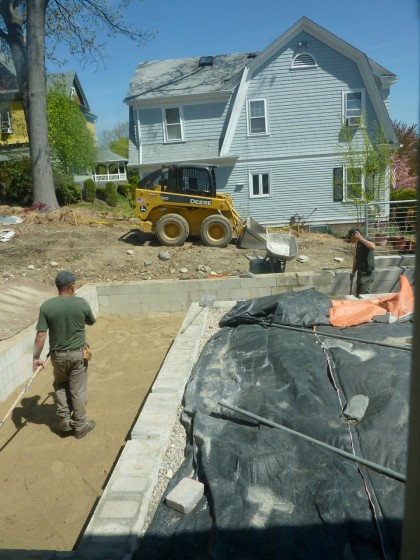
  • Trip to Ann Sacks coming up again soon so we can finalize a tile order. Two selections made. Guess I’ll have to show them to you later.
  • After countless phone calls, David finally located someone to help design the HVAC system and a house scientist (no, really) to help us with insulation and house sealing details. What does it mean exactly? Hopefully it means the downstairs walls can go back in soon. I’m sure David will do a post on this someday.
  • My floating steps across the koi pond: no go. Waah. Redesigned as plank bridges. The engineer has provided his calculations for the steel. Rhode Island Welding is down to do the project and the metal is ordered.
  • The remainder of the pond and the patio is… uh… slow to move forward. The liner, the pump, yadayada. All the details still a little hazy. The schedule, disappointingly non-existent, and here it is the beginning of April.
  • Made my first plant purchase of the year last week: three miscanthus giganteus via eBay. This means gardening season has begun!

Oh yeah, it’s snowing. Ha. Ha. April Fool’s on us.


thurs progress report

Thursday, March 17th, 2011

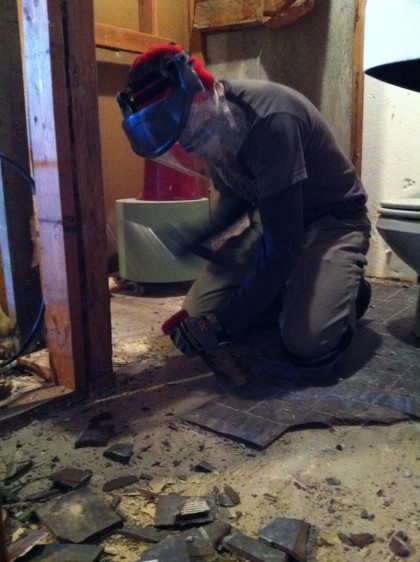
CLANG CLANG CLANG! Flying shrapnel. CLANG CLANG CLANG! Flying shrapnel. And so on…

the floor before

the floor during

what a mess

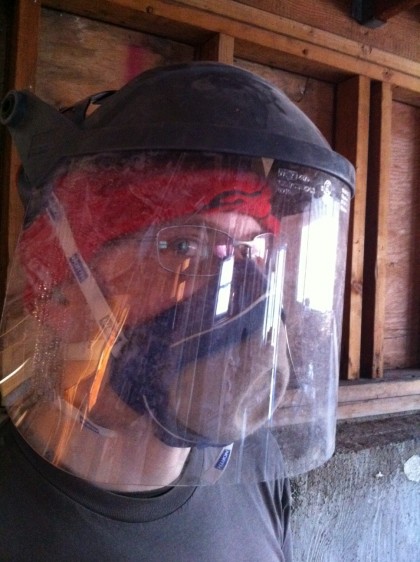
If you try this, be sure to break out your riot gear. You’re going to need it.

full-on riot gear